As most of you may already know the built in configuration settings for deploying a wallpaper and lockscreen image within Microsoft Endpoint Manager are restricted to the Education and Enterprise SKUs, this is going to cause issues for those organisations using Windows Pro or Business editions (which will be the majority of small businesses).
I would like to start this post by saying there are lots of different articles online documenting how to achieve this, my post is designed to collate what I think are the two best methods in a singular post for ease of use. The being said the two PowerShell scripts used are courtesy of Peter Selch Dahl and Brad Wyatt ‘The Lazy Administrator’ - Two MVP’s I highly recommend you go follow.
I have ever so slightly amended the lockscreen script by Brad to use the ‘Start-BitsTransfer’ rather than the ‘wc.DownloadFile’ used in his original script as I found this had more success, as such I will also provide a link to both the scripts I have and use, all credit goes to both Peter and Brad for both methods though.
If you want to see their original blog posts you can follow the links below.
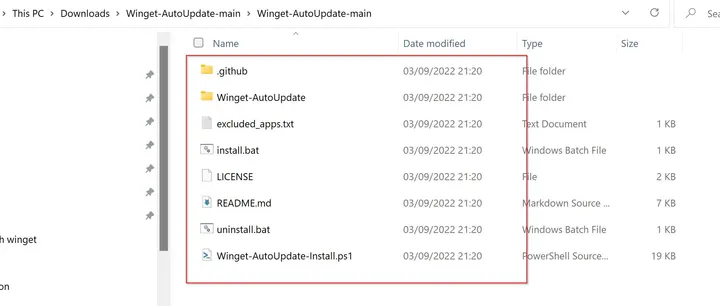
You can download the scripts I have amended and use below, just rename to .ps1 files.
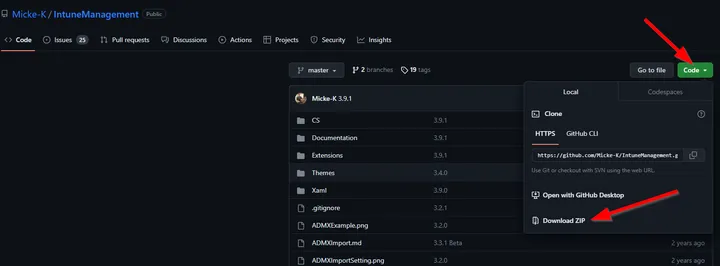
Download the wallpaper and lock screen scripts from GitHub
Lets get started!
I like to use SharePoint for deploying these images as every tenant has it, so that is the process we will use here but you can use your own website if you prefer to host the image elsewhere.
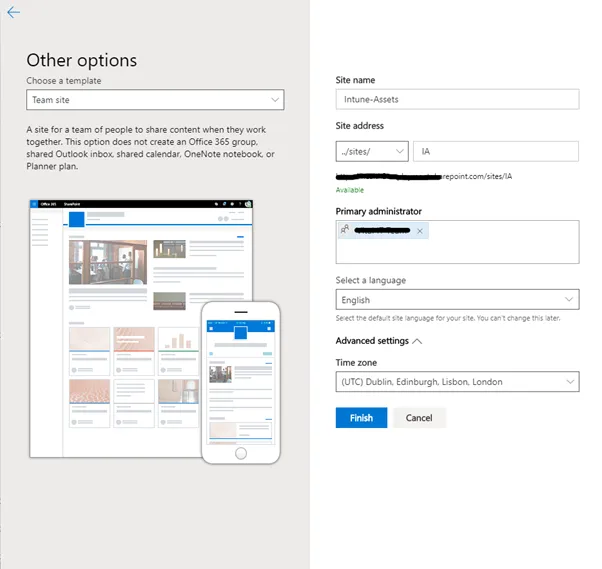
Create a SharePoint Team site without a group to store your assets Quick tip, edit the site address to a shorter name, this will save you characters for the file path limit in SharePoint
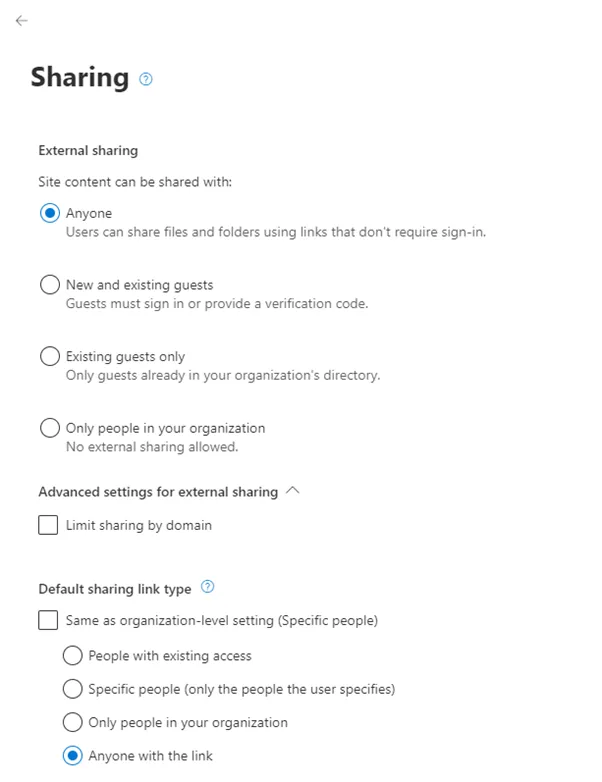
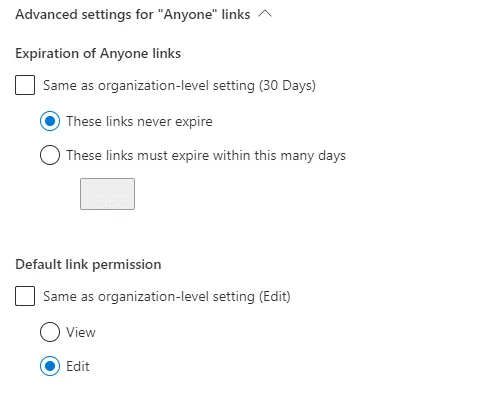
Once the site has been created, update the sharing settings to the same as below - We override the ‘Same as organisation-level specific’ settings so we don’t accidentally change the settings on this site in the future.
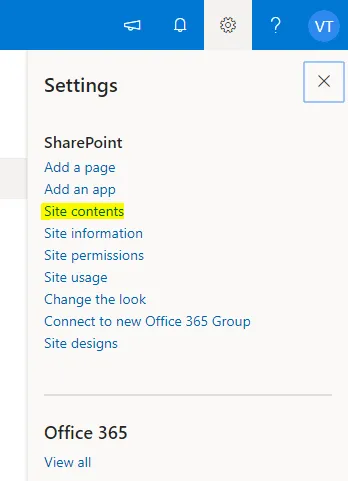
Open up your newly created site and from the settings icon select ‘site contents’
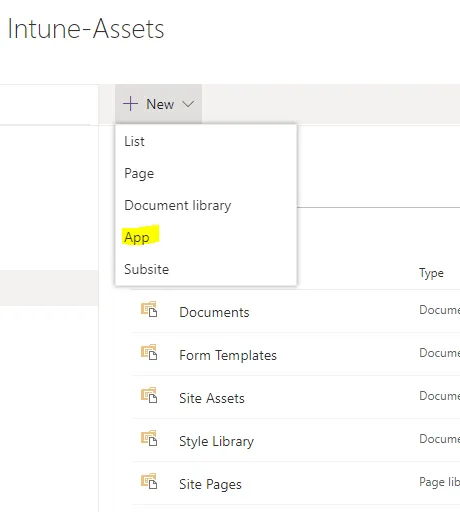
Select the + New dropdown and choose ‘App’
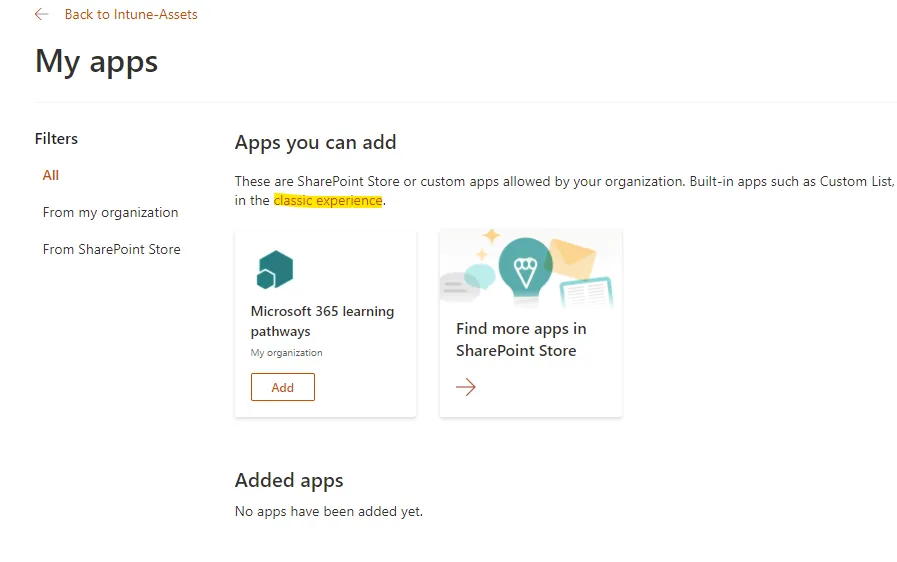
From the new SharePoint ‘My Apps’ page, select the link for ‘classic experience’
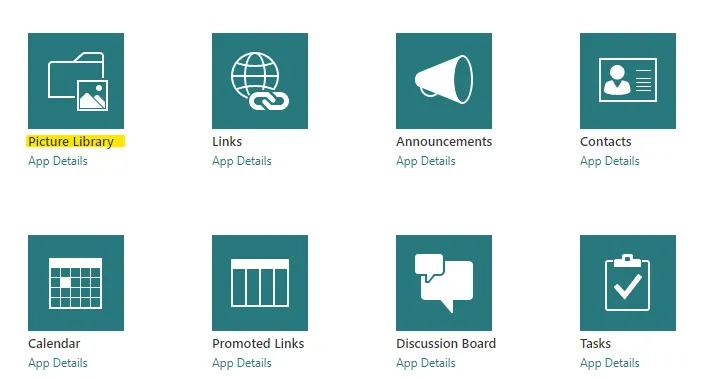
Then scroll down and add a Picture Library (I suspect a standard Document Library will work here also but it gets my OCD not having a picture in a picture library…)
Go ahead and rename it ‘Wallpapers’
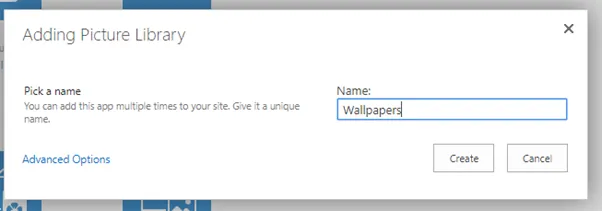
Add another Picture Library in the same way except this time call it Lockscreens or Screensavers, whatever takes your fancy.
Open up the Wallpapers library and upload your desktop wallpaper and rename the file to something memorable, you’ll need the filename later! Once uploaded select the image (tick the box) and select ‘Share’ from the top toolbar.
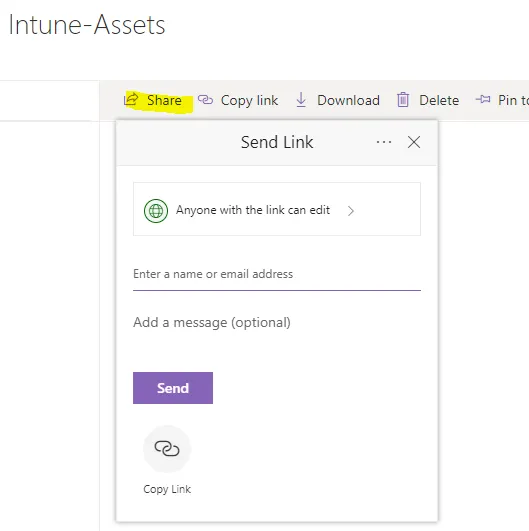
The default settings at this stage should be fine so long as it’s an ‘Anyone’ link, select ‘Copy Link’ - Store this link in a OneNote or notepad file for later and do the exact same thing for your lock screen, remember to switch to your lock screen library first to upload the image, remember to store the URL for later.
Now we have our images available we need to make sure we have our PowerShell scripts ready to deploy the images.
Go ahead and open up the SetDesktopBackground.ps1 file using notepad or ISE and edit the following sections.
Update the ‘CustomerXXXX’ on line 33 to the name of the Office 365 tenant as shown in the top left hand corner of the Office 365 admin portal.
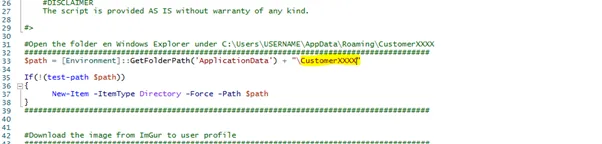
Remember that URL and filename you saved from earlier that points to your wallpaper? That needs adding to the $url section in line 44, also update the name of the file in line 45.
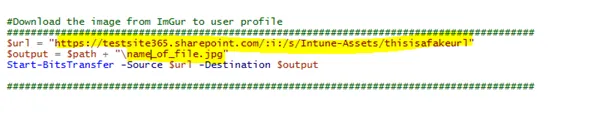
Save your script somewhere safe and give it a memorable name and let’s move onto the lock screen.
As I mentioned earlier this script is a mix between the lock screen script that Brad created and Peter’s download method, specifically changing the download method from ‘wc.DownloadFile’ to ‘Start-BitsTransfer’ I found I had 100% success rate using this method for downloading of the file and I believe this change to the script helps to fix issues others were having with Brad’s original script - Credit goes to Steve from https://pcquicktips.net/ for spotting that and helping me adjust the script to work.
Just like the previous script you will need to update the URL and name of the file, this time in line 11 and 12.
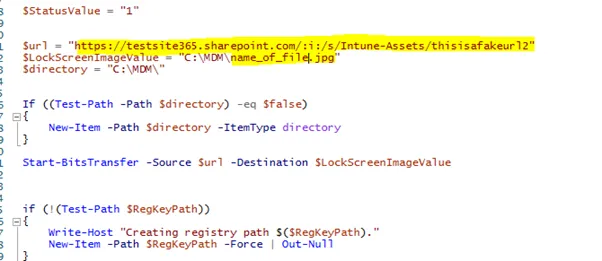
Once complete, save the script and name it something memorable, now it’s time to deploy the scripts via Microsoft Endpoint Manager so head over to your MEM portal.
Navigate to Devices–>Windows–>PowerShell scripts.
Select the + Add button, give the script a name, such as ‘Set corporate wallpaper’ and upload the correct script with the below settings.
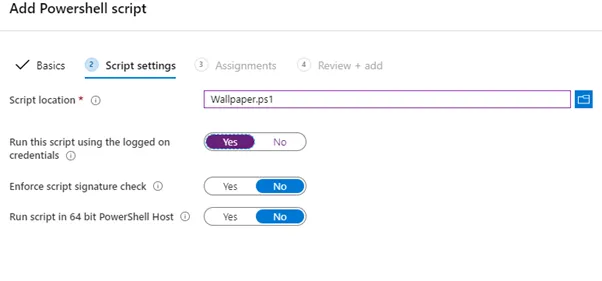
Select ‘Next’ to add your assignments, I usually try to keep things relatively simple so for this I will choose ‘All Devices’ or a dynamic security group with my target devices included.
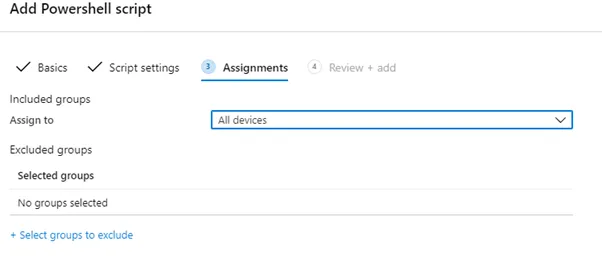
Do the exact same to deploy the lock screen but note the different script deployment settings below.
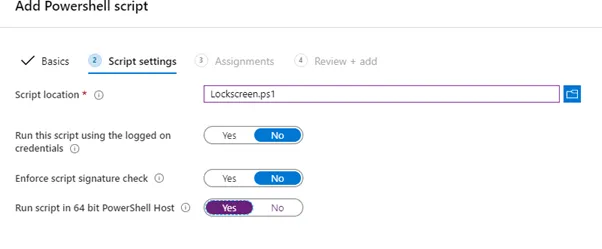
Continue with the setup and apply to your required groups.
Keep in mind because we are using PowerShell to deploy this it won’t take effect until the user logs in, so if you are testing force a sync, sign out and sign back in. You will find that after 24 hours it should have successfully deployed to all of your targeted devices.
When you need to update these images I find it best to delete the old PowerShell script from Endpoint Manager and upload your new one with the new URL and filenames.
And that’s all there is to it! Credit again must go to Peter and Brad for the original scripts, and Steve for spotting and suggesting the change to the desktop image deployment script, this post is intended to save you time searching for each method separately.