Cross tenant sync is a feature I’ve been waiting to see for a while and with the announcement of cross tenant access settings, I knew it wouldn’t be long.
What is cross tenant sync?
Cross tenant sync bridges the gap when two separate organisations need to come together as one, yet they have their own tenants. It’s perfect for mergers, acquisitions or if you are simply looking to restructure based on new company requirements, who knows? But whatever your reasons, this feature is sure to help, although it is worth mentioning it is currently in public preview so the standard supplemental terms of use for Microsoft Azure previews apply.
It takes the cross-tenant access settings used for the likes of Microsoft Teams shared channels even further to allow for seamless access and much better collaboration across tenants. Cross-tenant synchronisation allows two separate organisations to:
- Seamlessly access applications, even when hosted in different tenants.
- Minimise user friction by allow admins to consent to sharing data across tenants.
- Automatically synchronise accounts across tenants and remove them when they leave.
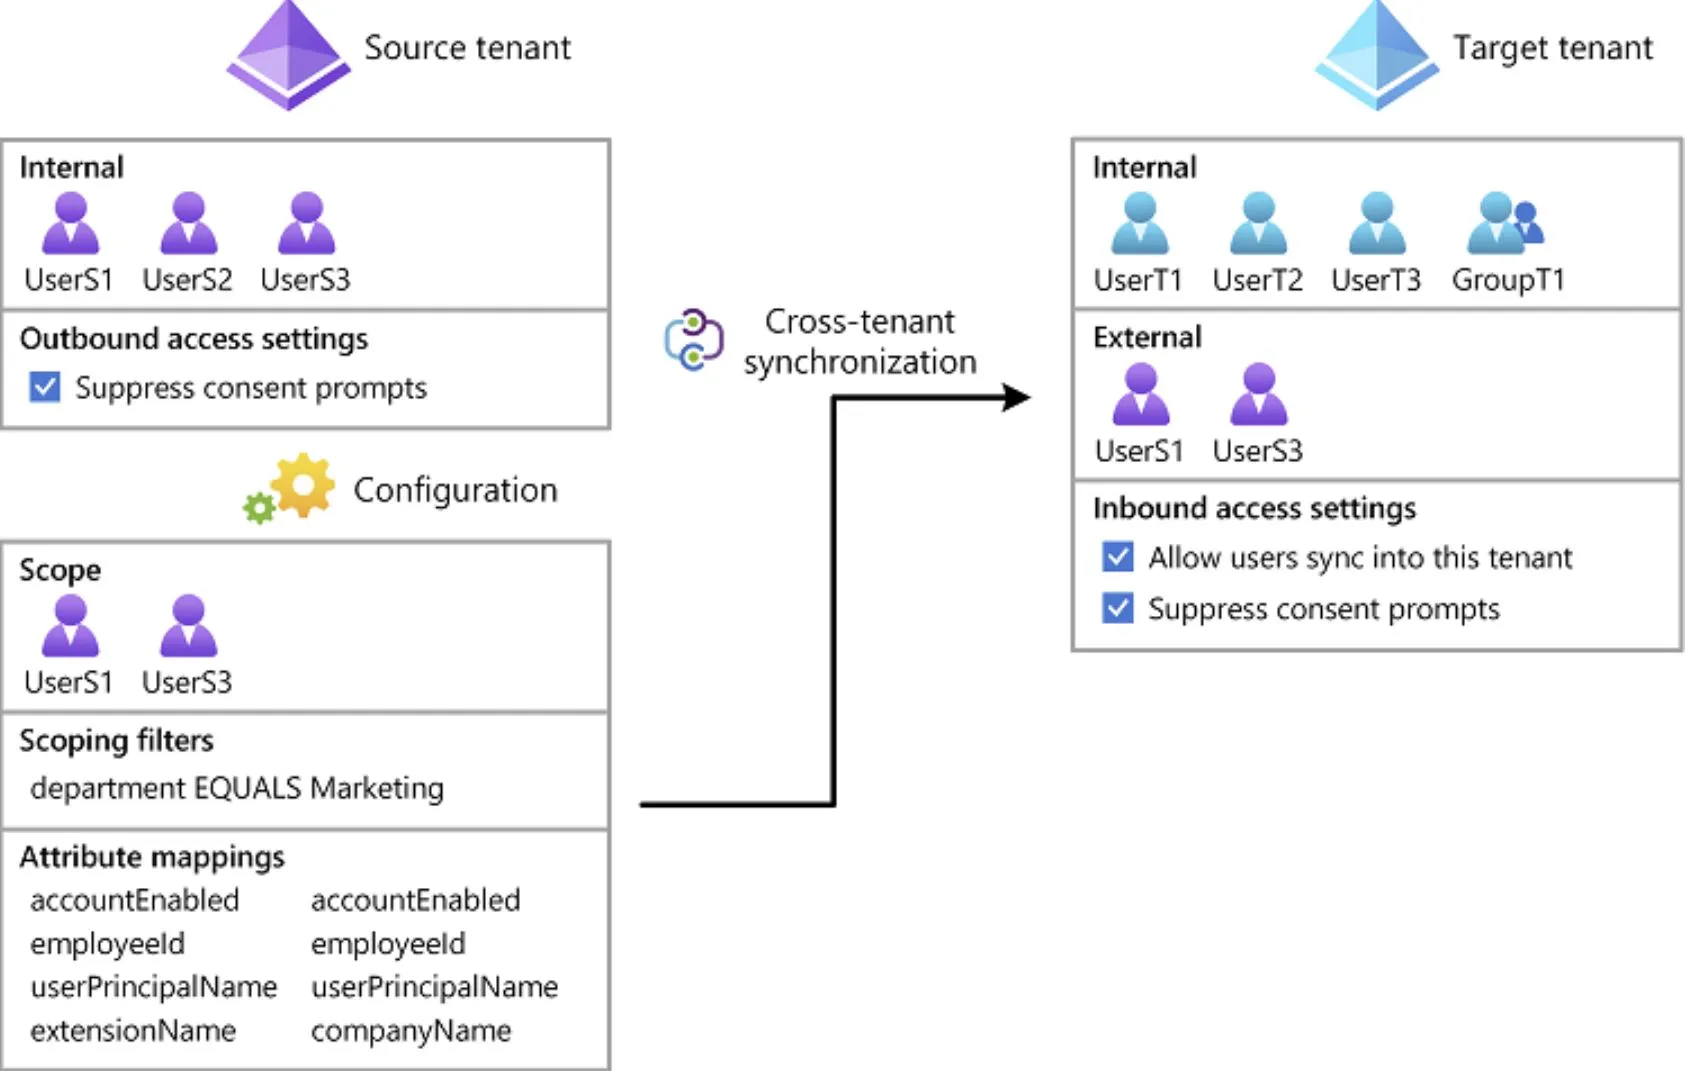
The feature uses the Azure AD B2B functionality that is already integrated with Azure Active Directories security and compliance features such as conditional access, cross-tenant access settings, and entitlement management. The below image illustrates how the above looks.
So, brief explanation out of the way, how do we configure it!
Configuring cross-tenant sync
To set this up you will need at least two Azure AD tenants; one will act as a source and the other the target.
Configuring the target tenant
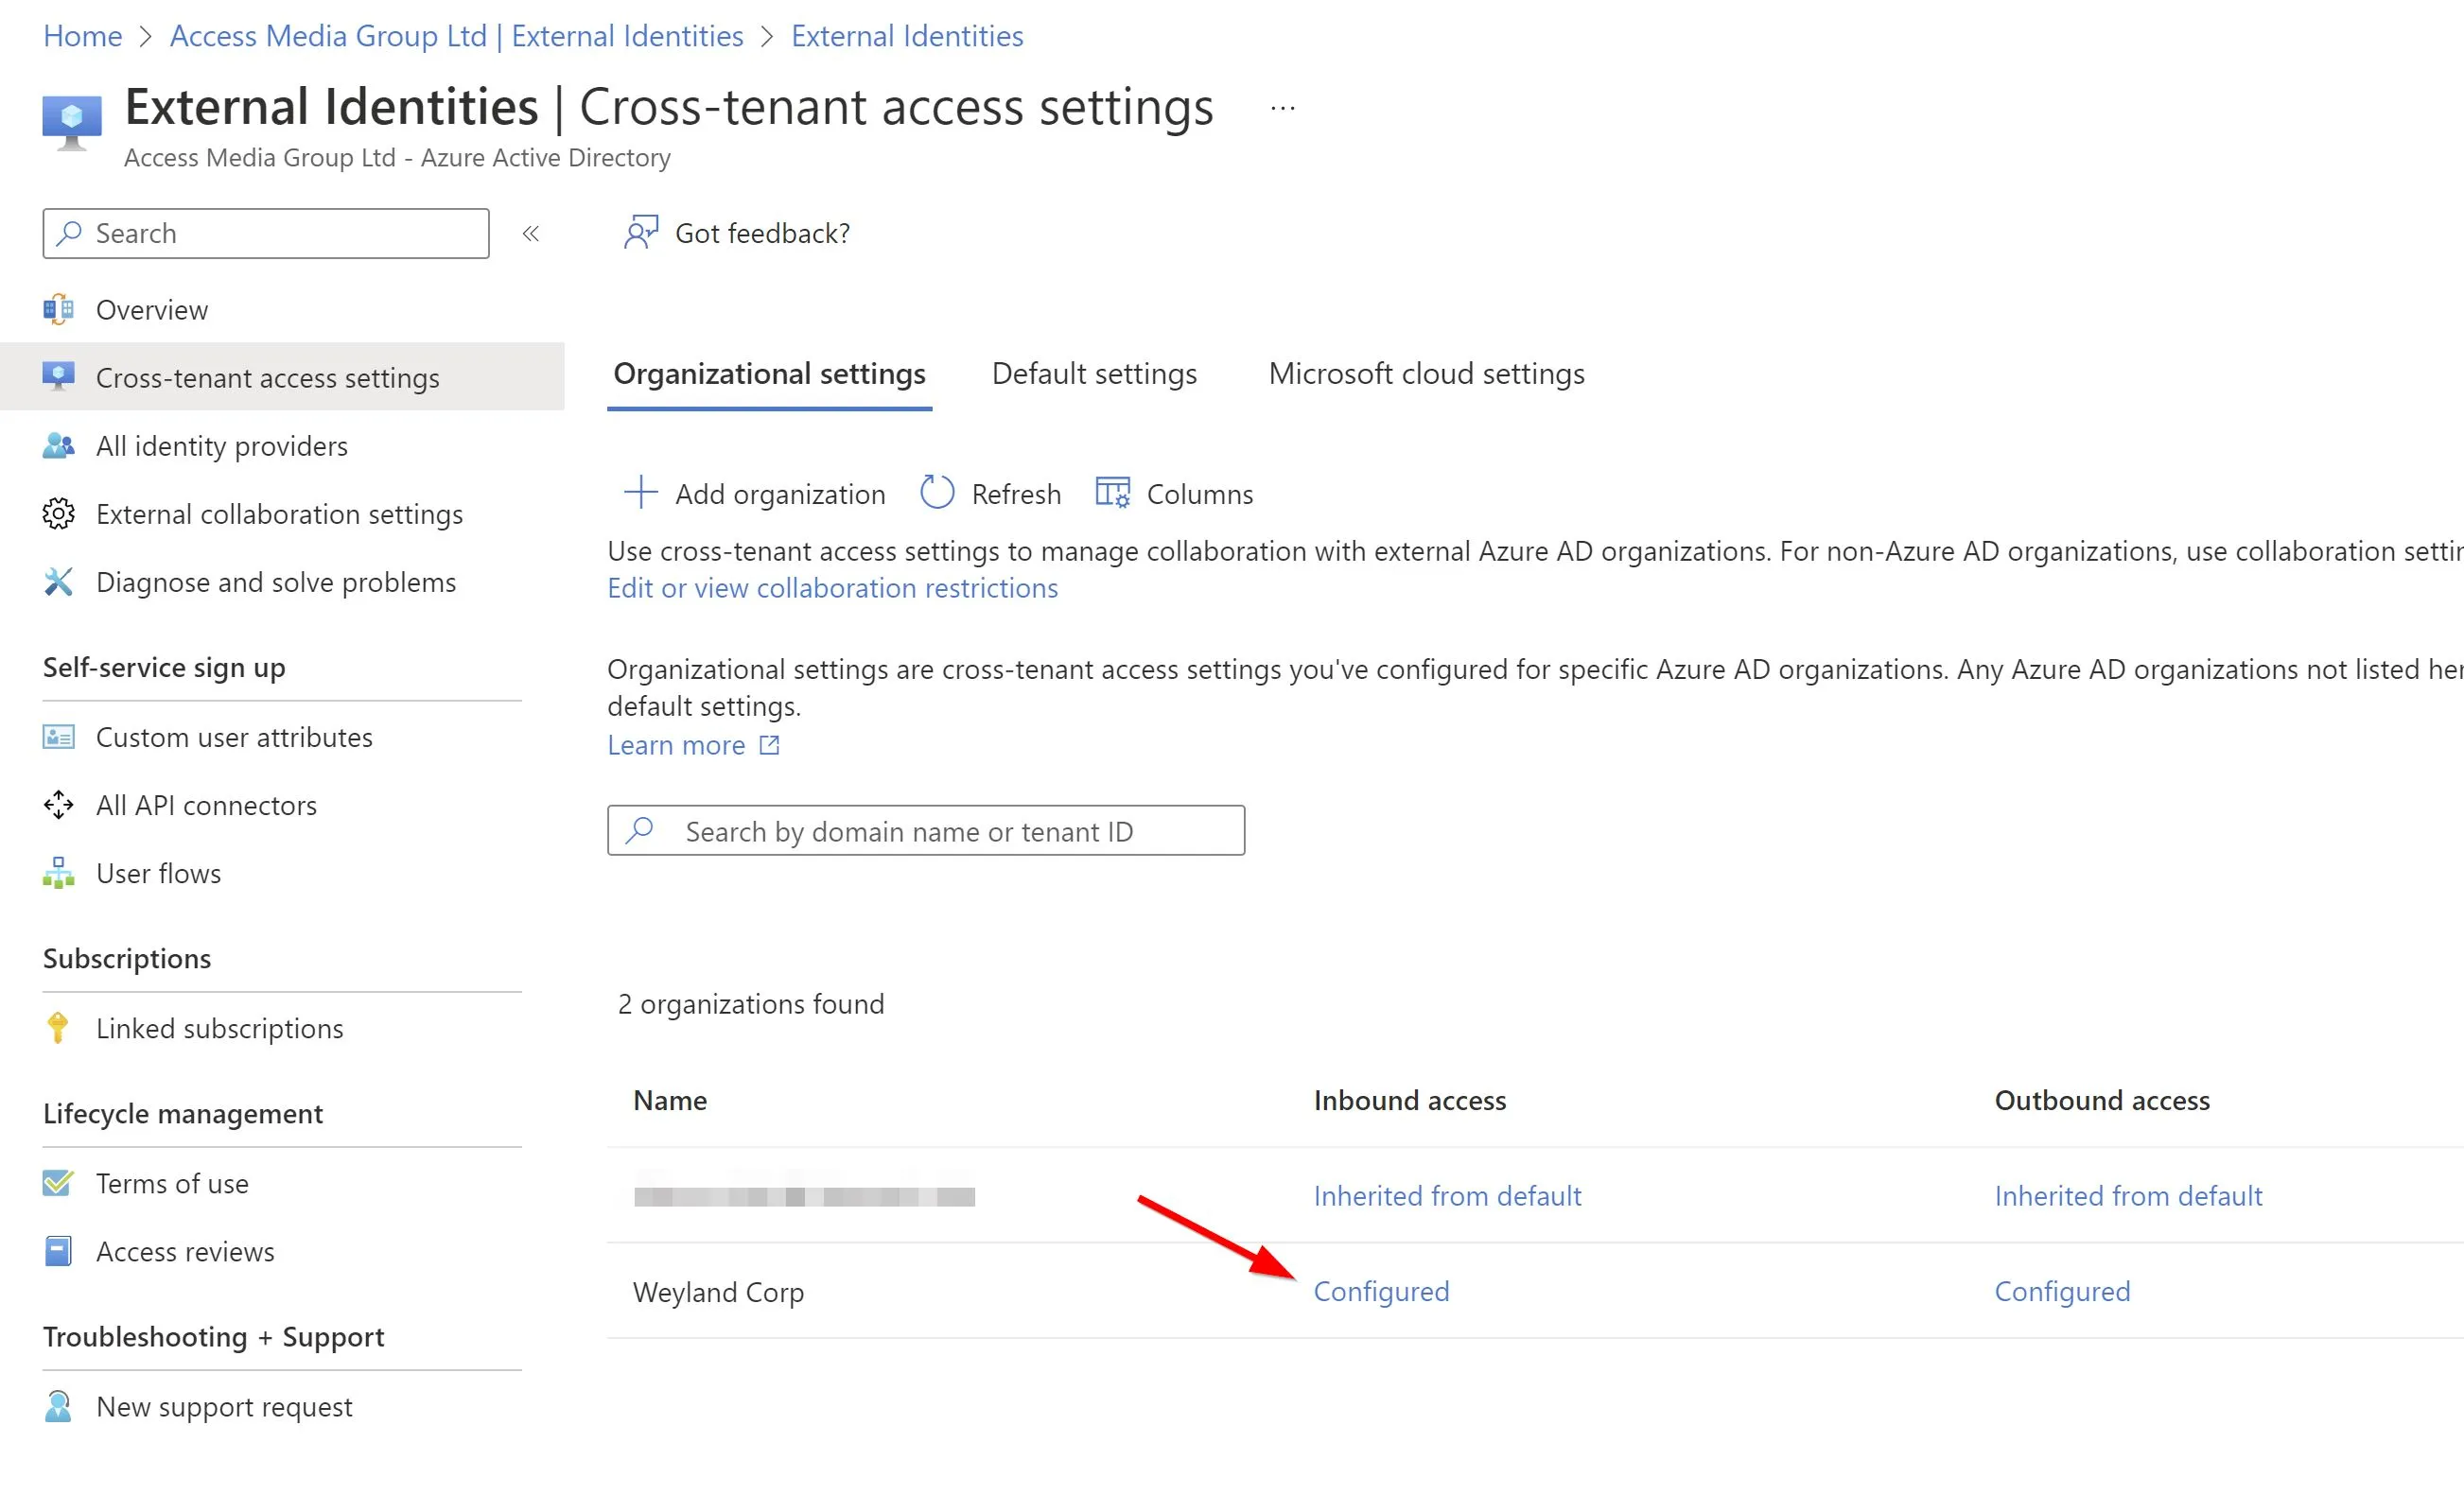
First, we’ll start in the target tenant (this will be the tenant that the users are synced to) so head to the External Identities tab in Azure AD and select Cross-tenant access settings and on the Organisational settings tab add your partner (source) tenant using the Add organisation tab, you may already have this setup if you have been using Teams shared channels with them, like I have.
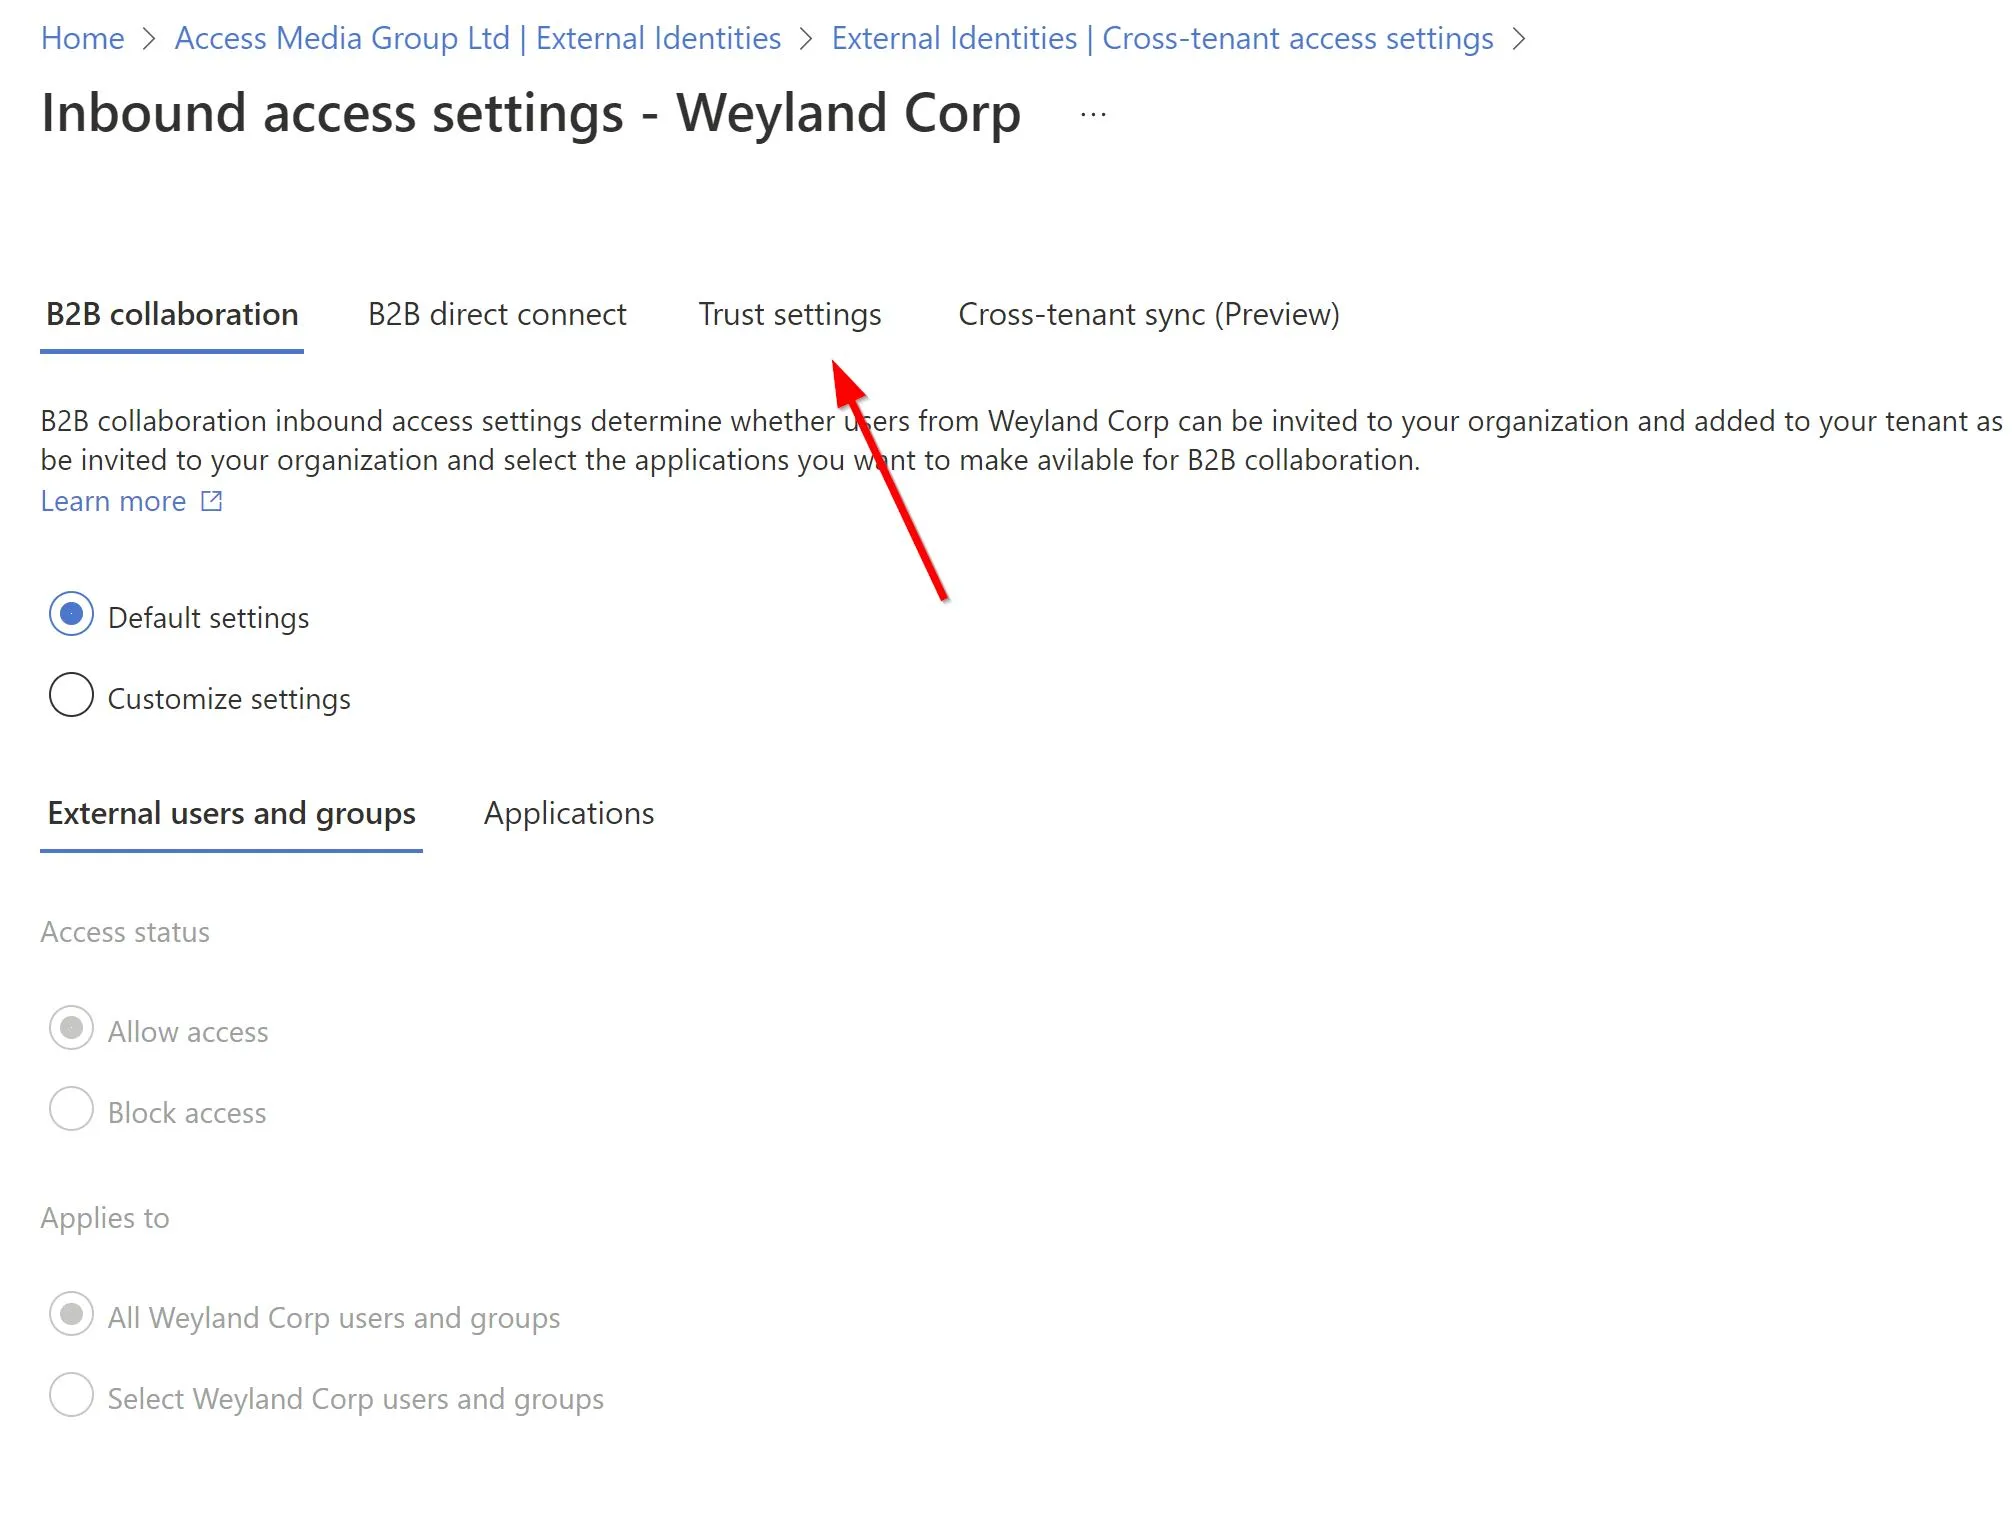
If you have only just set this connection up you will need to select Inherited from default underneath the Inbound access column, if you already have an organisation configured in here, select Configured under the same column instead, in my example I already have a partner organisation configured.
From the following screen navigate to Trust settings.
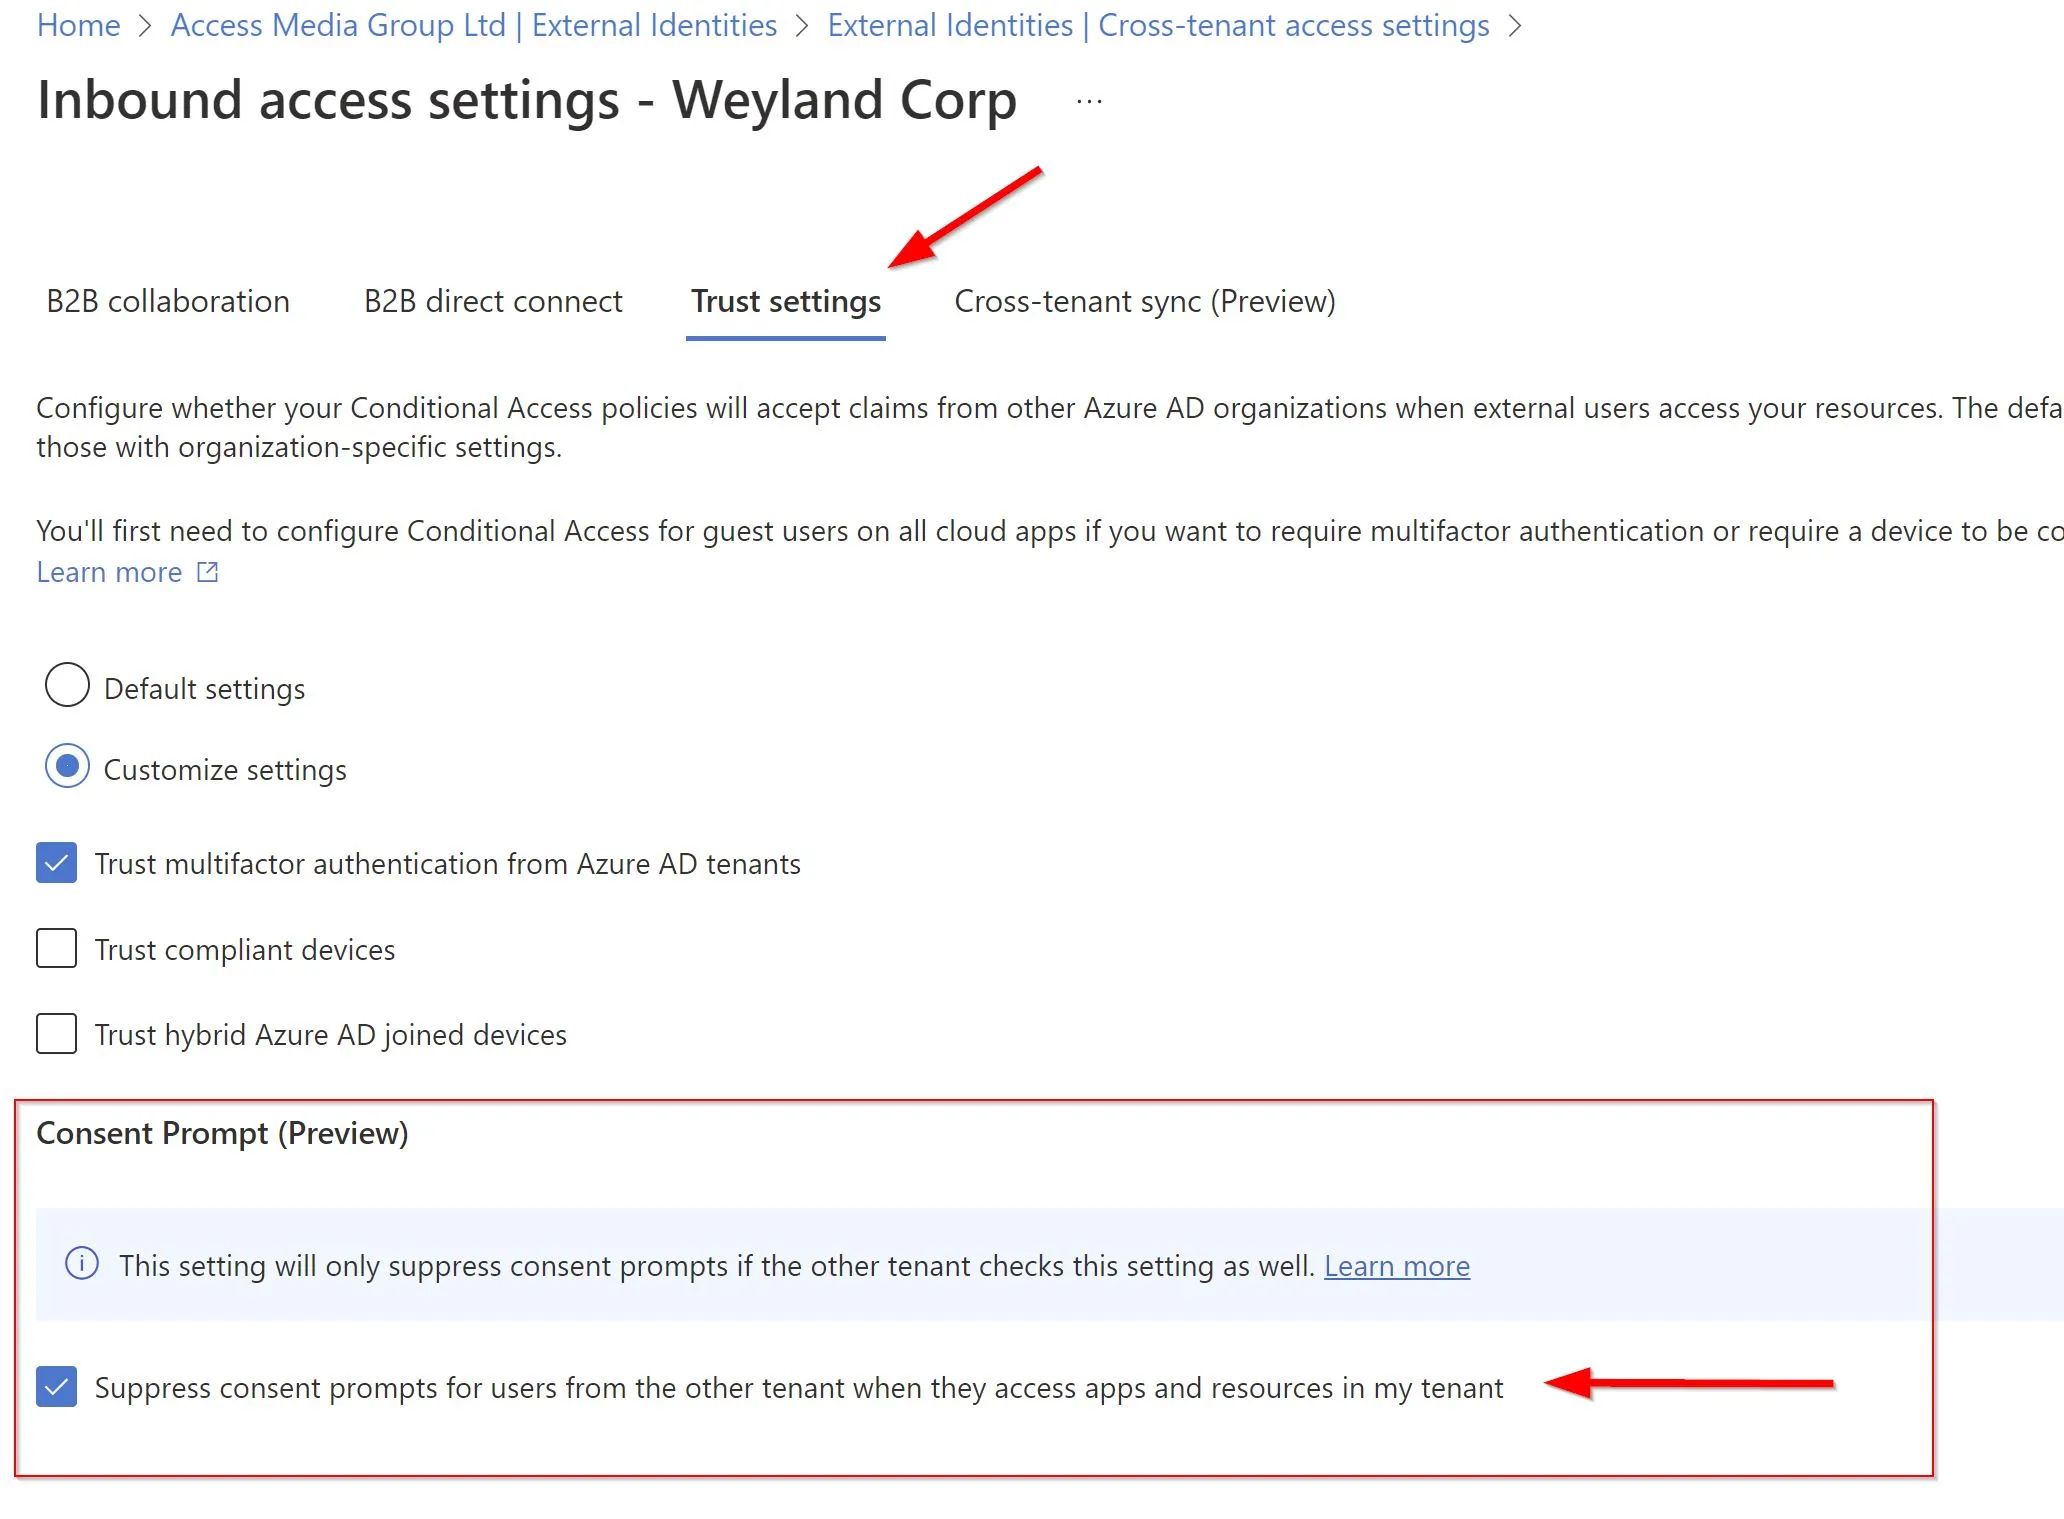
This is where you can configure how conditional access in your tenant will work with claims from another tenant, you may wish to configure these while here and if so, I would recommend enabling at least trust multifactor, like I have below. However, these settings are not what we are here for as underneath you will notice the Consent Prompt options, here is where you will want to enable this feature as it will suppress consent prompts from apps in your tenant for synced user accounts.
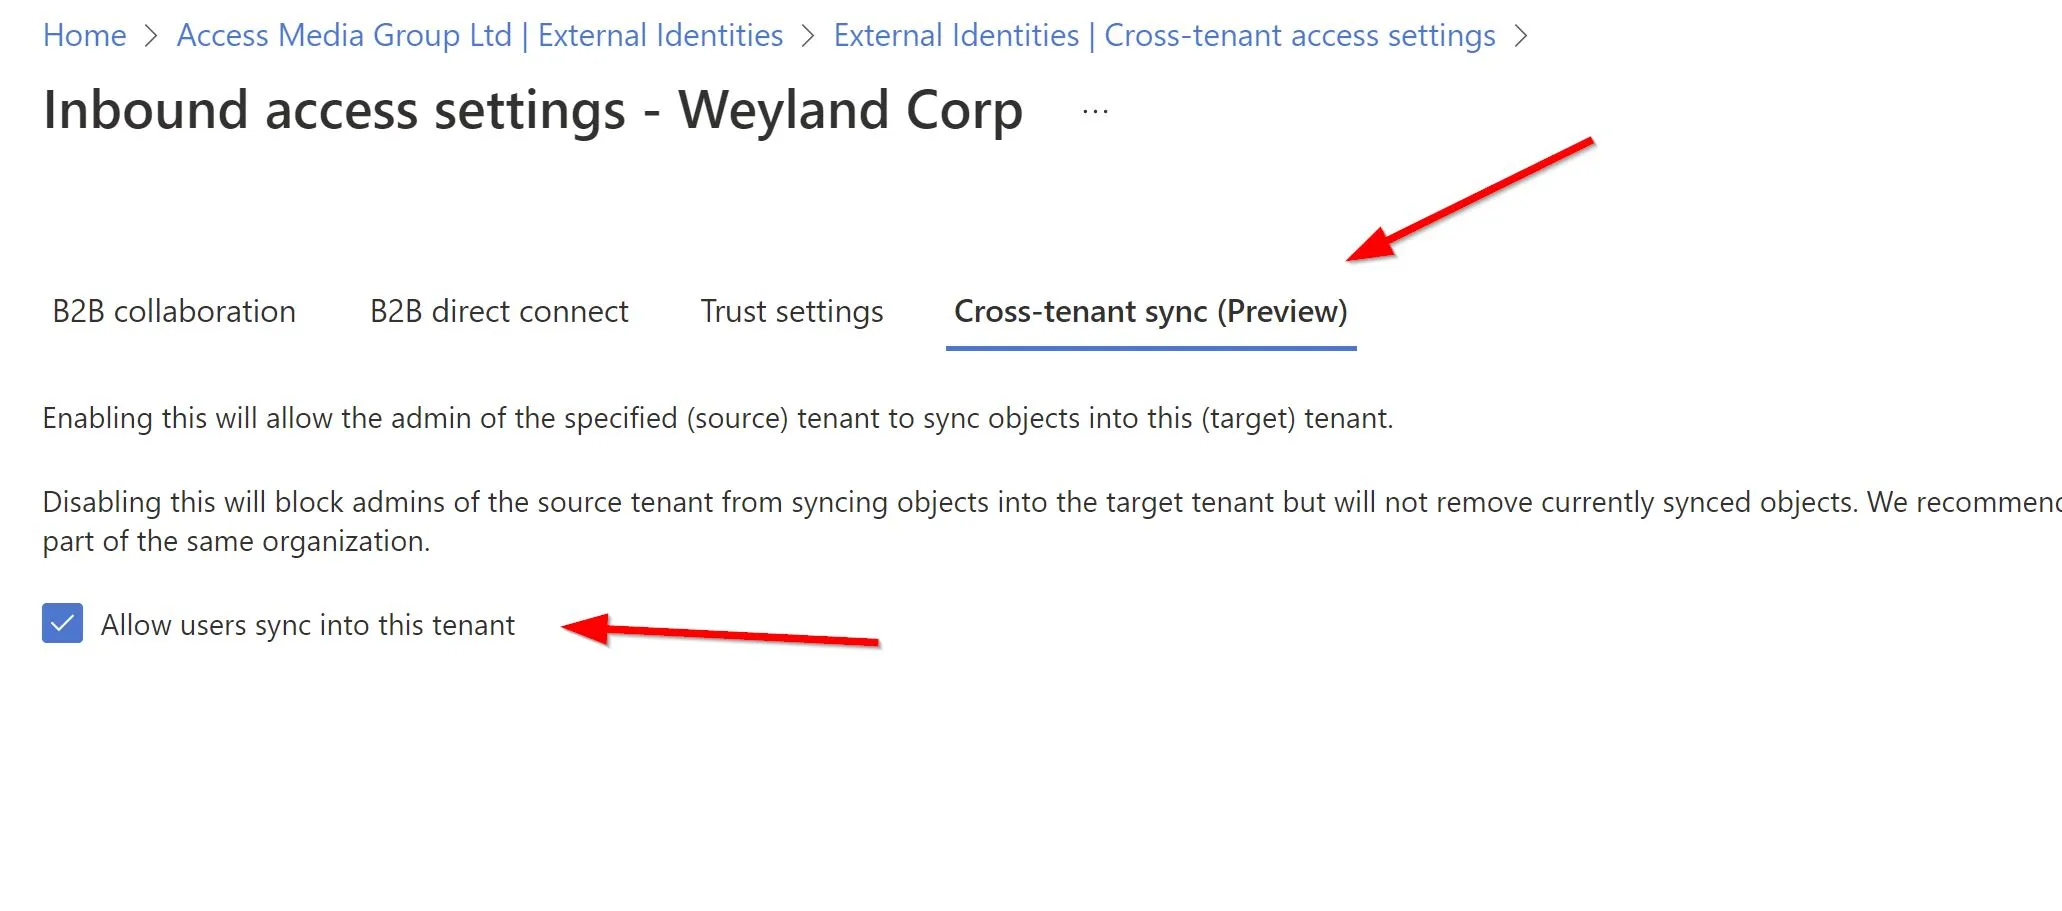
Finally, head over to the last tab Cross-tenant sync and enable the only checkbox there which is to allow users sync into your target tenant from your source tenant.
That’s all there is to configure in the target tenant, now we are going to head over to the same location within our source tenant.
Configuring the source tenant
Now in your source tenant head to the cross-tenant sync page however this time we will be updating the configuration for the Outbound access settings.
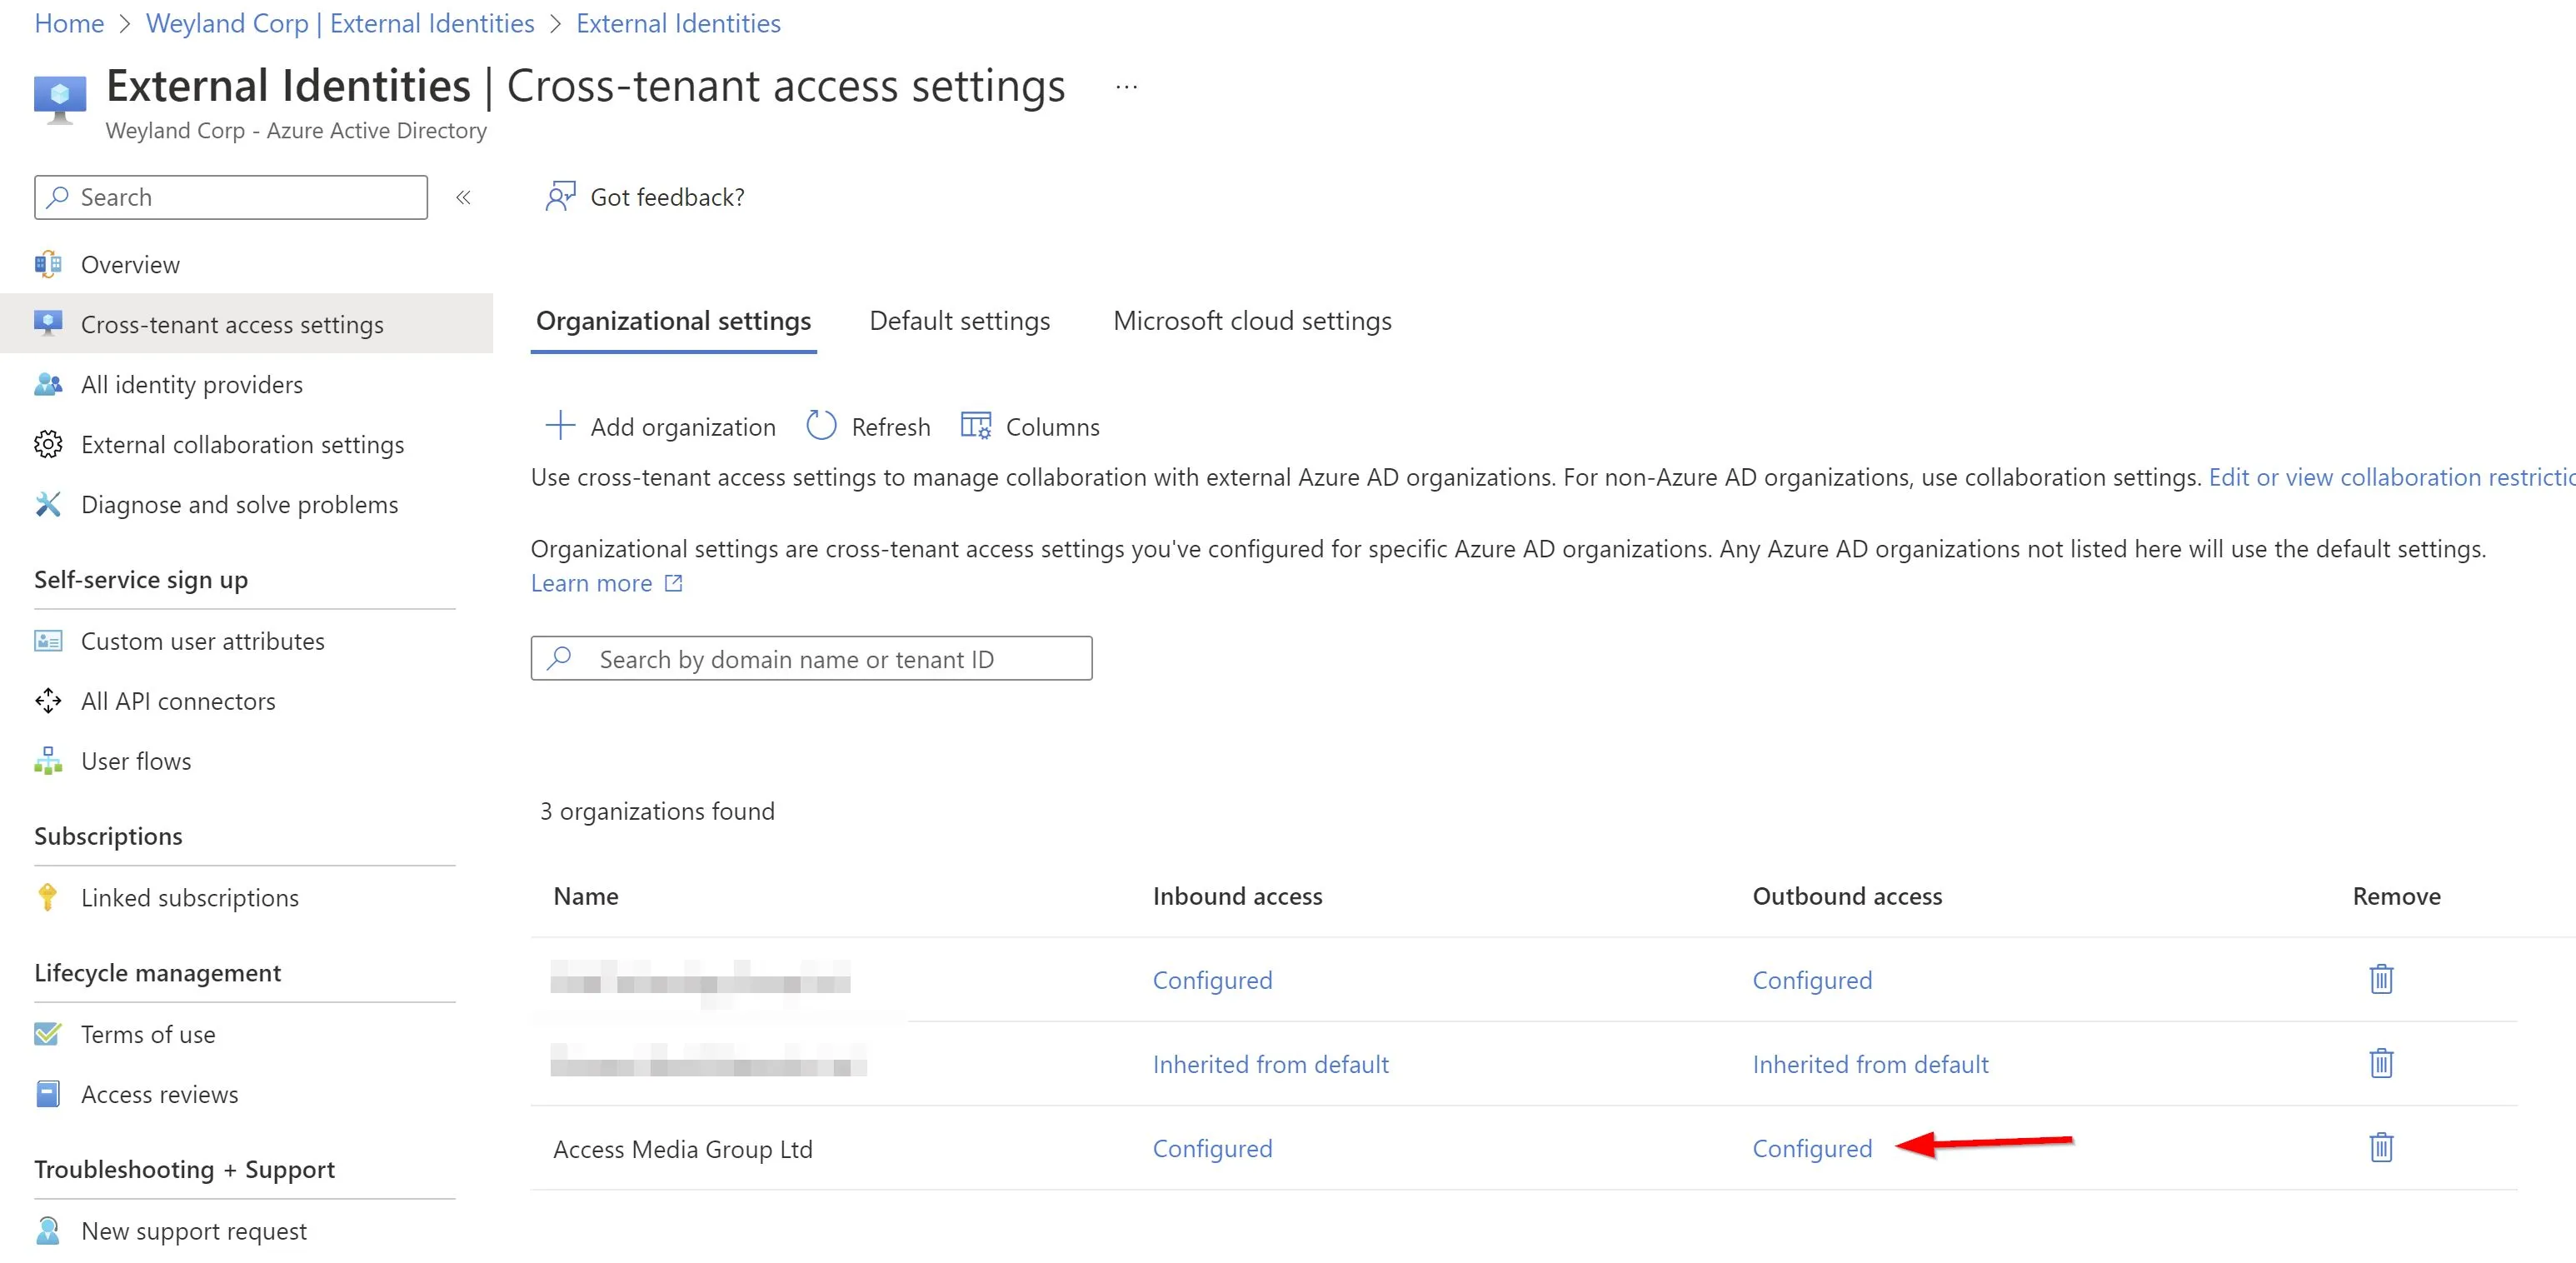
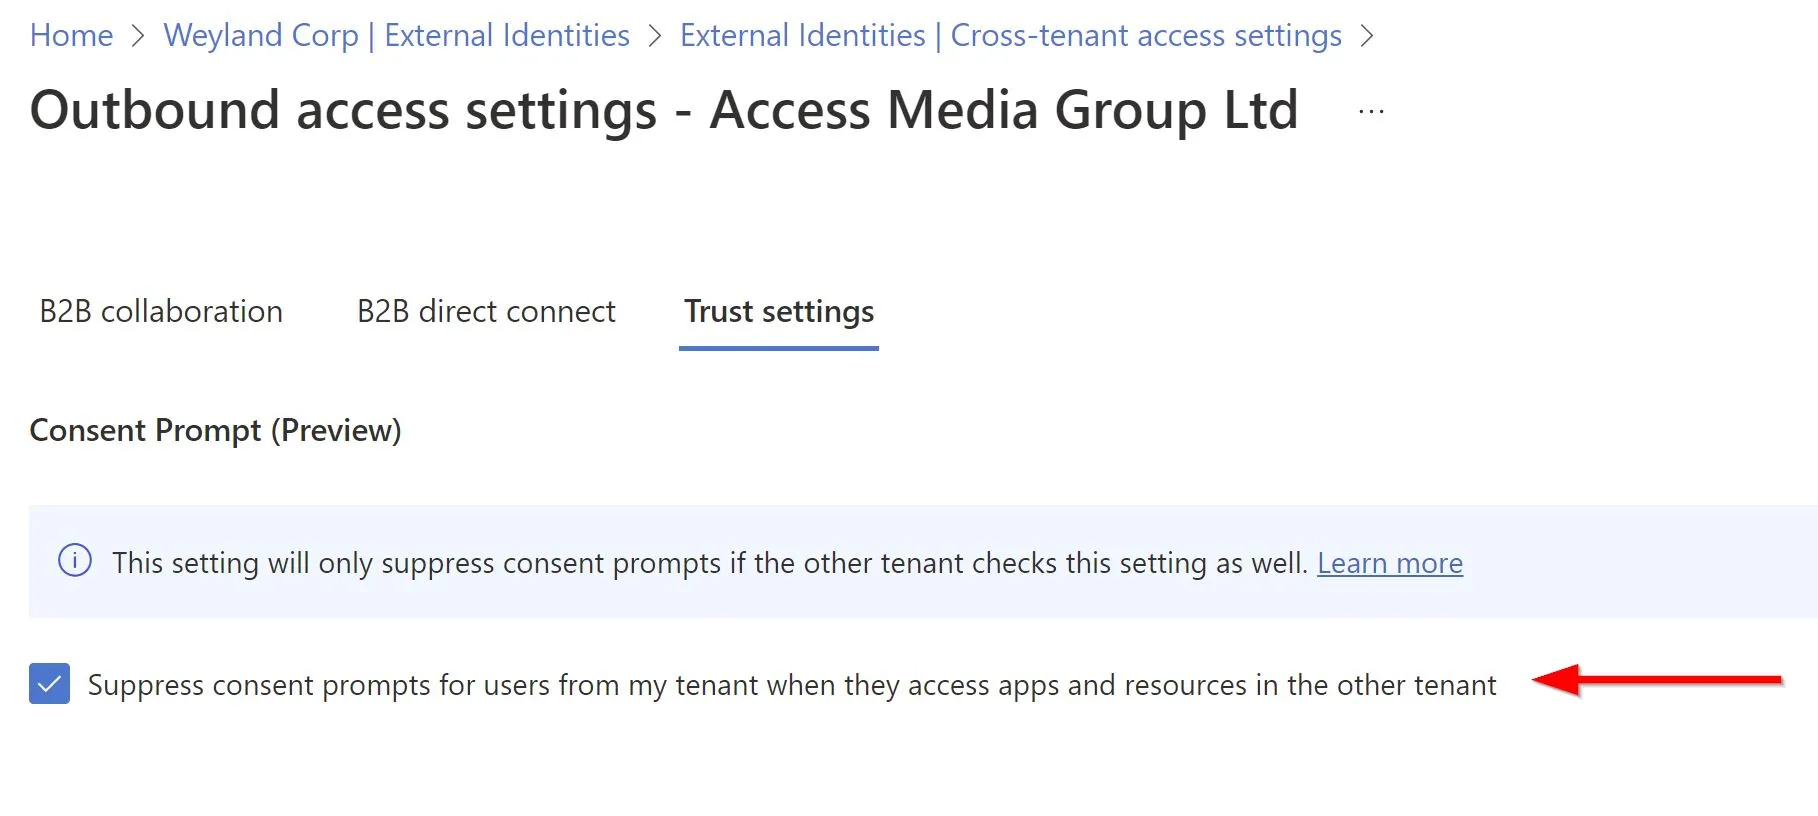
From the Trust settings page go ahead and enable the checkbox to suppress consents, remember this must be enabled on both tenants or configuration will fail.
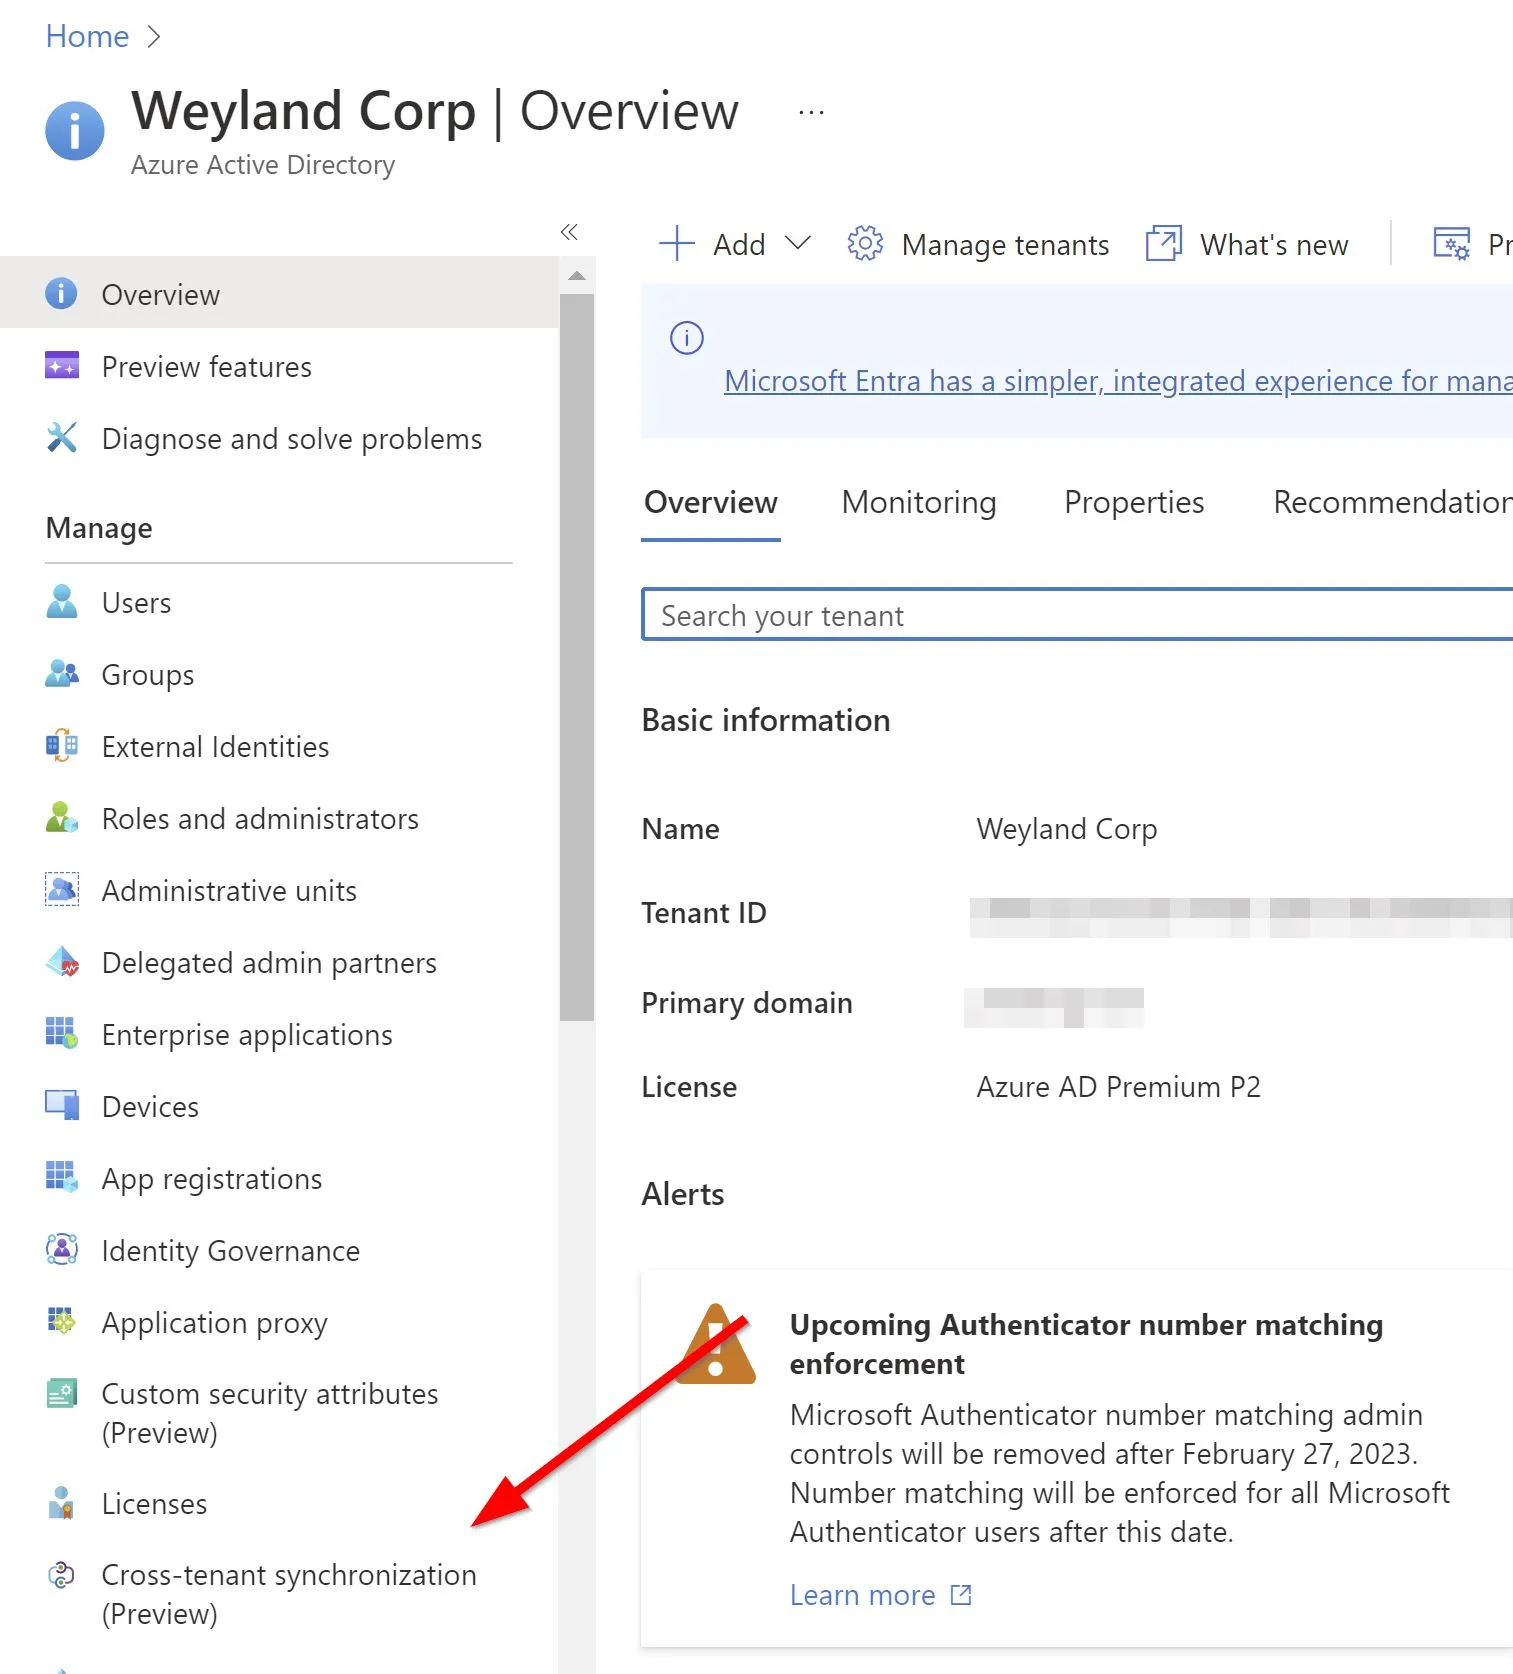
Now, time to configure the sync settings we want to use for our user sync, to do this navigate to Cross-tenant synchronisation from the Azure AD portal page.
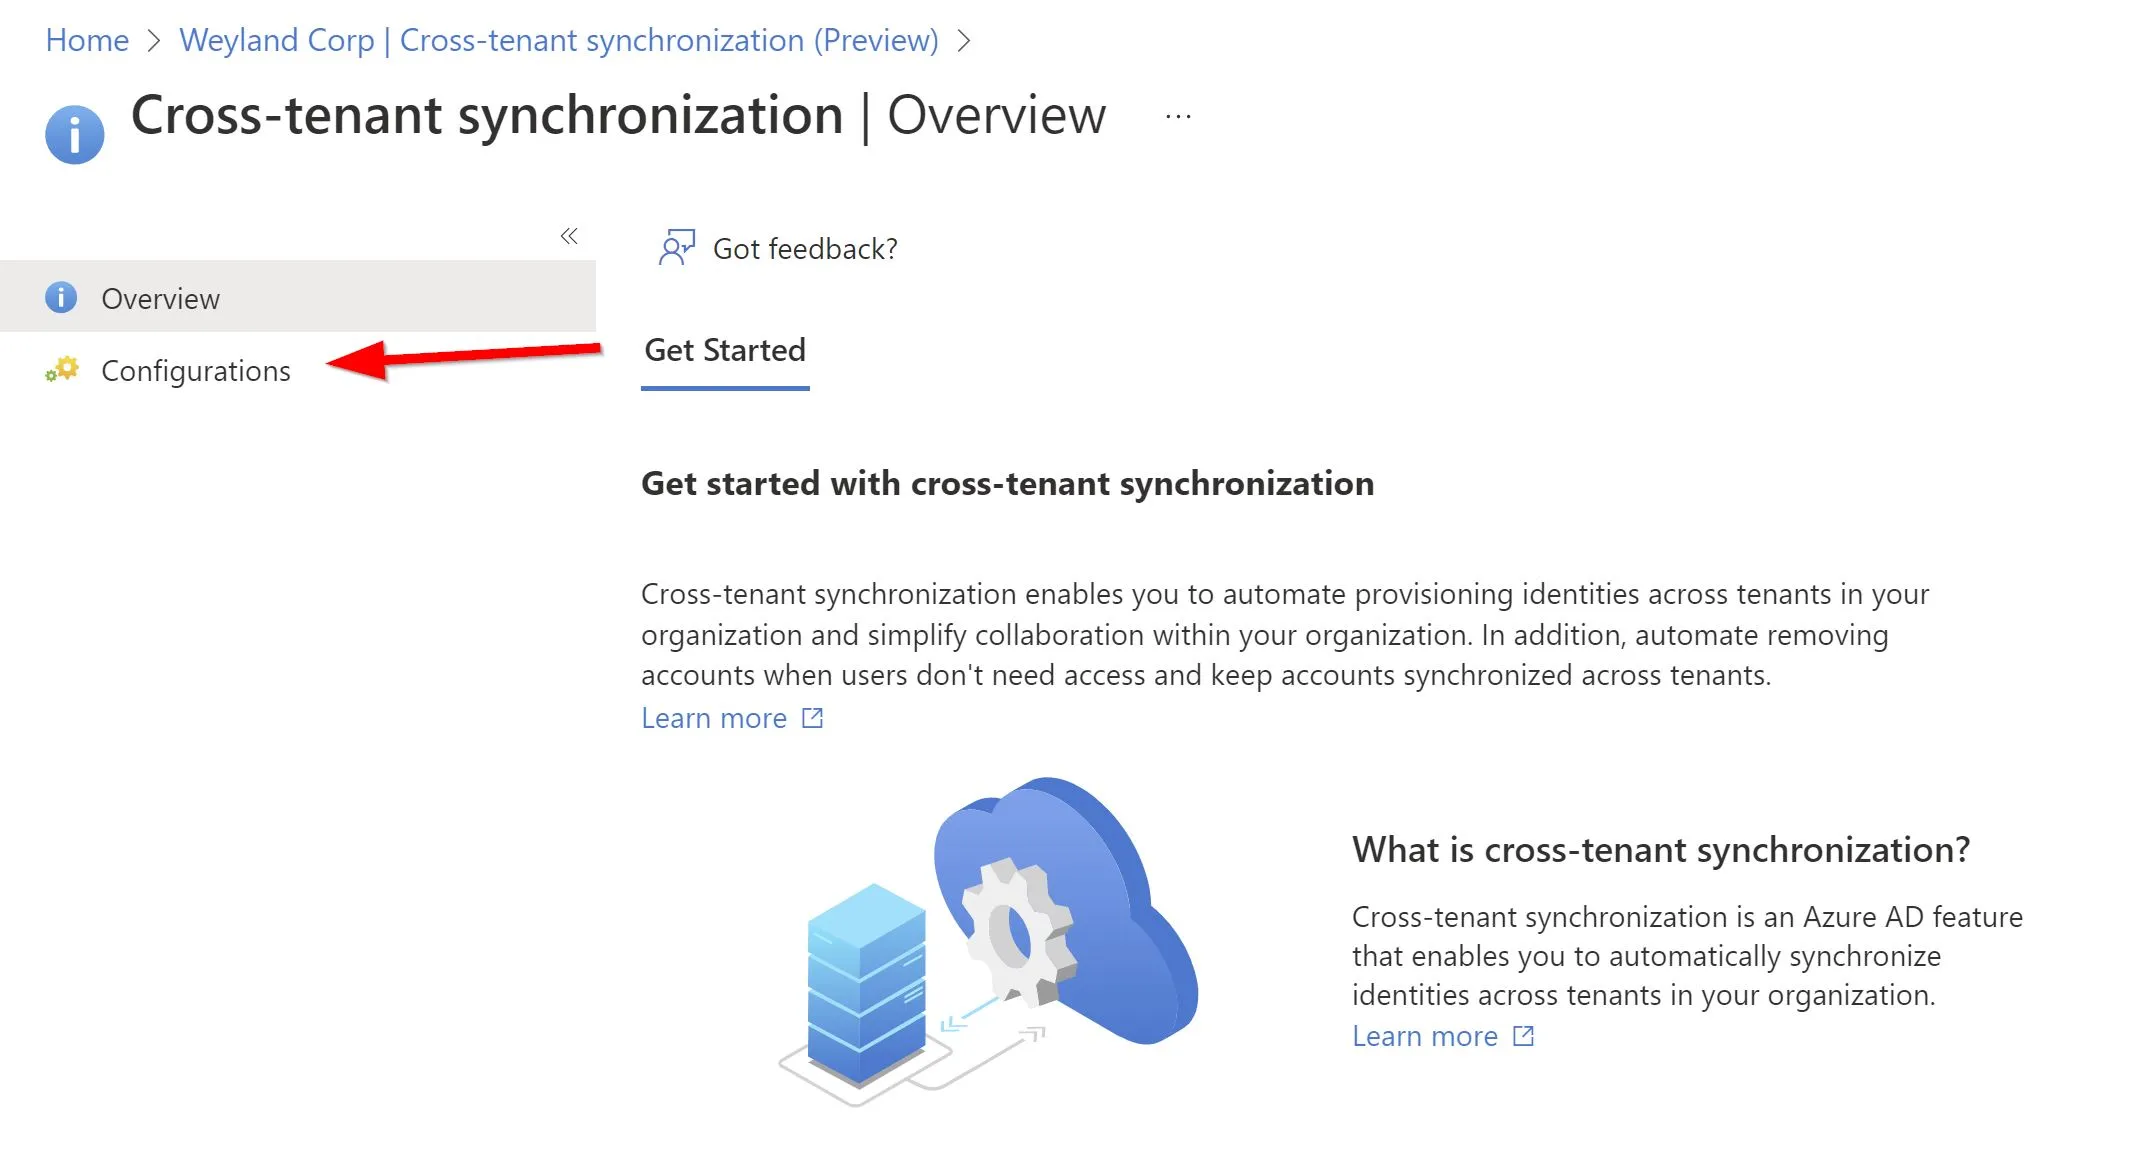
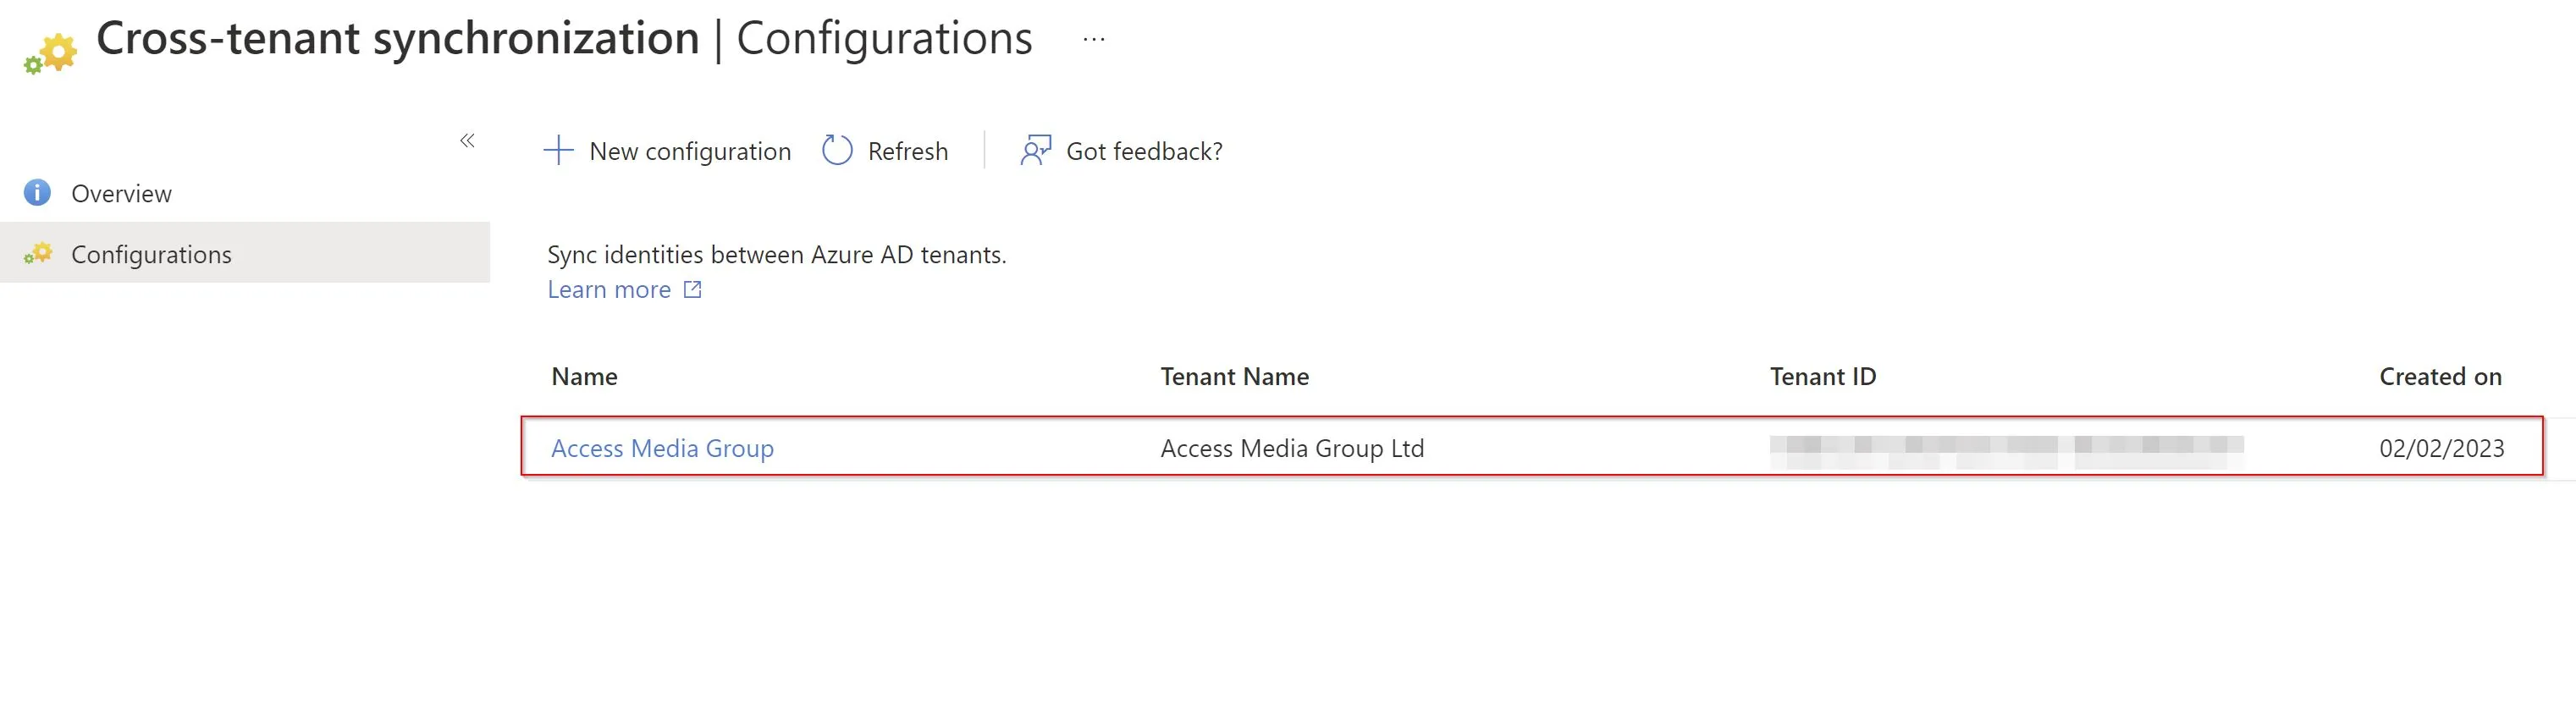
From here you will want to create a new configuration.
Give your configuration a suitable name.
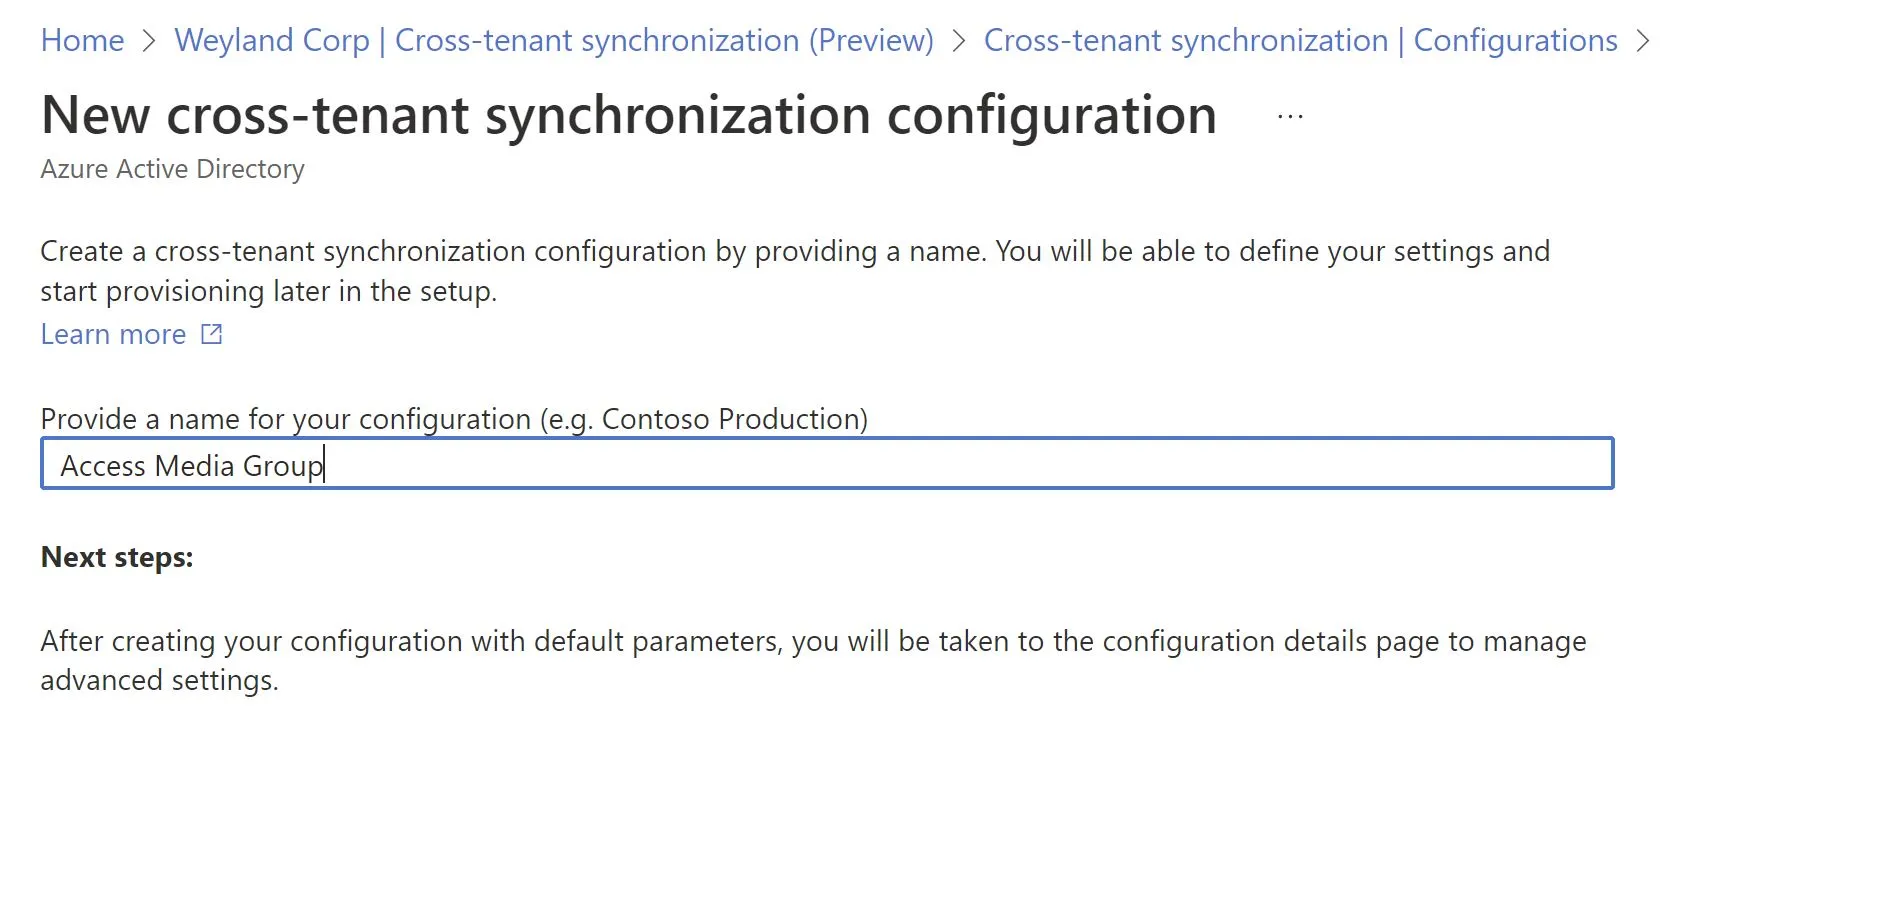
It’s worth noting that once you have created your configuration it can take 10-20 seconds before the configuration shows up in the list, so don’t panic that it’s not there right away, give it a few more seconds and refresh till it’s available.
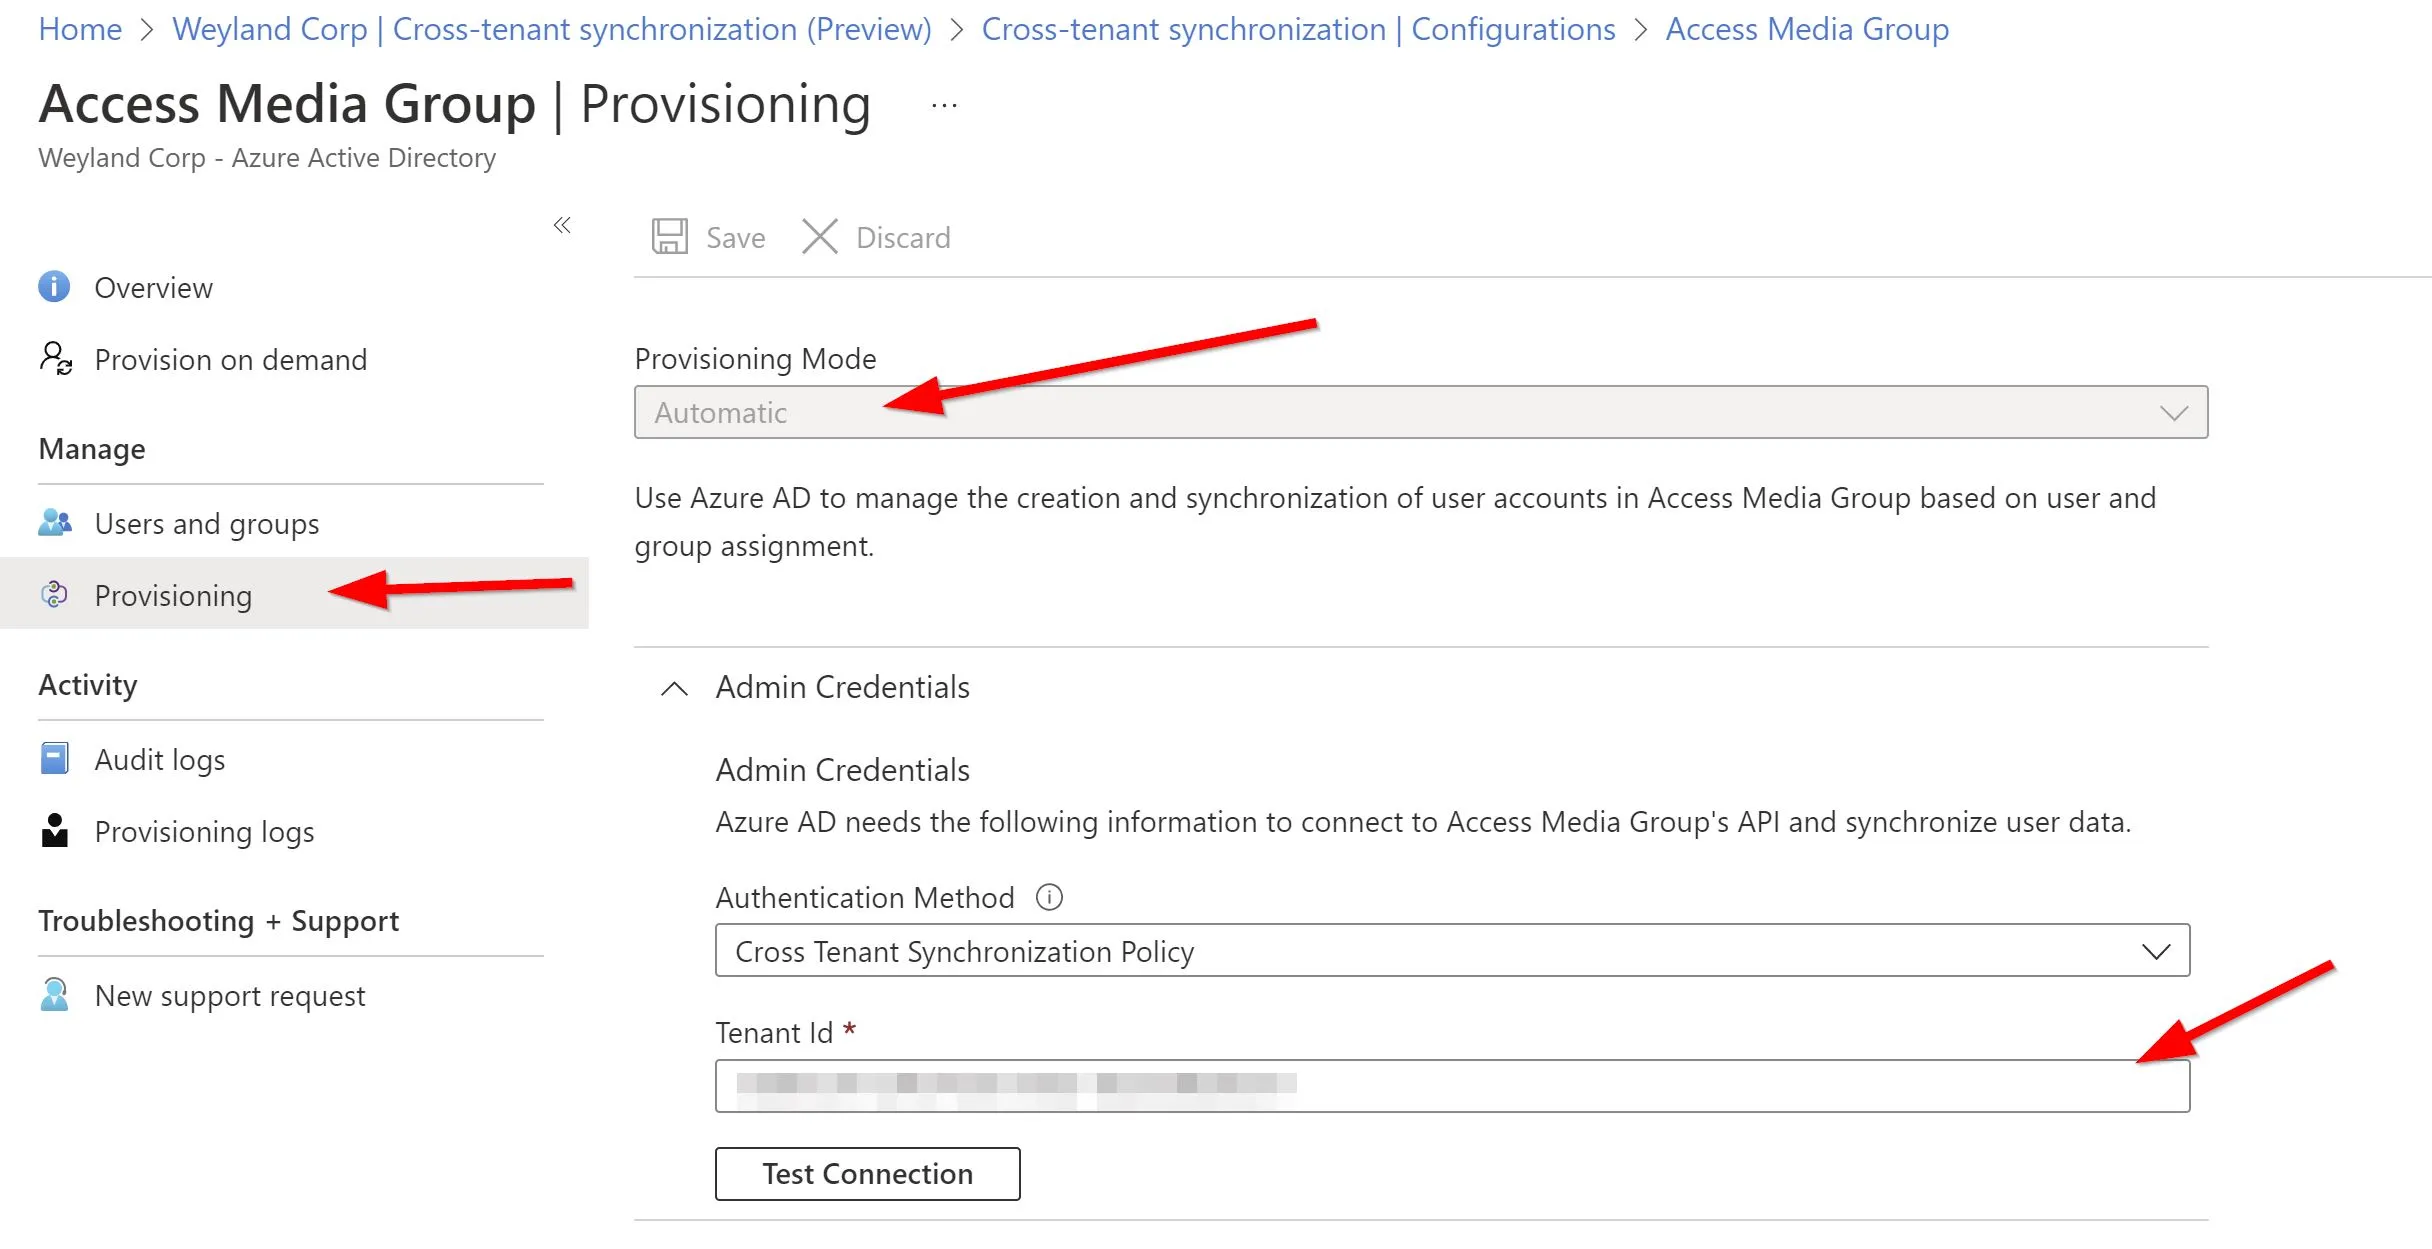
The first thing you are going to want to do is update the provisioning setting to Automatic and provide the tenant ID for the target tenant to test the connection between the two.
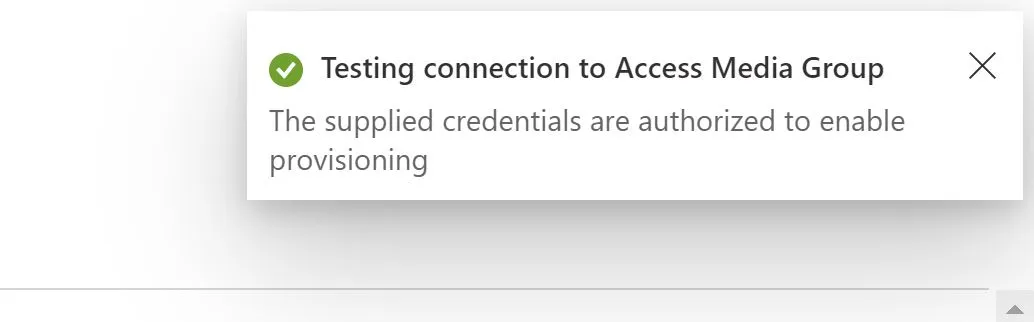
Go ahead and test the connection before you go any further, you should get the following message.
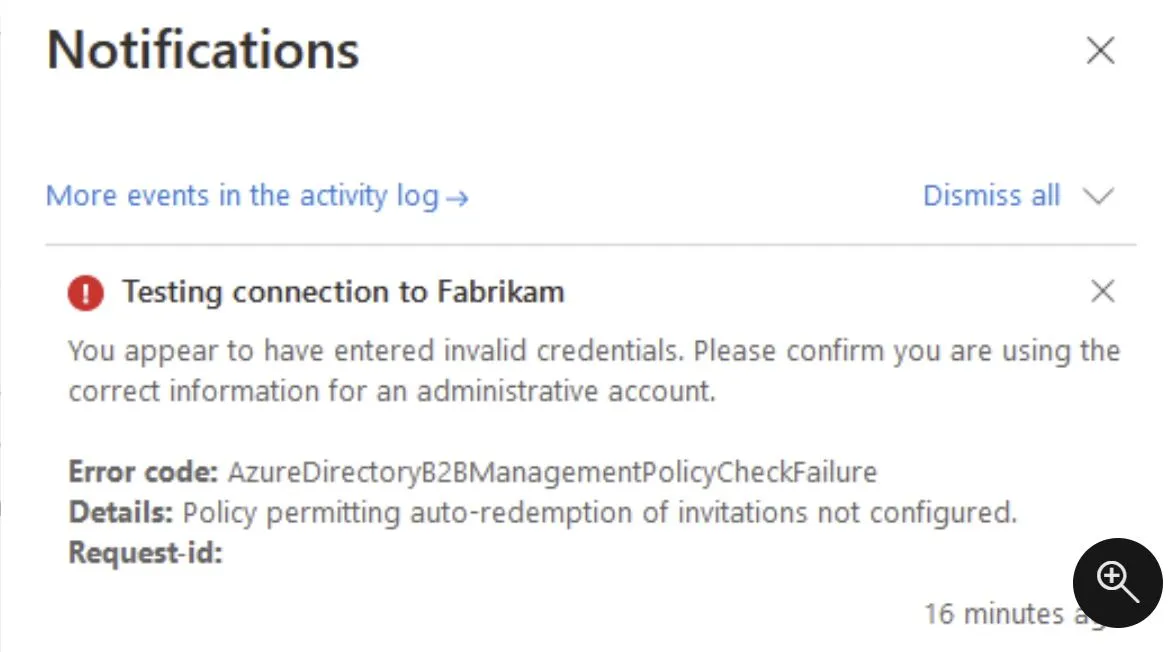
If instead you get the below message, you will need to go back to your inbound and outbound settings for the respective tenants and make sure that the consent suppress checkbox is enabled for both tenants.
Once you’ve confirmed a successful test, you can move onto the mappings and settings sections that appear afterwards.
It is possible to scope cross-tenant sync by user configuration assignment (per user or per group) as well as by user attribute, the recommendation when configuring this is to start small and test with a single or small subset of users to ensure you get the desired outcome.
To start with, we will configure who will be in scope for synchronisation, to do this head back to the Provisioning blade and scroll down to settings. In here you can opt to provide an email address for sync errors, activate the prevent accidental deletion feature and choose whether to synchronise all users and groups (not recommended) or to scope it to assigned users and groups (recommended), go ahead, and choose your preferred option, again for testing I would leave this on the default initially.
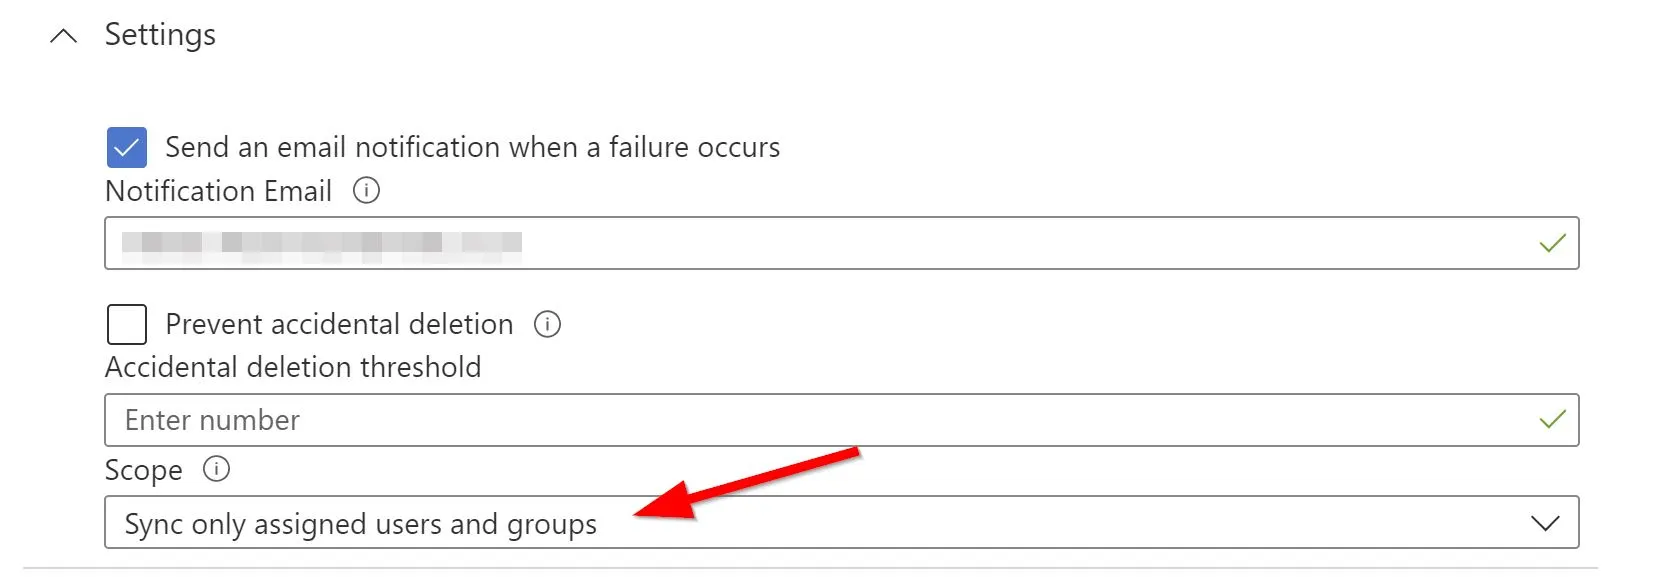
Go ahead and save your current settings and then head over to the **Users and Groups **section on the left.
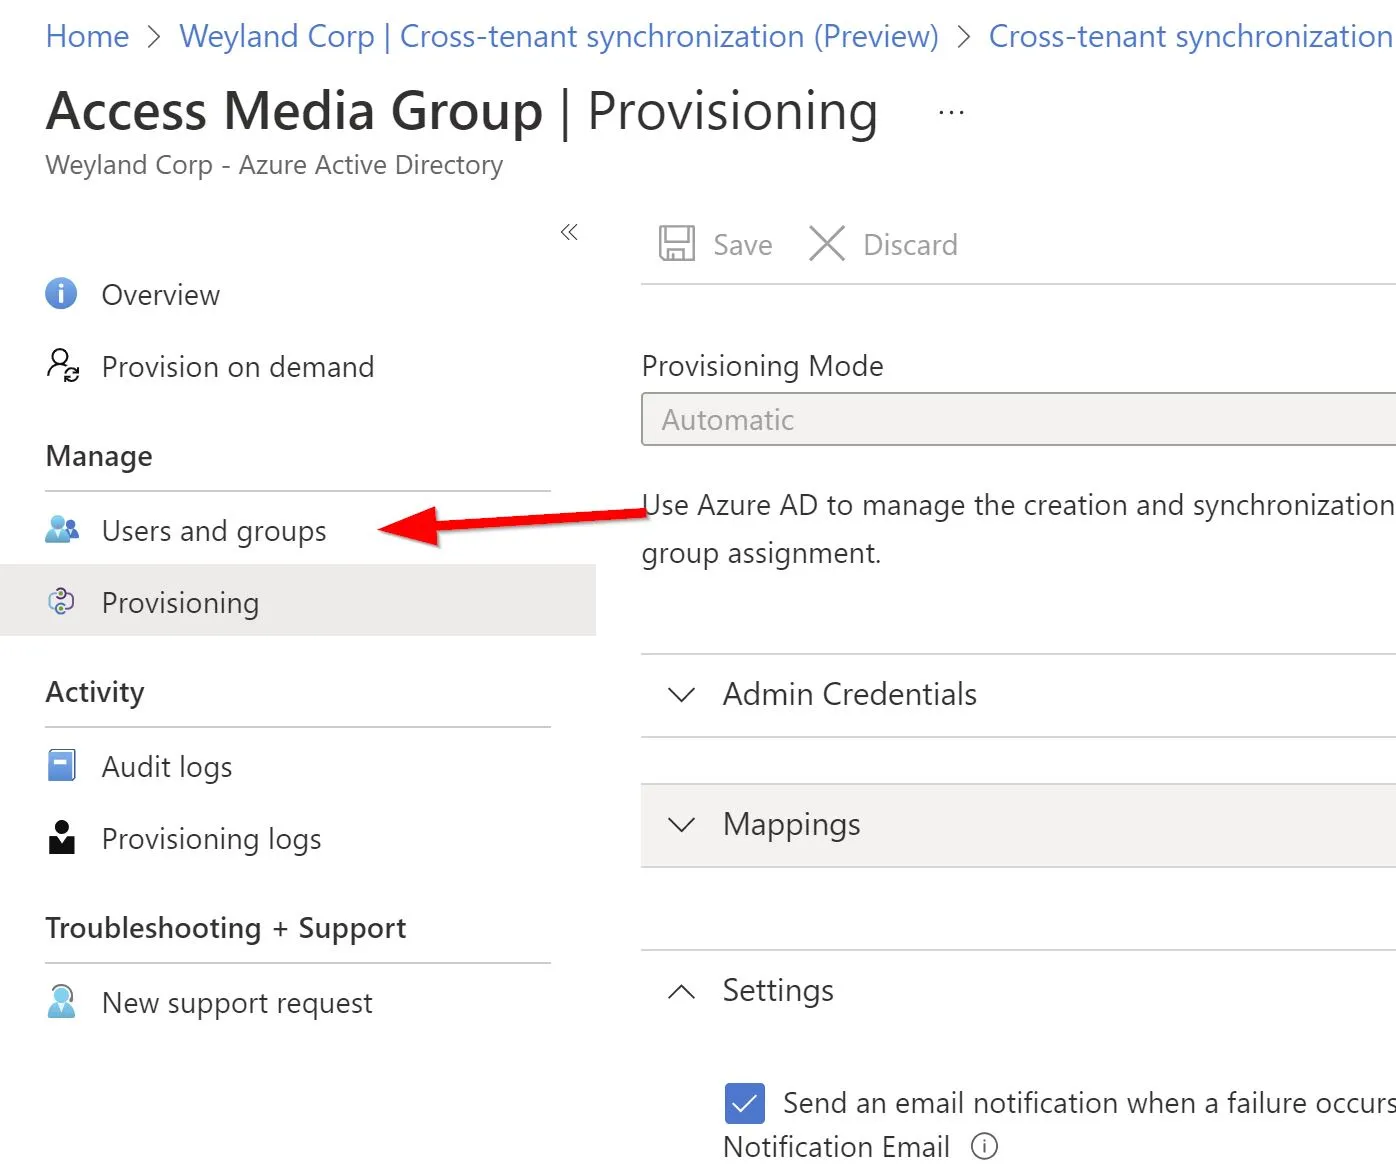
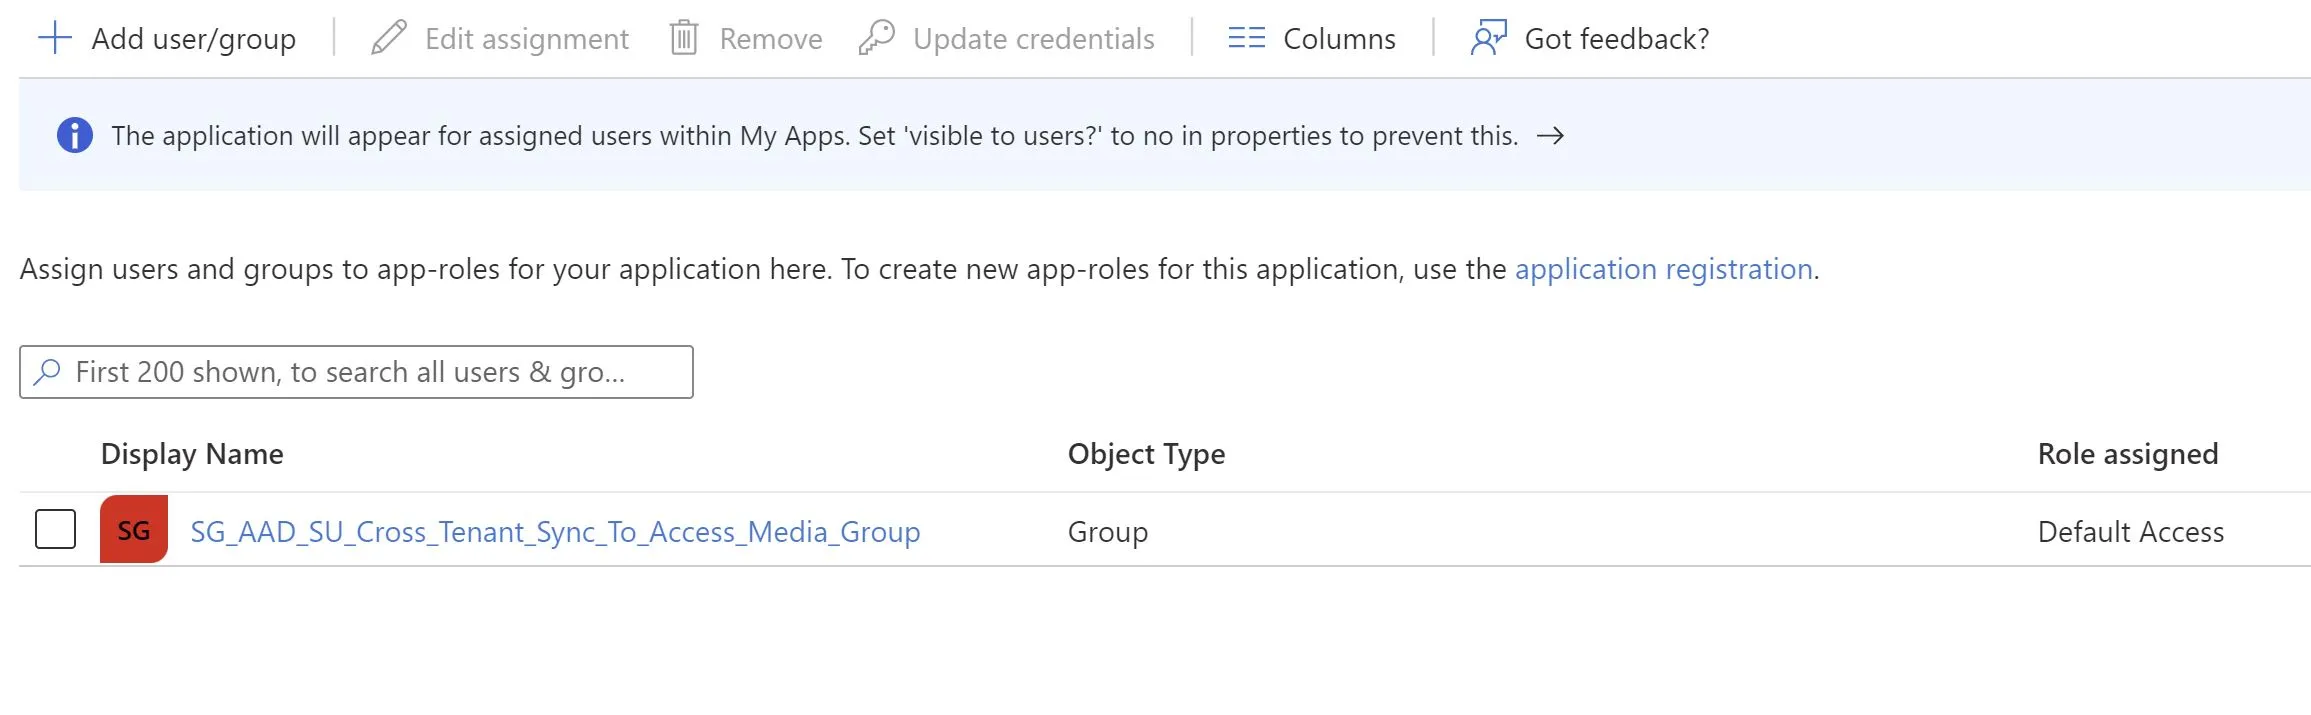
From here you can choose which users or groups are to be included in the sync, I have opted for a static security group so I can add and remove users from the sync, this is good practice for testing the functionality out, but you may want to switch this to a dynamic group afterwards to automate the complete process, just keep in mind that nested or cascaded groups are not supported, users must be a member of the assigned group.
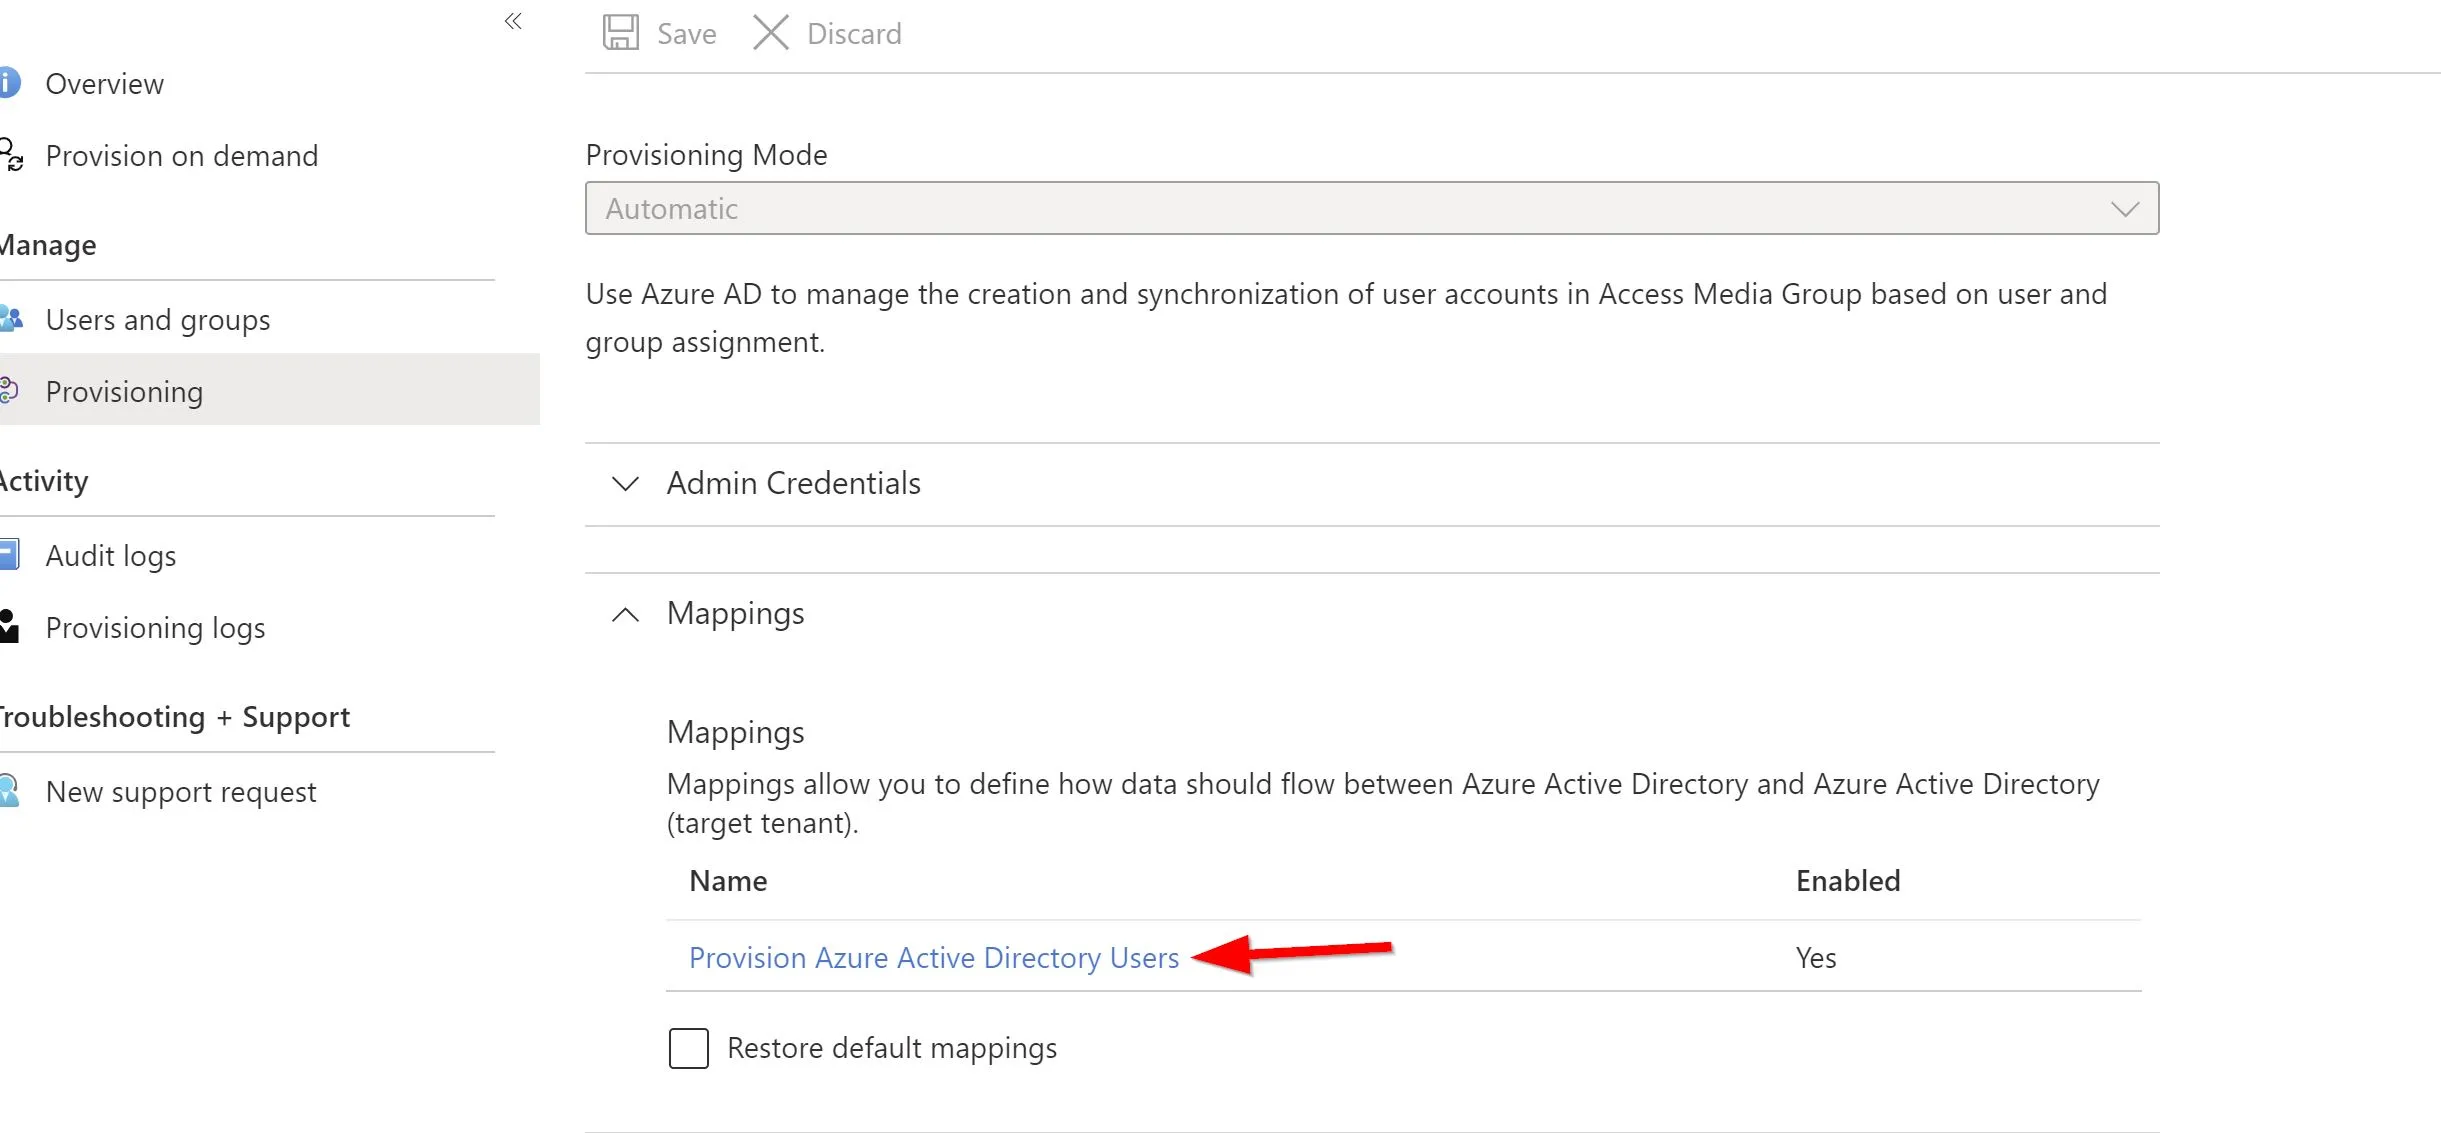
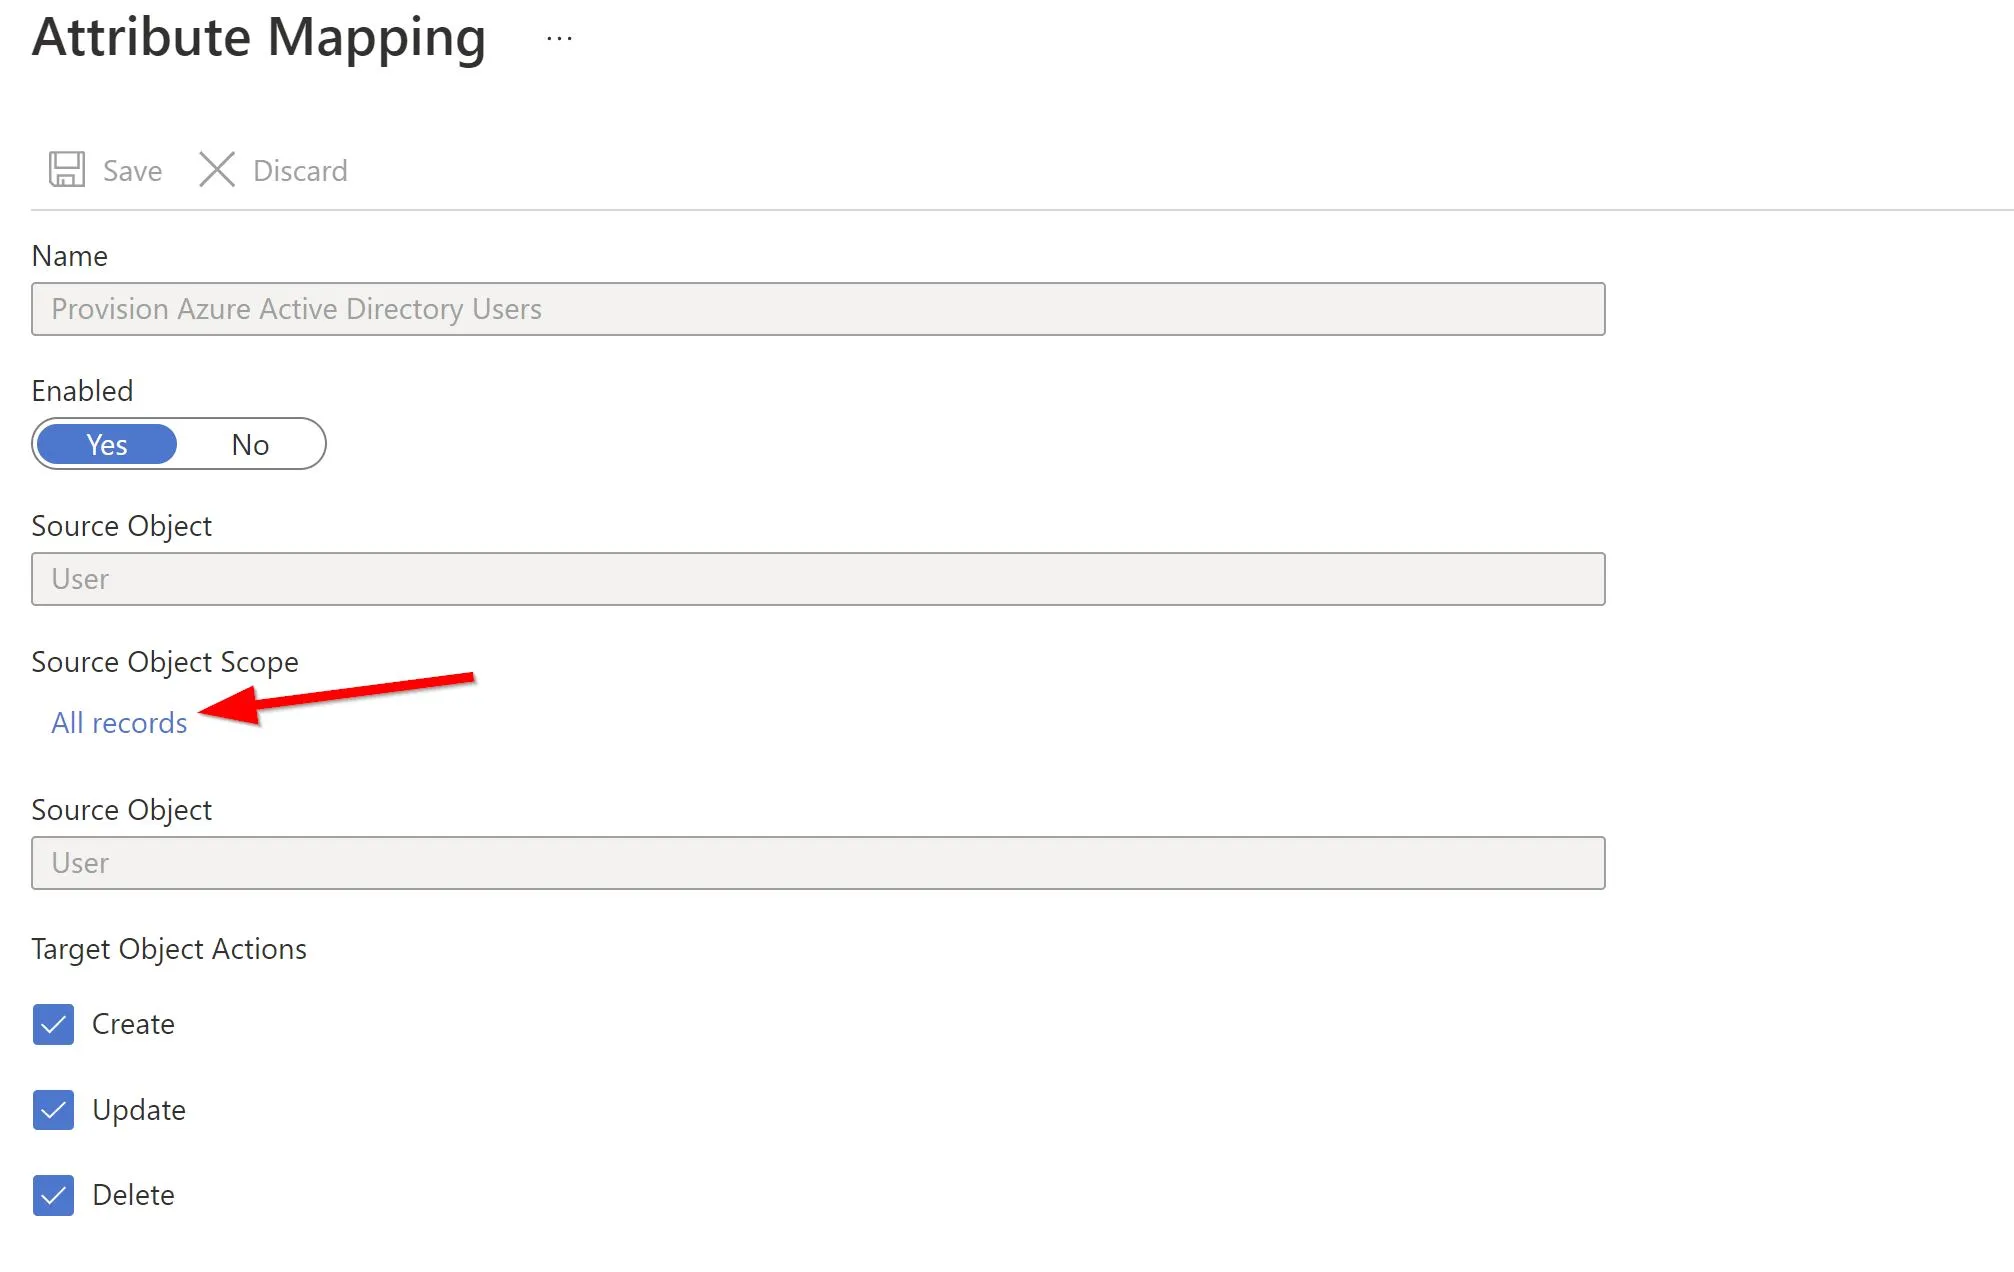
At this stage we technically have our user scoping ready, but you can scope the sync down even further should you need to, you can do this using scoping filters. To do this, head back to the **Provisioning **blade and select Provision Azure Active Directory Users undeath the Mappings subsection.
From here then select All records underneath Source Object Scope.
This will allow you to define which users are in scope for provisioning based on user attributes. For example, you could scope it so that it only targets users within the Marketing department, like so.
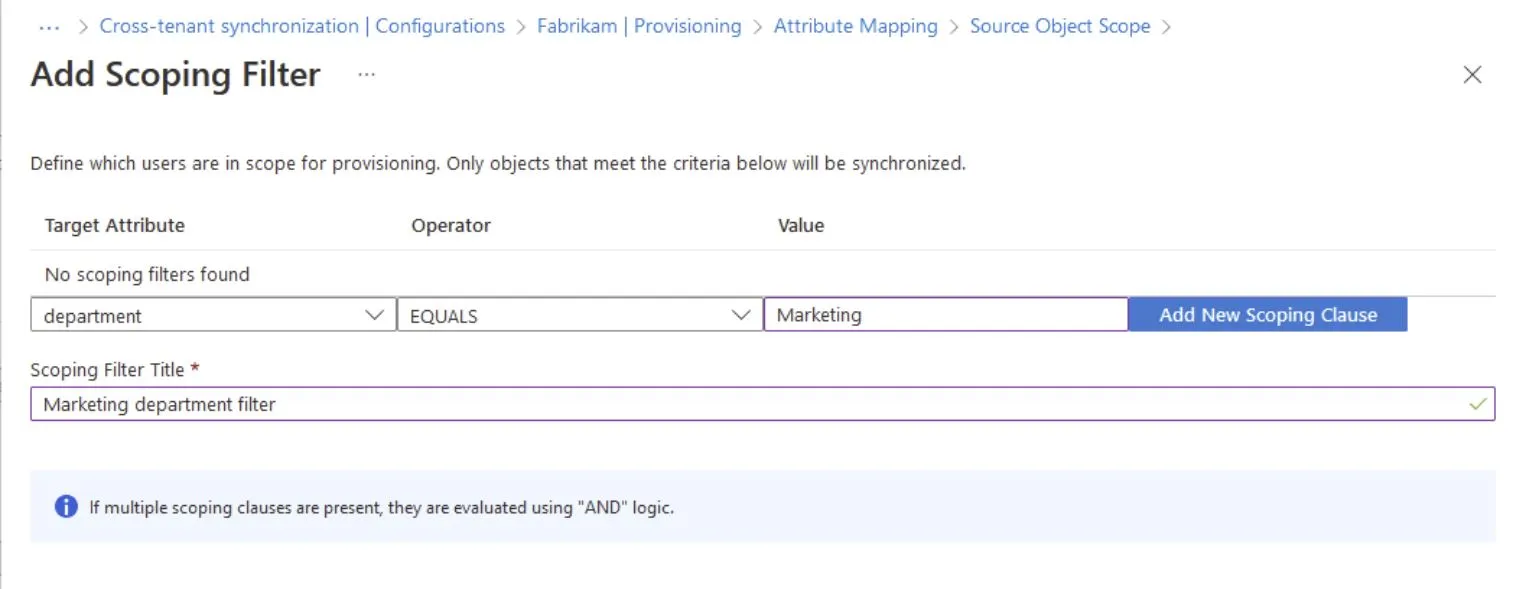
For now, we will leave this blank and head a bit further down the mappings page to Attribute Mappings.
Here is where we can map each user attribute in the source tenant to the target tenant and if so, amend the mappings to suit any specific requirements and here are two examples that I would recommend you consider using.
Show users from the source tenant in the Global Address List of the target tenant
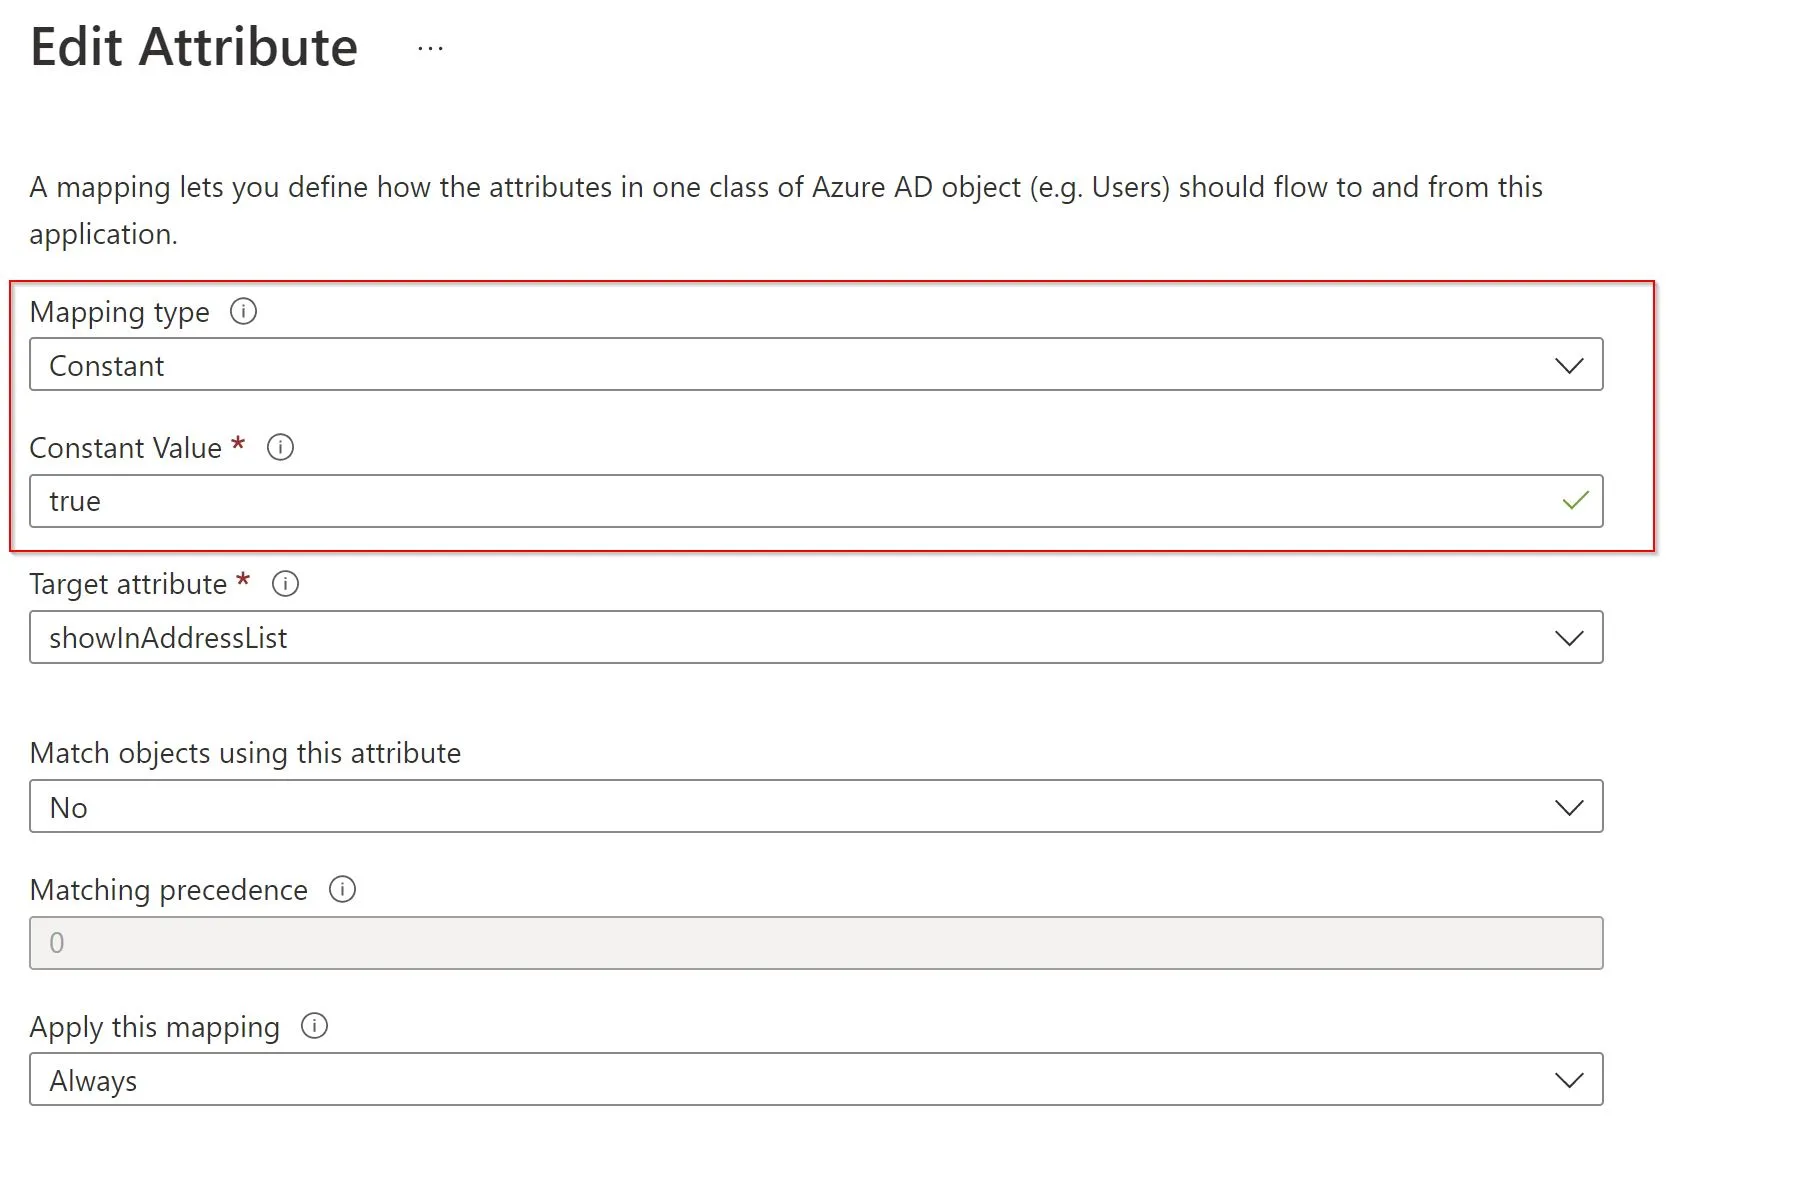
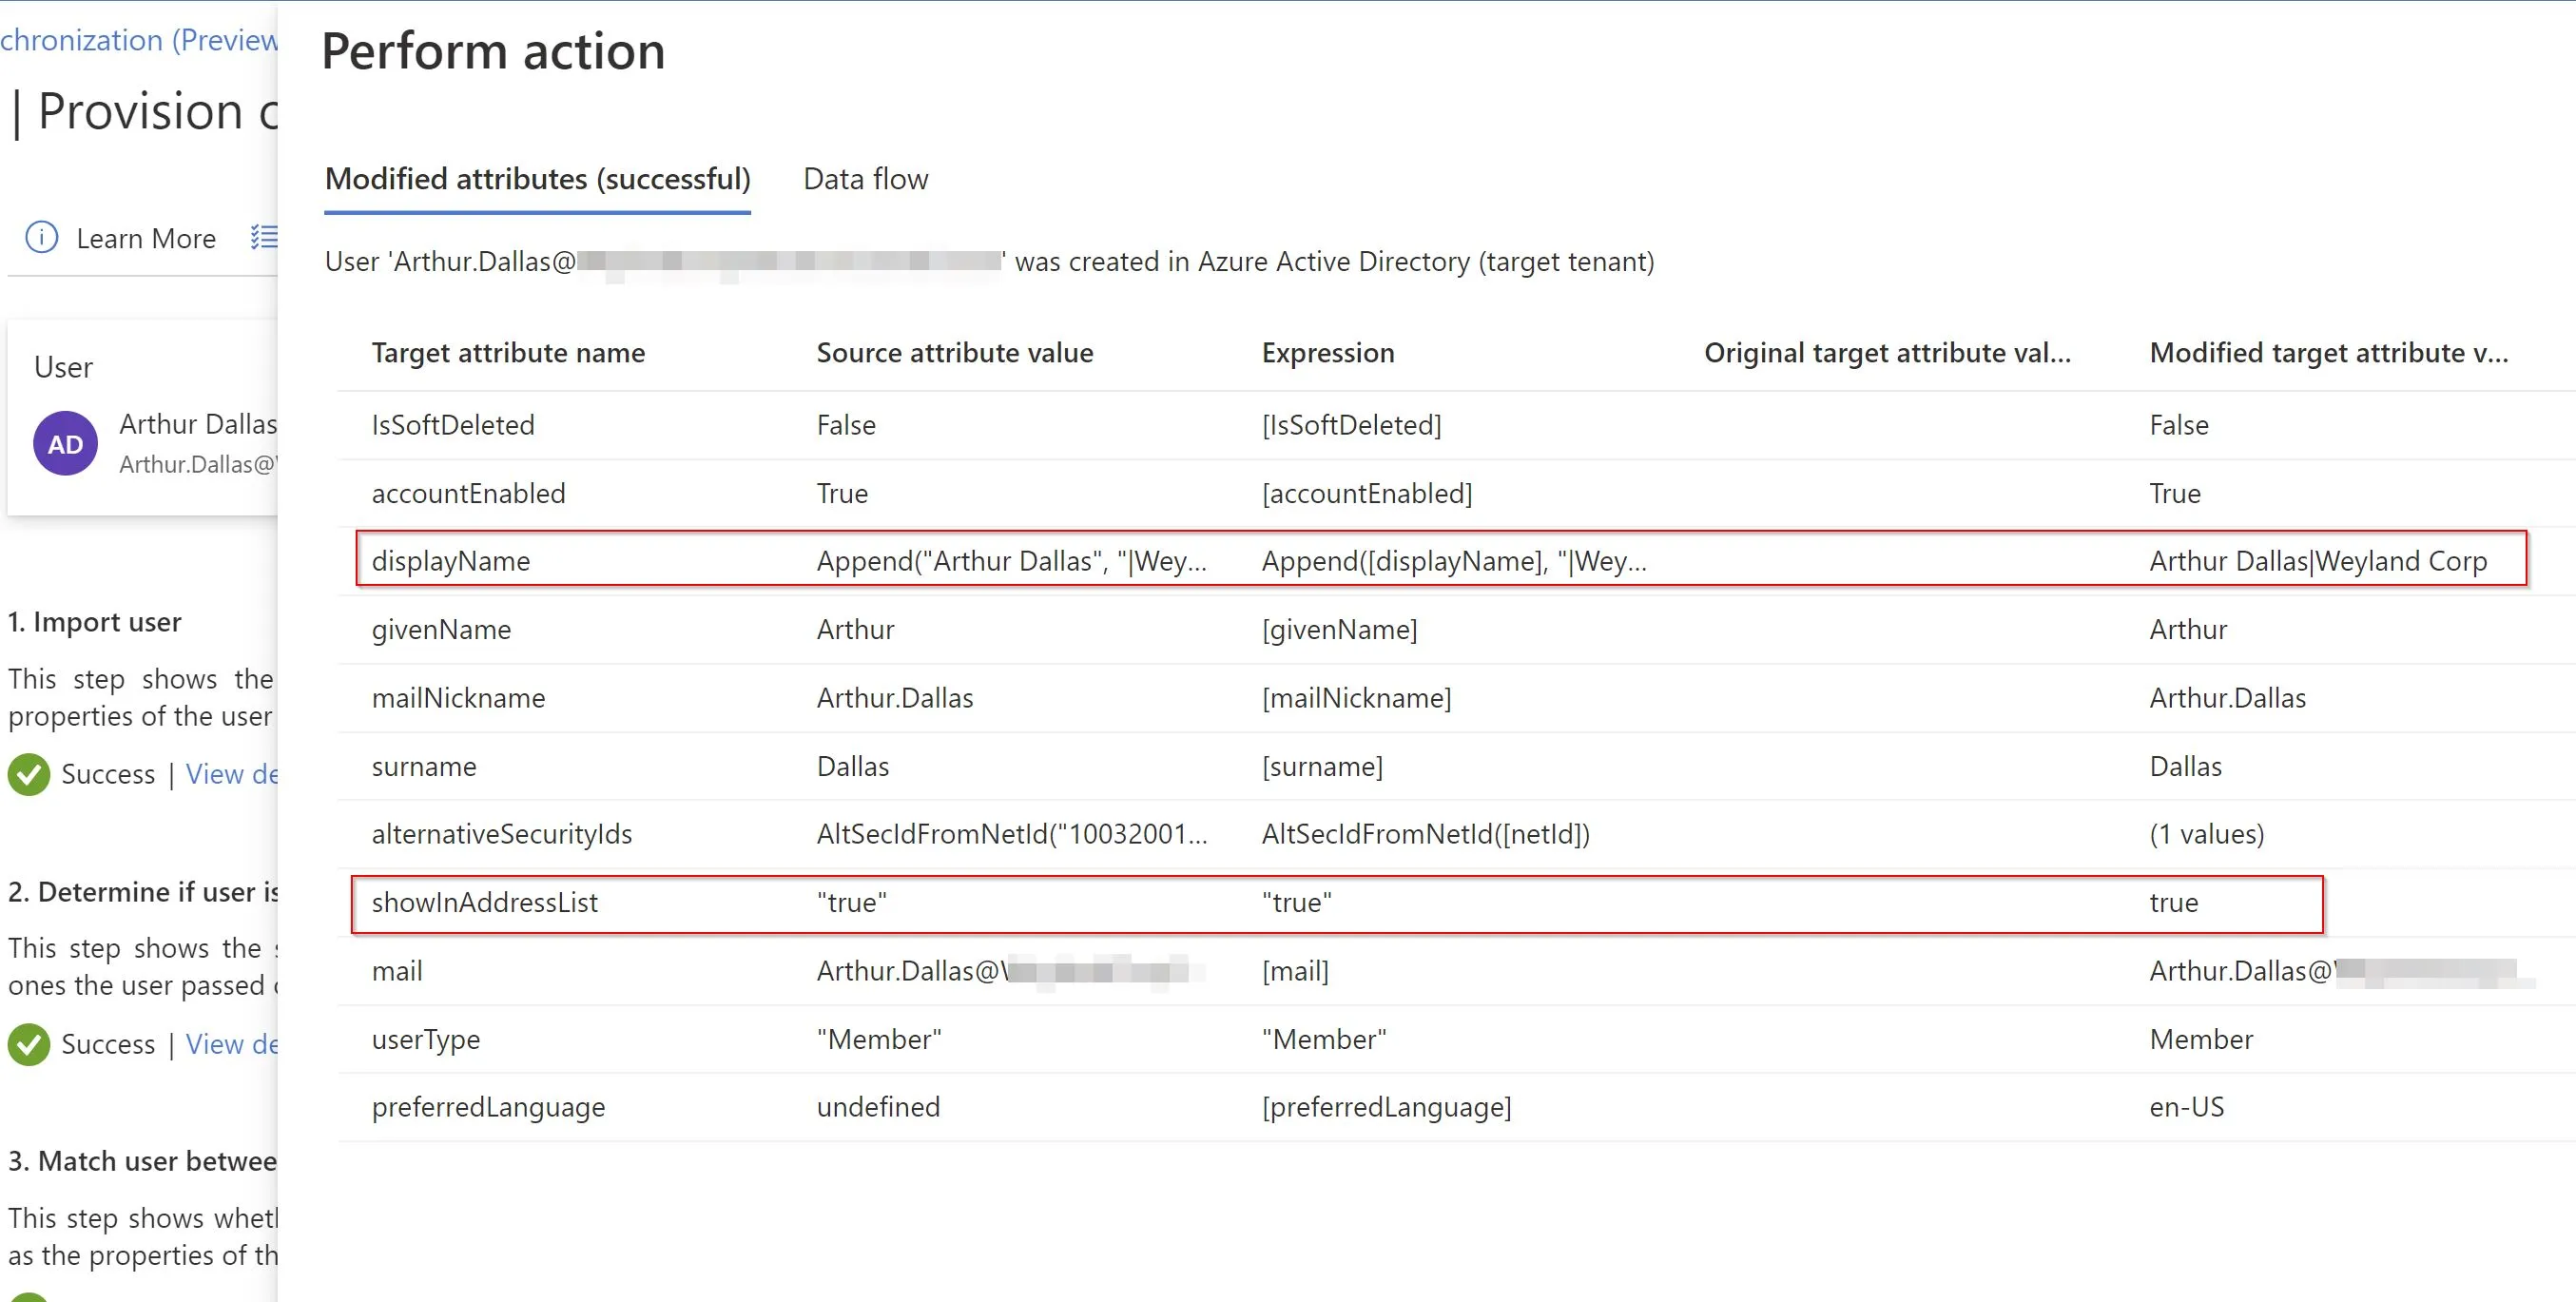
By updating the attribute showInAddressList to the below settings, you can ensure that your synced users will show up in the GAL within the target tenant. You will need to update the Mapping type to Constant and the Constant value to true.
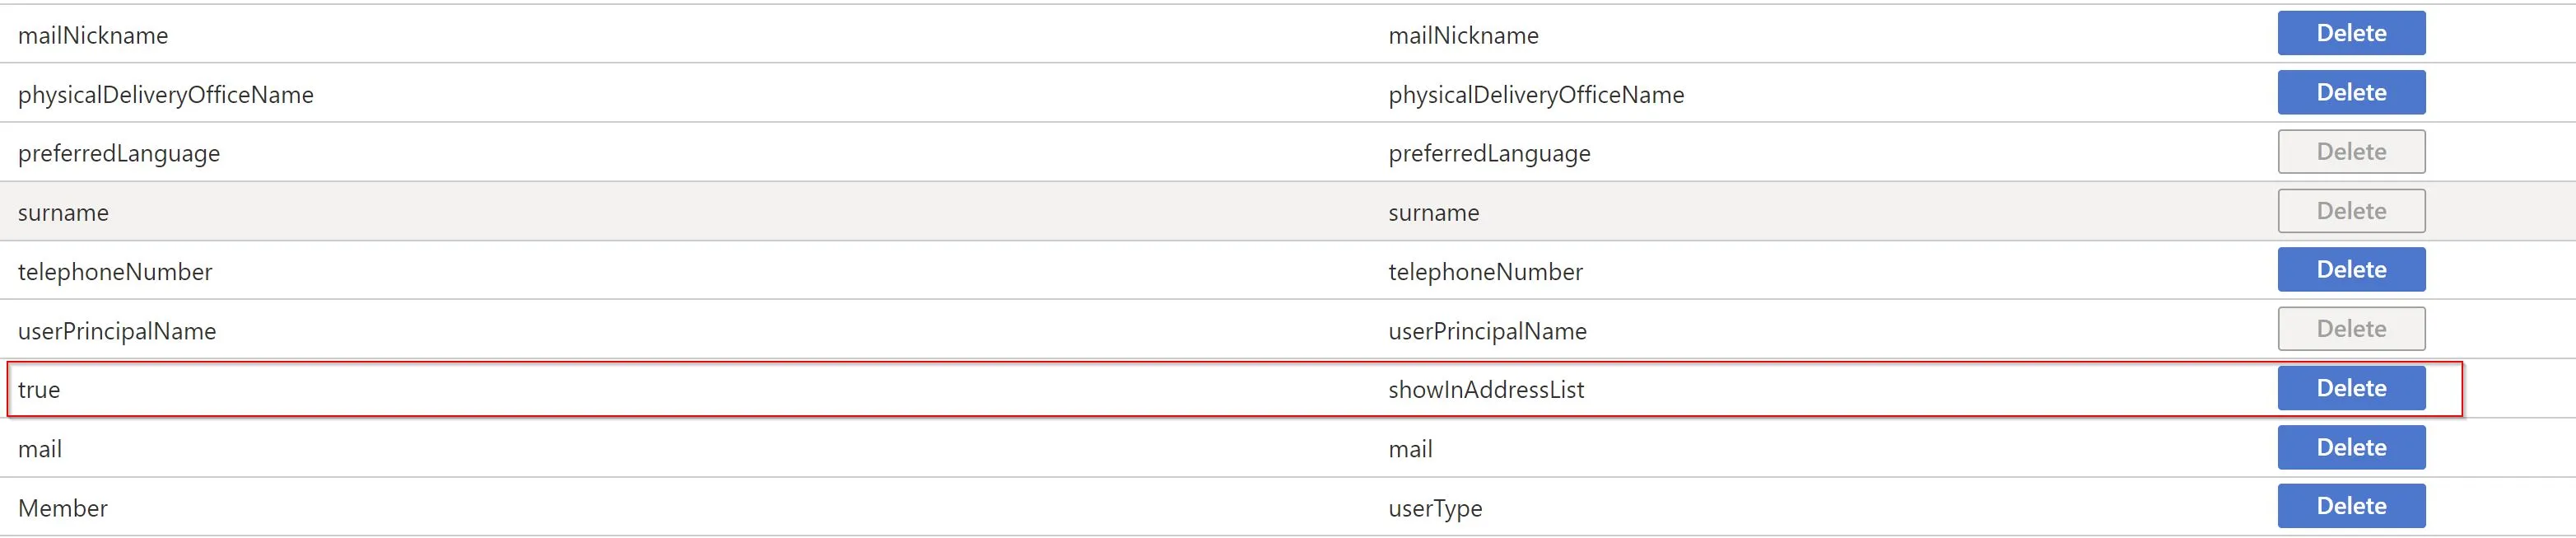
This is how it will look in the attribute mapping list once updated.
Append the company name to the end of the users display name
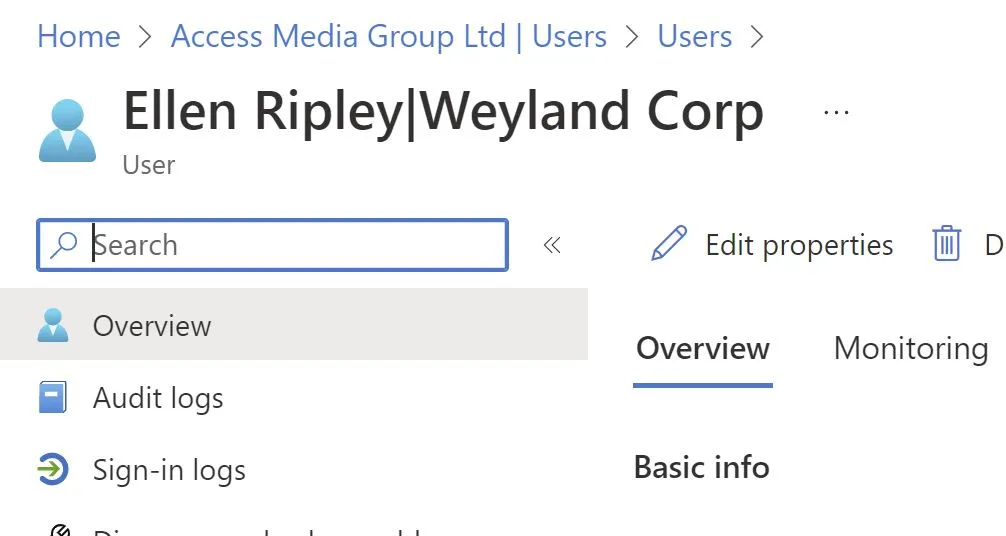
This next one is useful especially for larger organisations as it will allow your users to quickly see at a glance which organisation or business unit your synced users have come from. In my example I have two completely different organisation names so using the company name within the display name of each synced user makes sense, but you may need to adjust this to suit your specific needs.
For this we are going to amend the mapping for displayName, so select it to open up the options.
In here we are going to update the mapping type to Expression, as this will allow us to use the relevant syntax within the attribute mapping. As you can see in my example, I am using the following expression to add the company name at the end of the users display name.
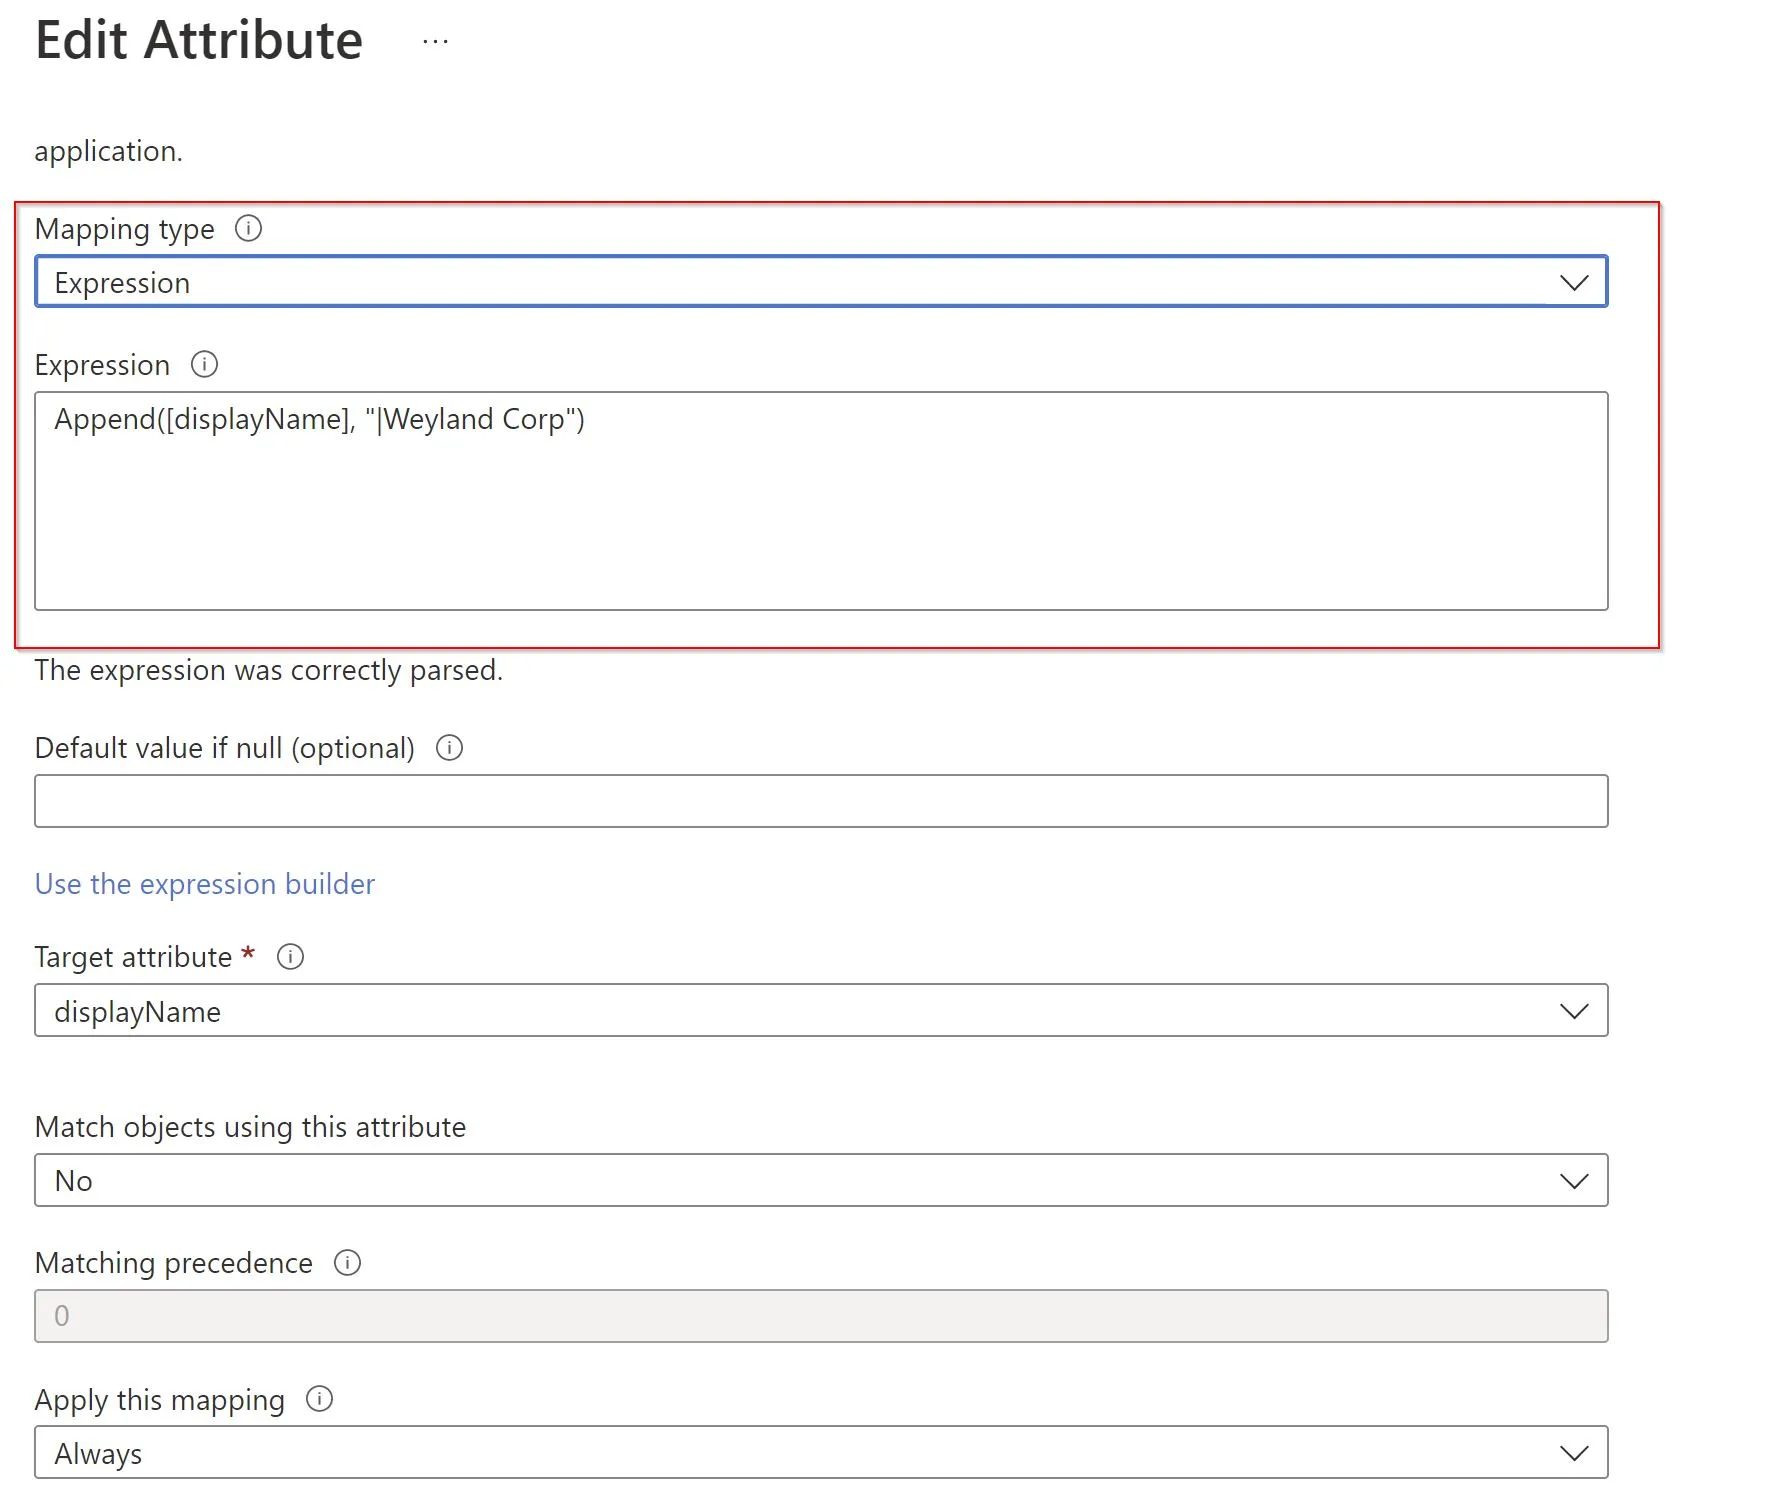
The expression I am using is below where ‘|Weyland Corp’ is my company name, so remember to change this to suit your needs.
Append([displayName], "|Weyland Corp")Below is how this looks in the target tenant after a successful sync.
Other example of how expressions can be used can be found here: Reference for writing expressions for attribute mappings in Azure Active Directory Application Provisioning - Microsoft Entra | Microsoft Learn
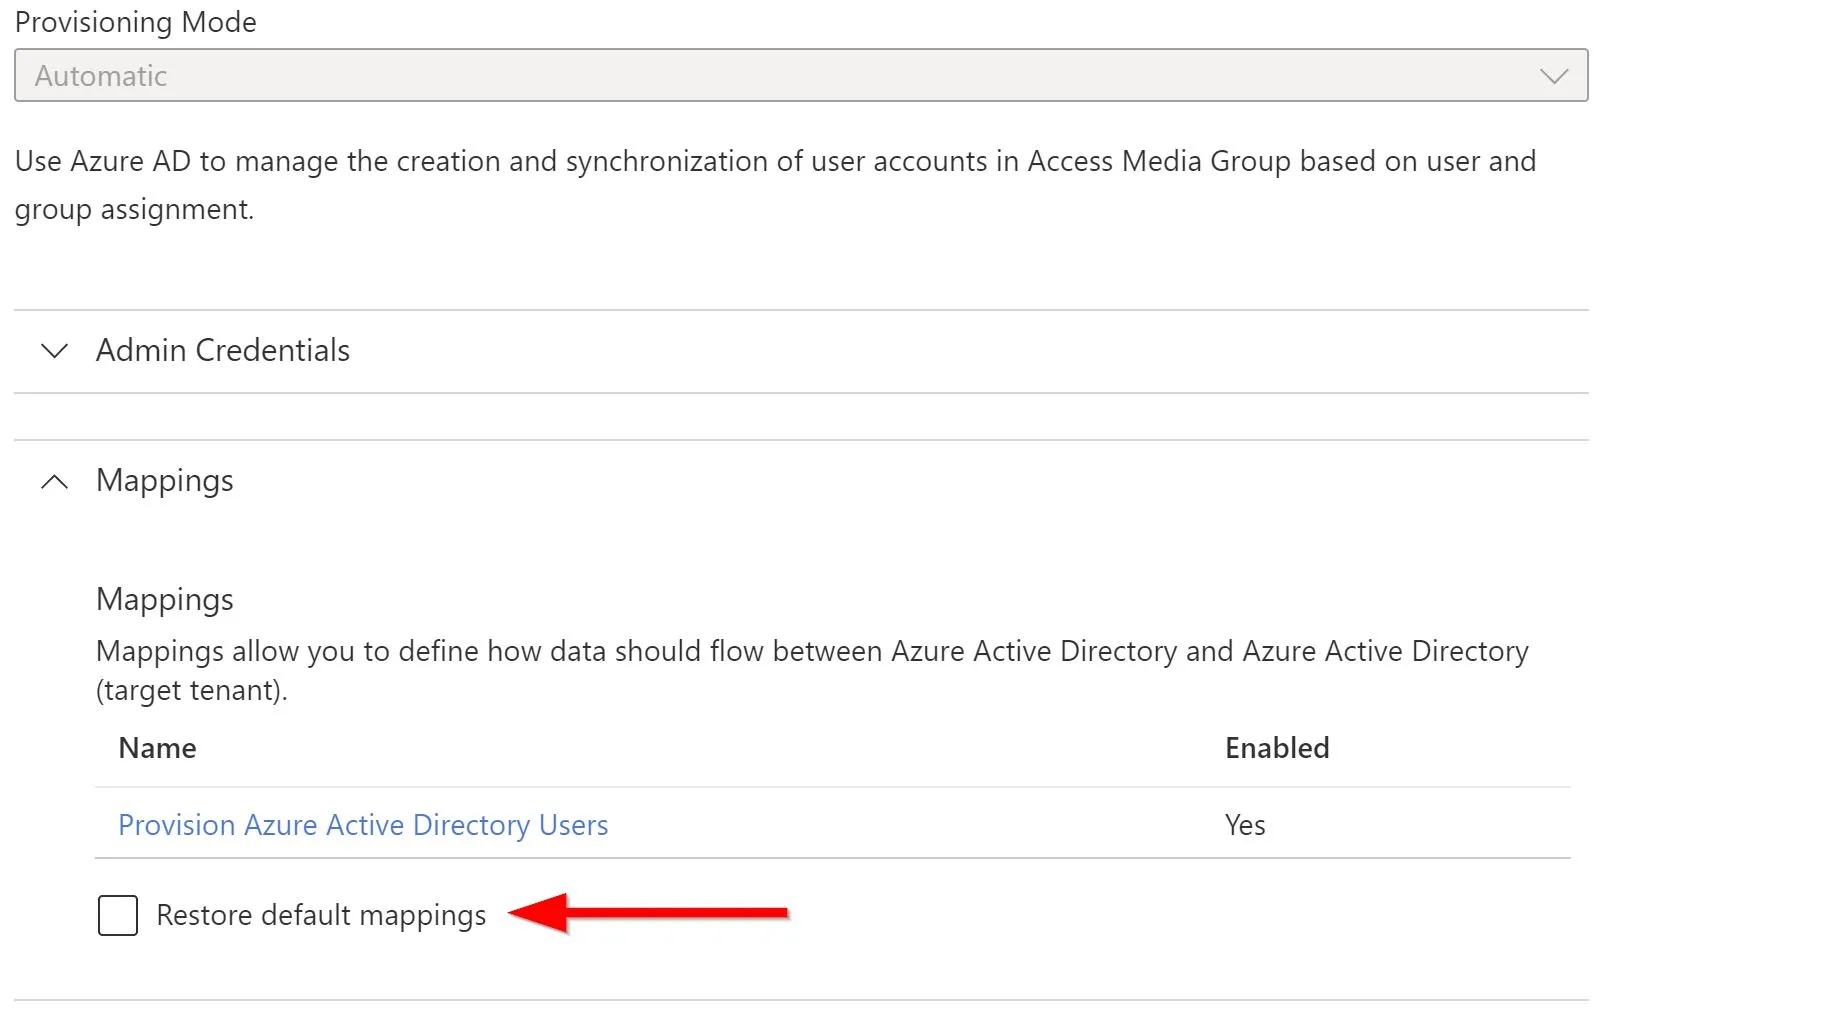
Now go ahead and review any other attribute mappings you might require and then head back to the cross-tenant sync configuration menu. It’s worth noting that if you somehow manage to make a real mess of your attributes you can reset them back to the defaults and start again should you need to by using the below checkbox.
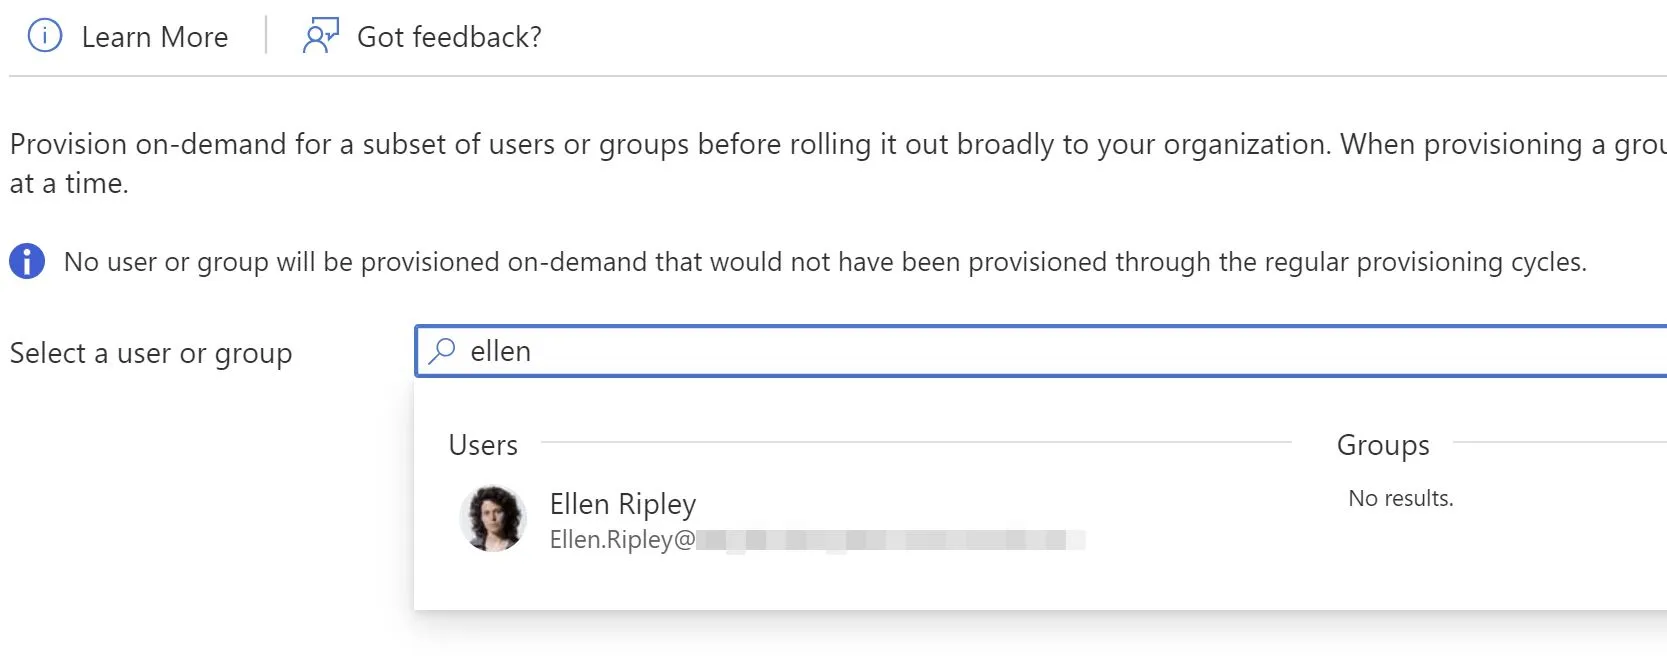
So, with all that said and done it’s time to test it out, and similar to the Azure AD Cloud Sync (that is due to replace AD Connect altogether once feature parity matches) there is the option to Provision on demand, this handy feature allows us to do exactly what it says on the tin and test out our configuration. Go ahead and open up this blade.
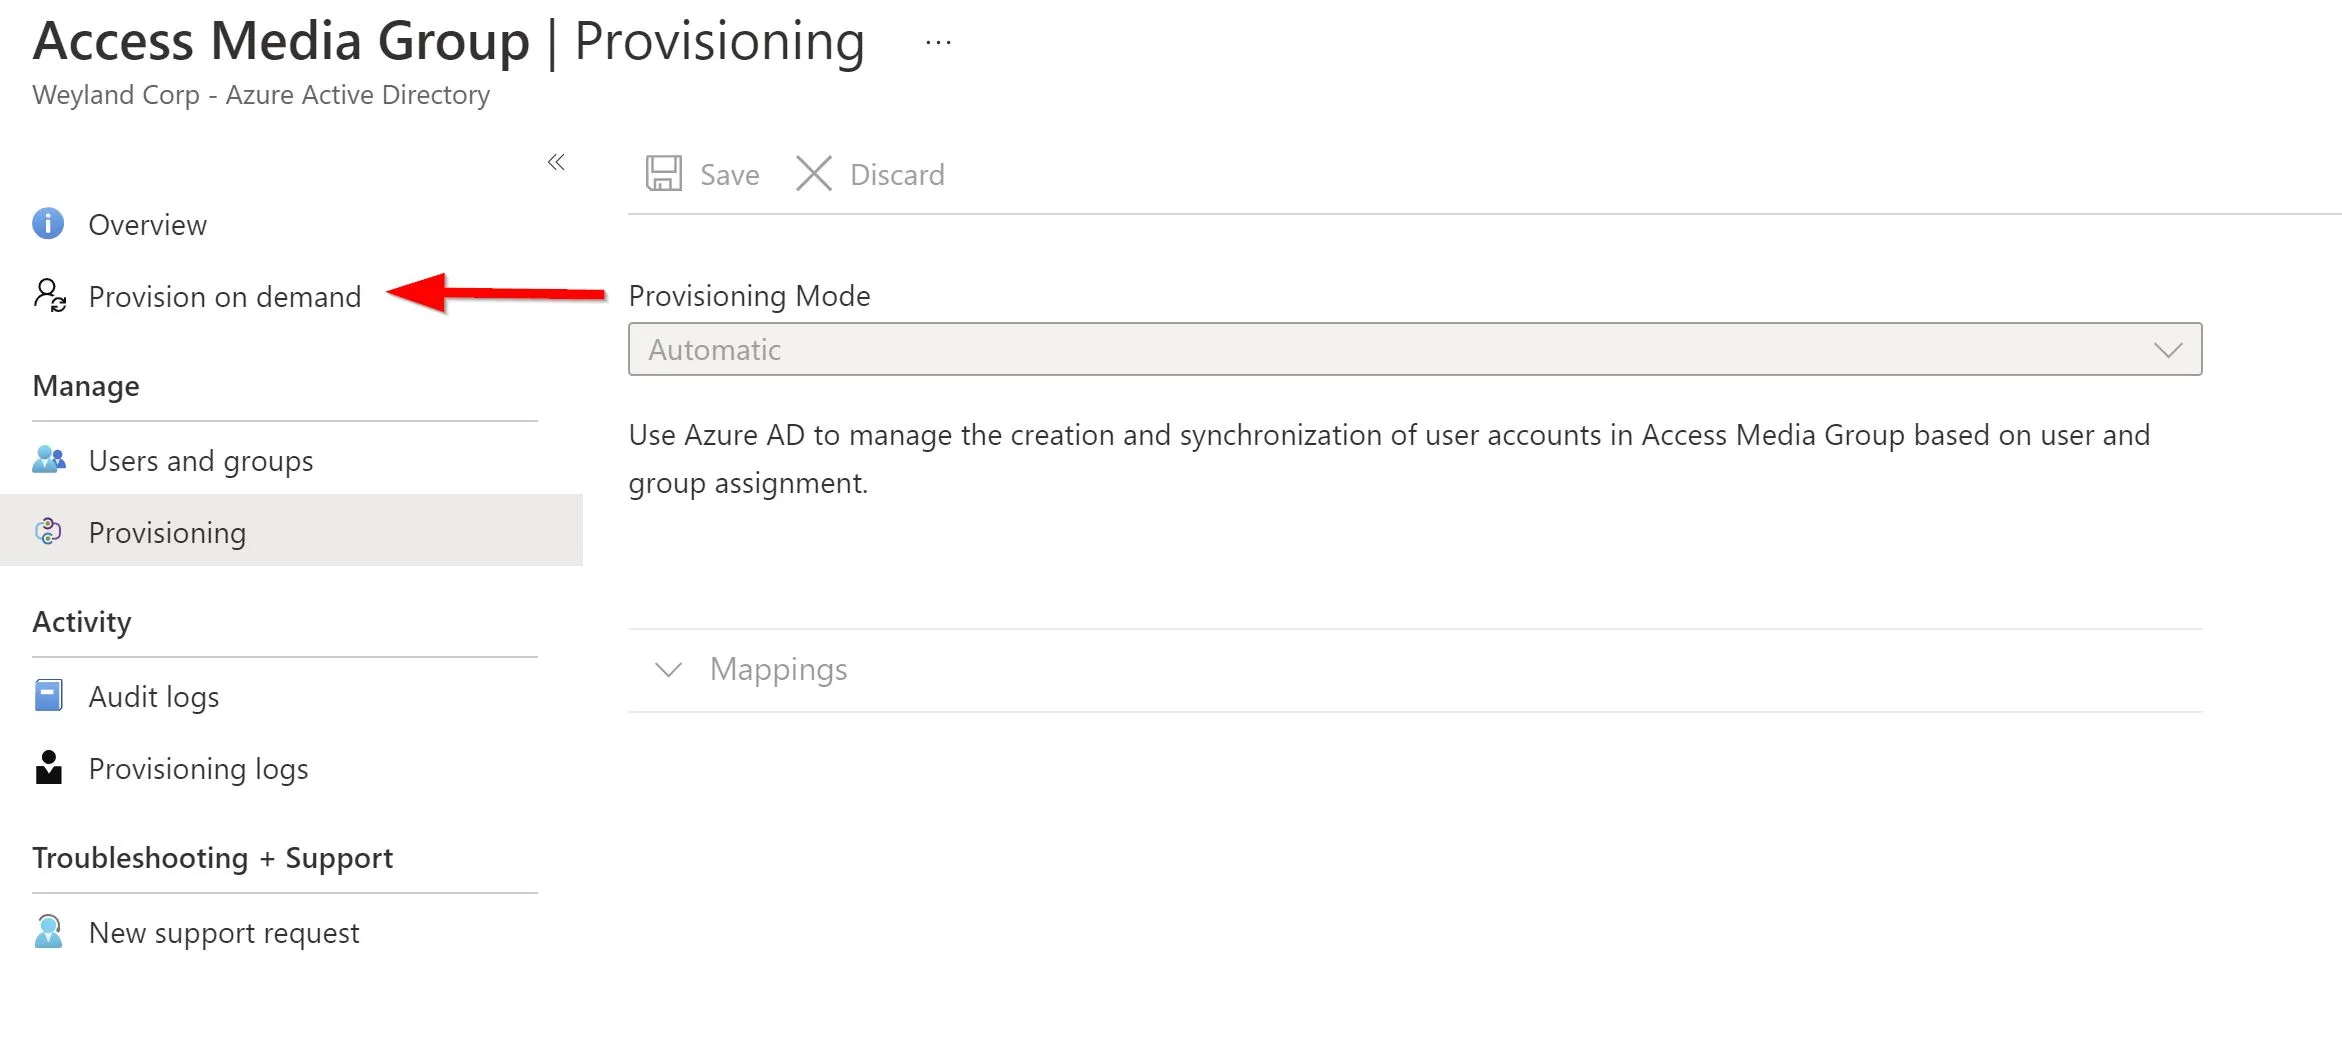
From here you can search for a user or group and test out your settings, I would suggest using this for just a single user only if this is your first run at setting this up, once you have selected your user go ahead and select provision.
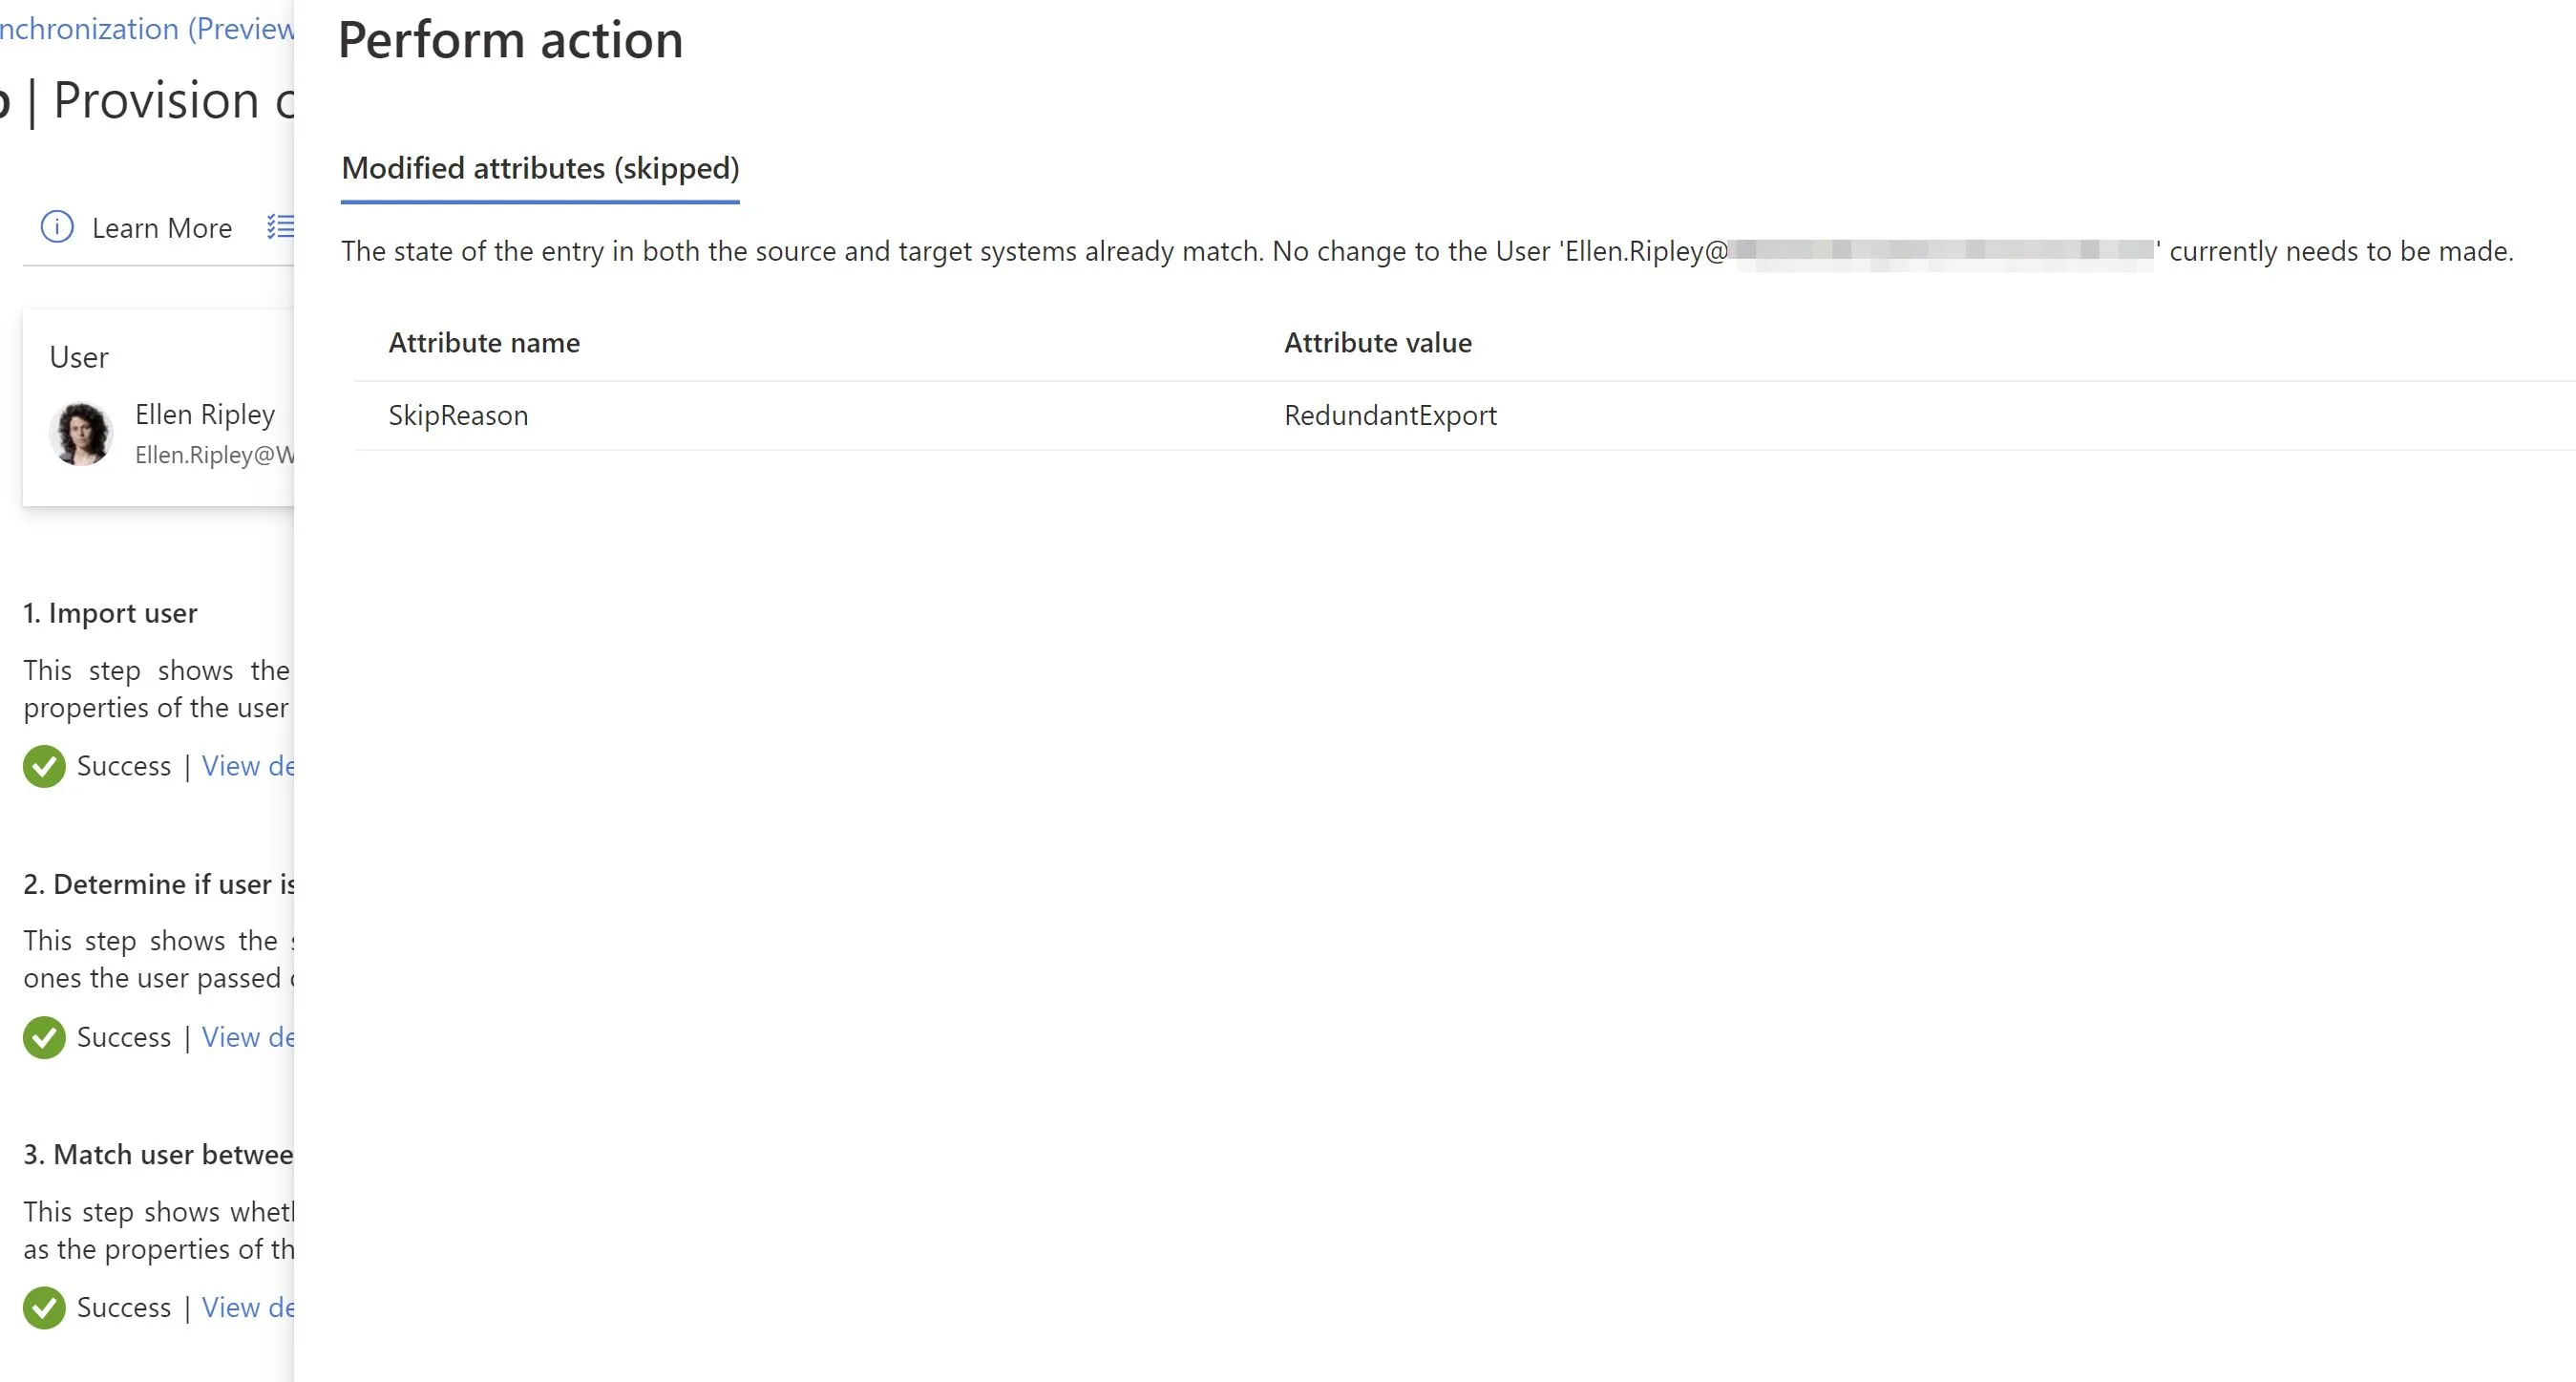
In the following window you will receive a provisioning report based on the user attributes and other settings you have configured advising you if there were any issues, in my case my user Ellen was already synchronised, in that case you would see something like this.
In the event this was a new user it would look like the below. You can also see here that the updated attribute mappings have taken effect successfully as I required them to.
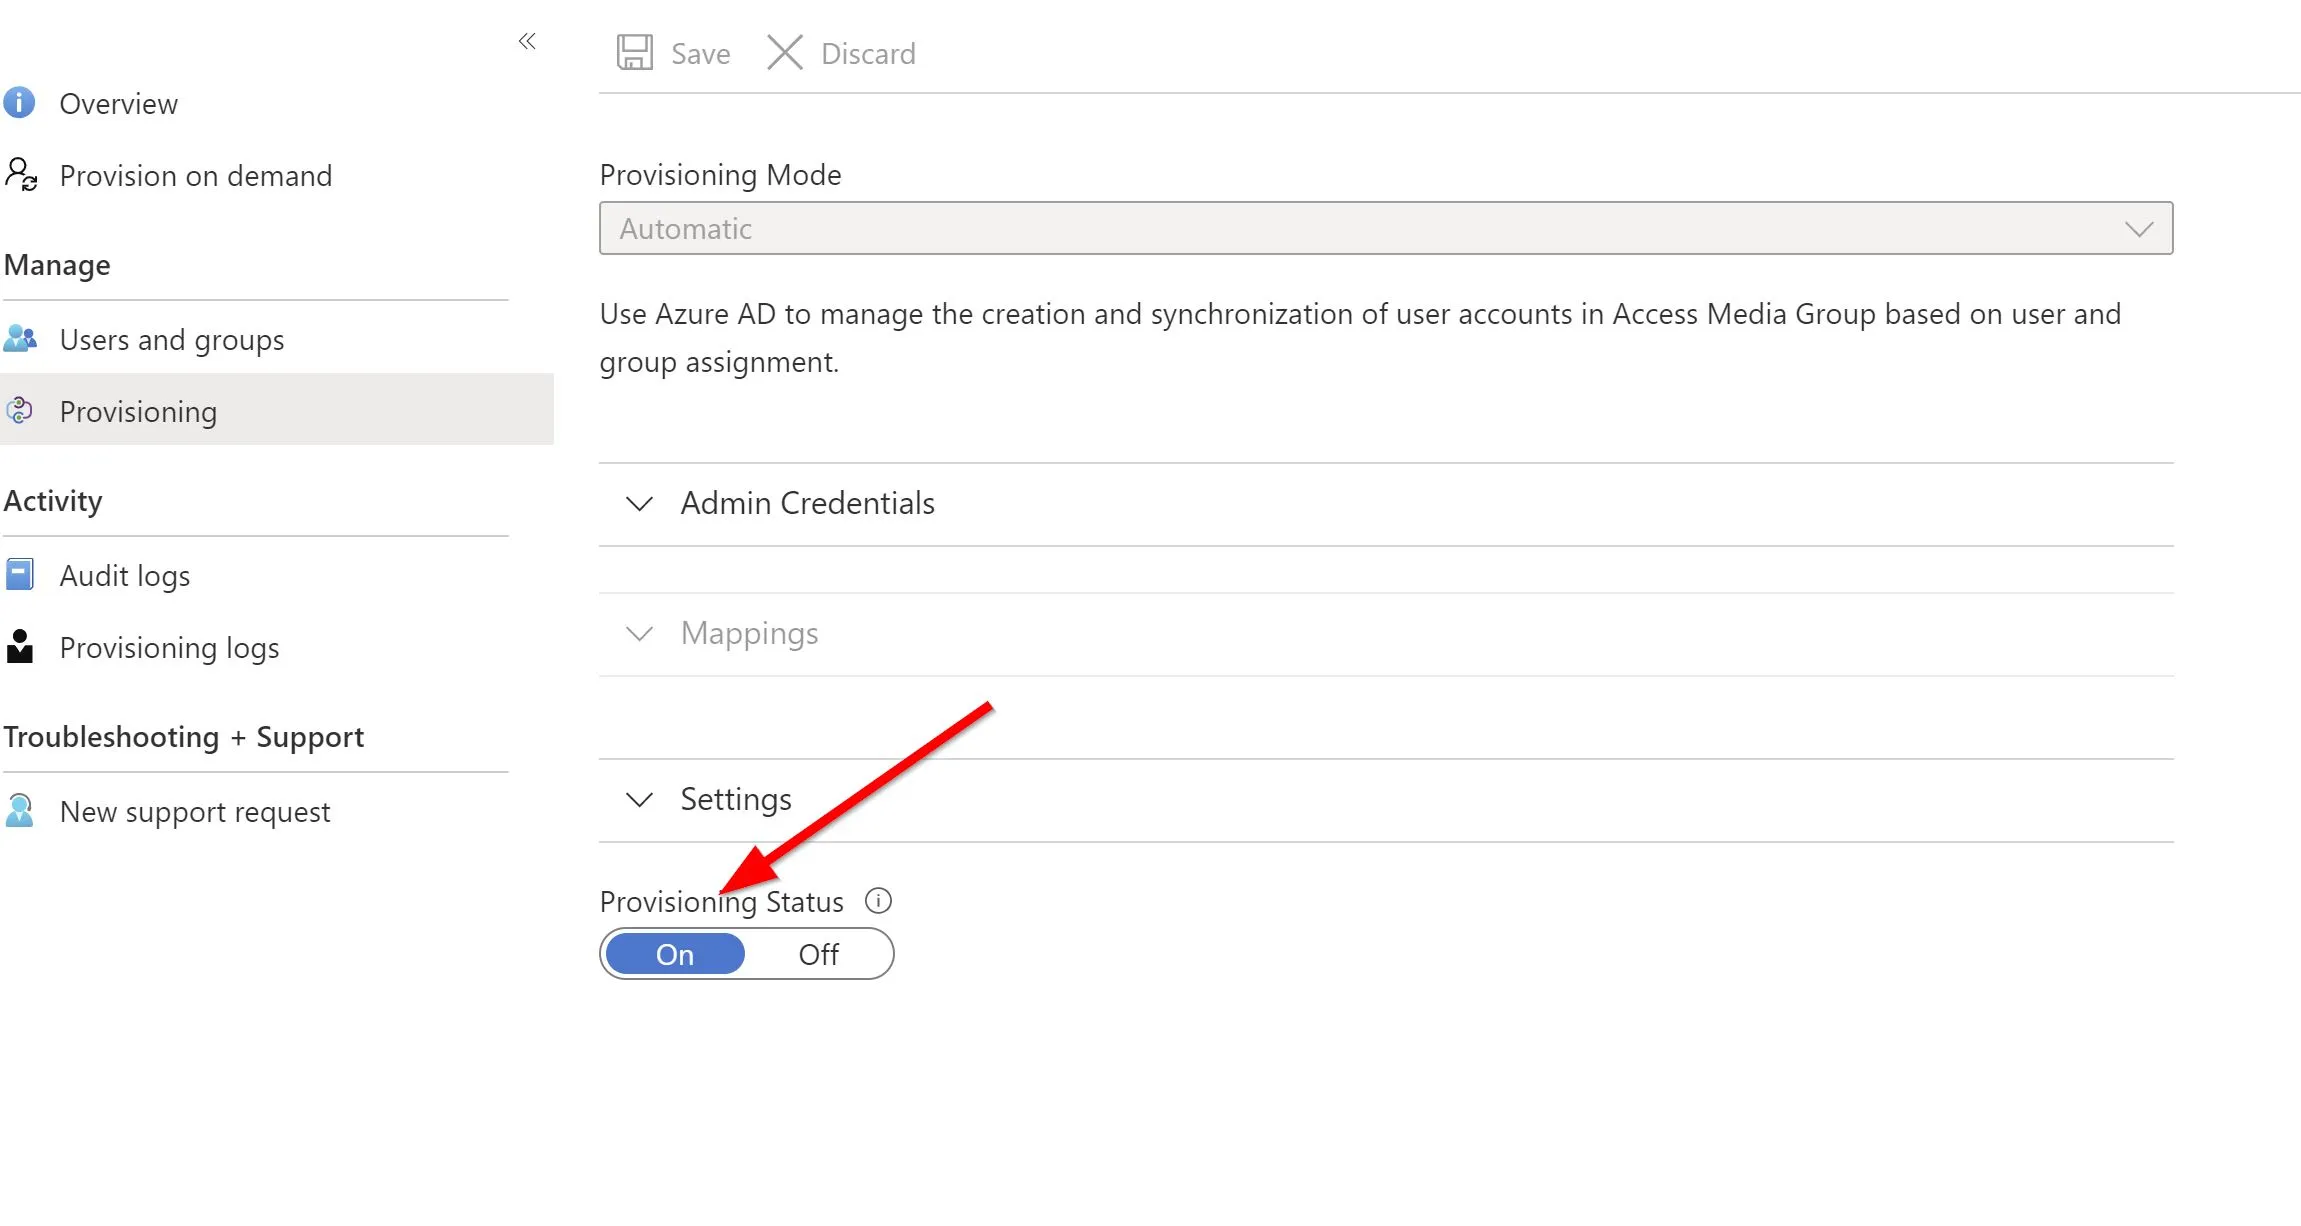
So now we’ve tested everything and confirmed attributes are pulling through as we want them to, the last step is to add any existing users to our sync group and enable synchronisation. Once your group is up-to-date or you have switched to a dynamic group, head back to the Provisioning blade and enable sync at the bottom.
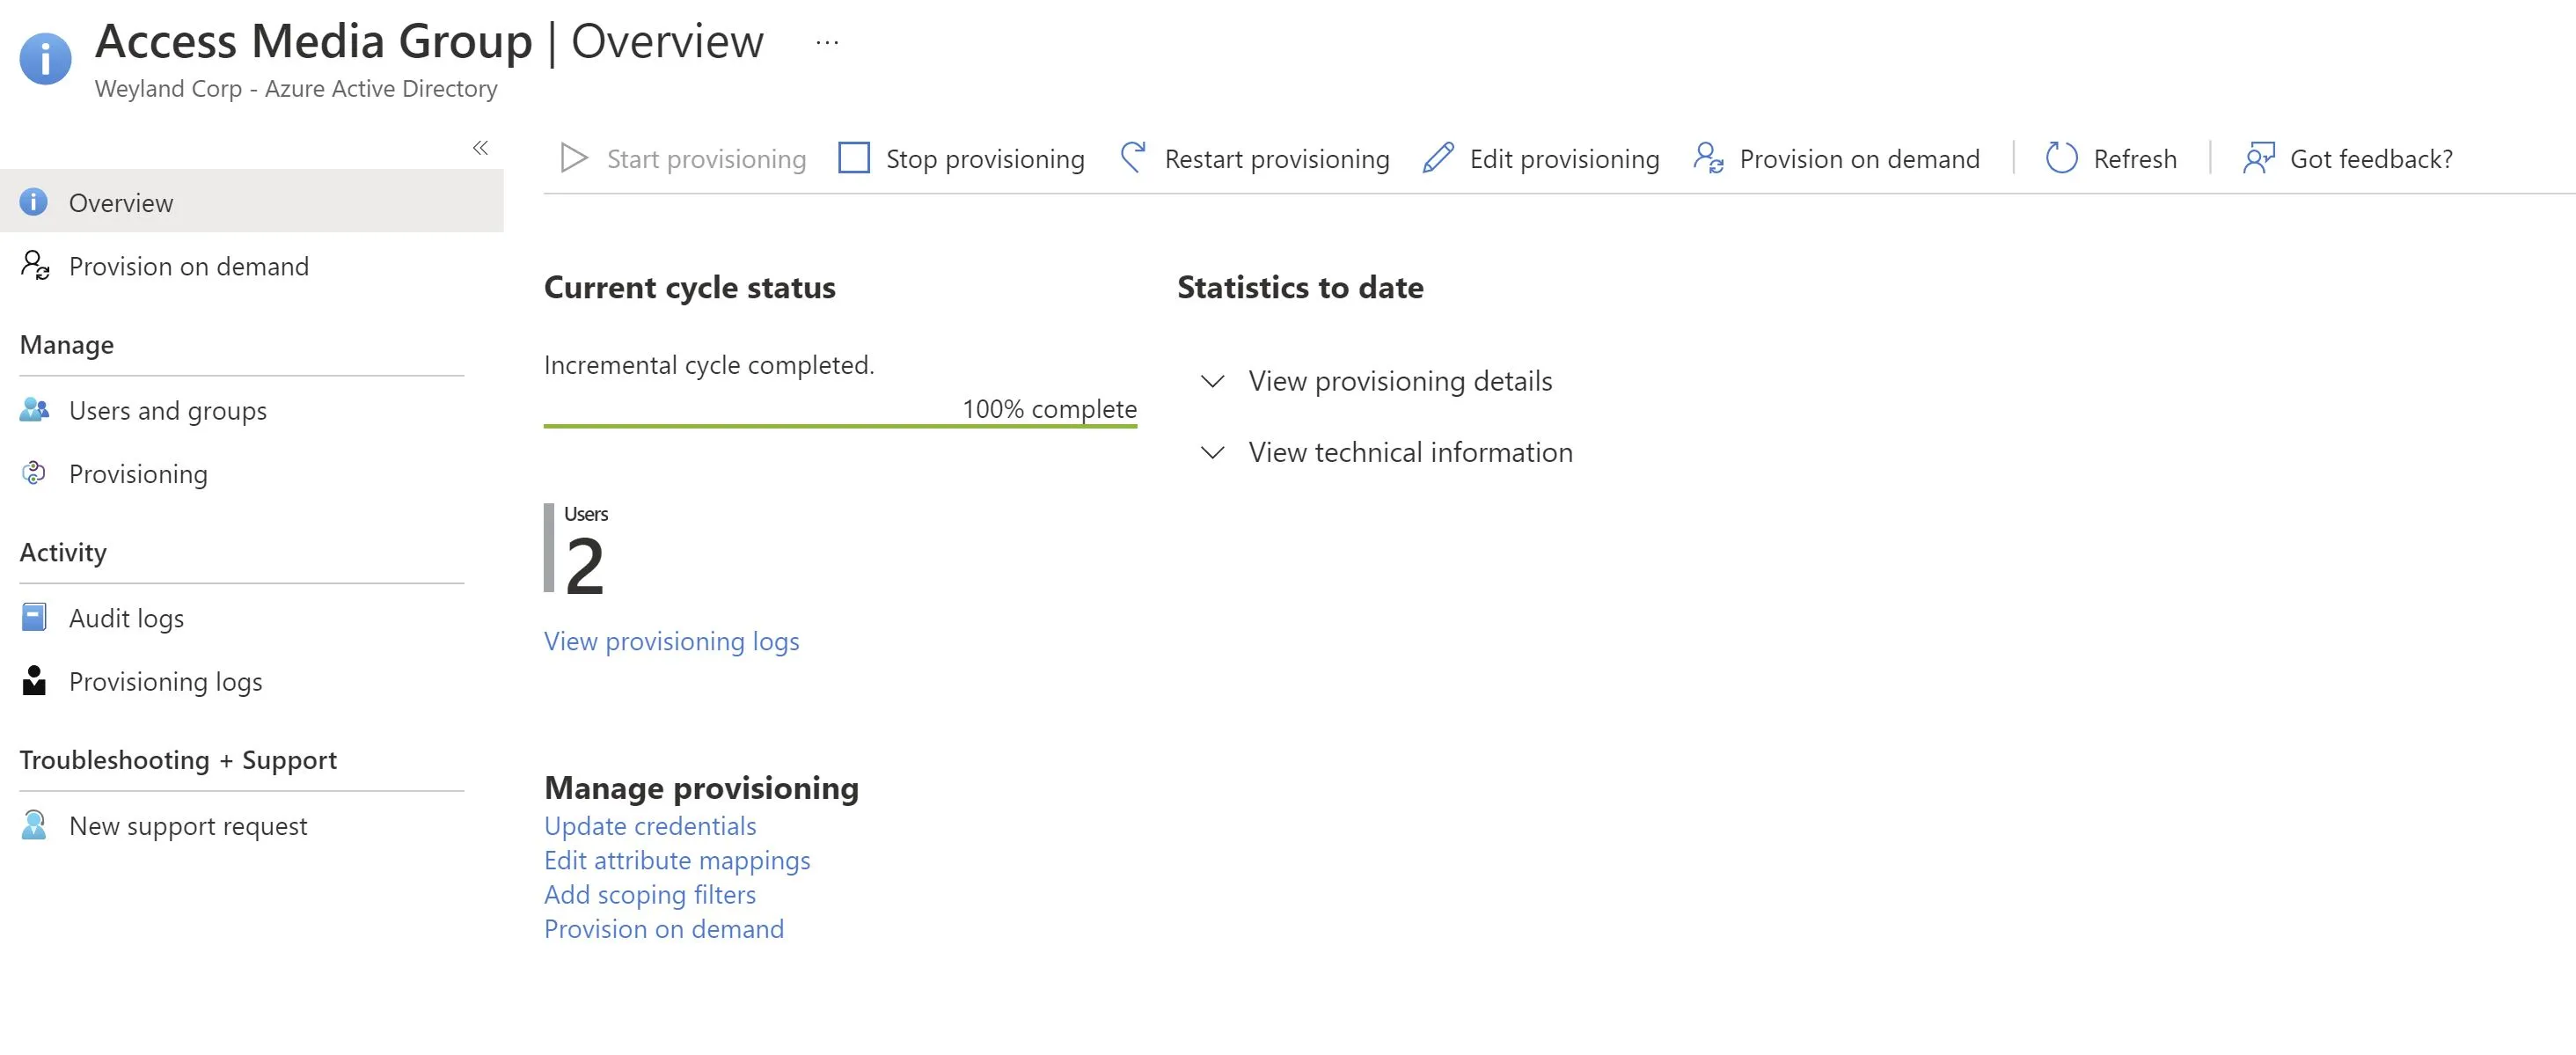
Once that has been enabled the overview page should update to show you information about your sync state. The initial cycle takes longer to perform than subsequent ones which occur roughly every 40 minutes.
Two-way sync?
It is also worth mentioning that while I talk about source and target tenant in this article, this can be configured both ways so if you want users synchronised between all tenants to give that true feeling of a single tenant, you can do, just do everything you have just done the other way around!
For troubleshooting setup see here: Configure cross-tenant synchronization (preview) - Microsoft Entra | Microsoft Learn