Microsoft Defender for Identity brings the power of cloud security to your on-premises environment. It monitors, and analyses data from your on-premises domain controllers and Active Directory allowing you to detect and act upon identity-based attacks within your environment. To get the most out of MDI there are some specific requirements that must be met as part of the deployment, I hope to document all these below in detail to ensure you can get the most out of your instance.
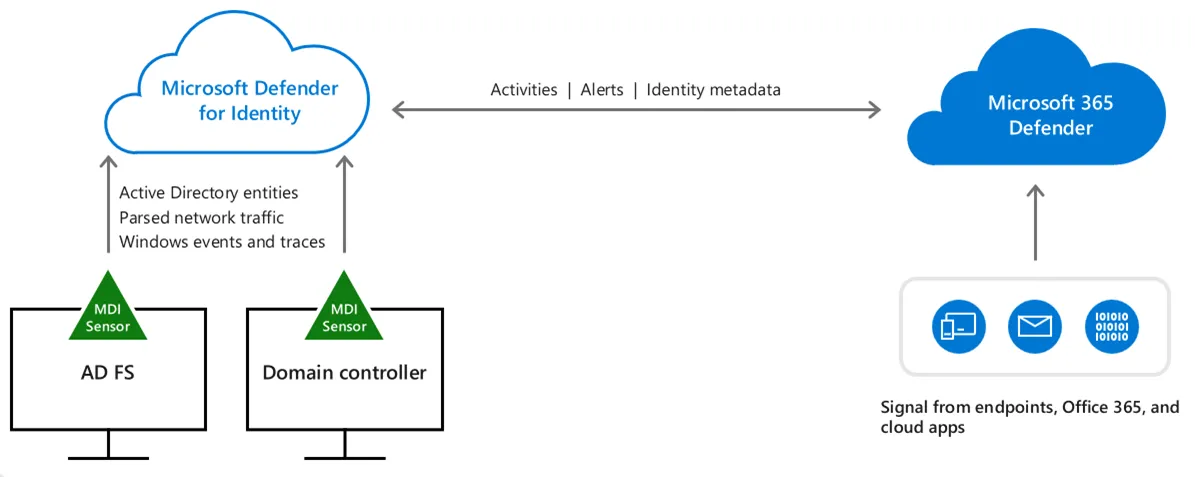
Depending on your environment, server hardware, network configurations etc the deployment requirements can differ, this guide is intended for use in a typical Windows Hyper Visor scenario using Hyper-V. You can read more about these requirements in the following link which I recommend you review regardless as it covers basics such as license requirements as well as other bits: Prerequisites - Microsoft Defender for Identity | Microsoft Learn
MDI can be installed in two ways, either via a sensor (installed directly on the domain controllers) or via standalone sensors, in this guide I will walk through the sensor method.
Planning for capacity
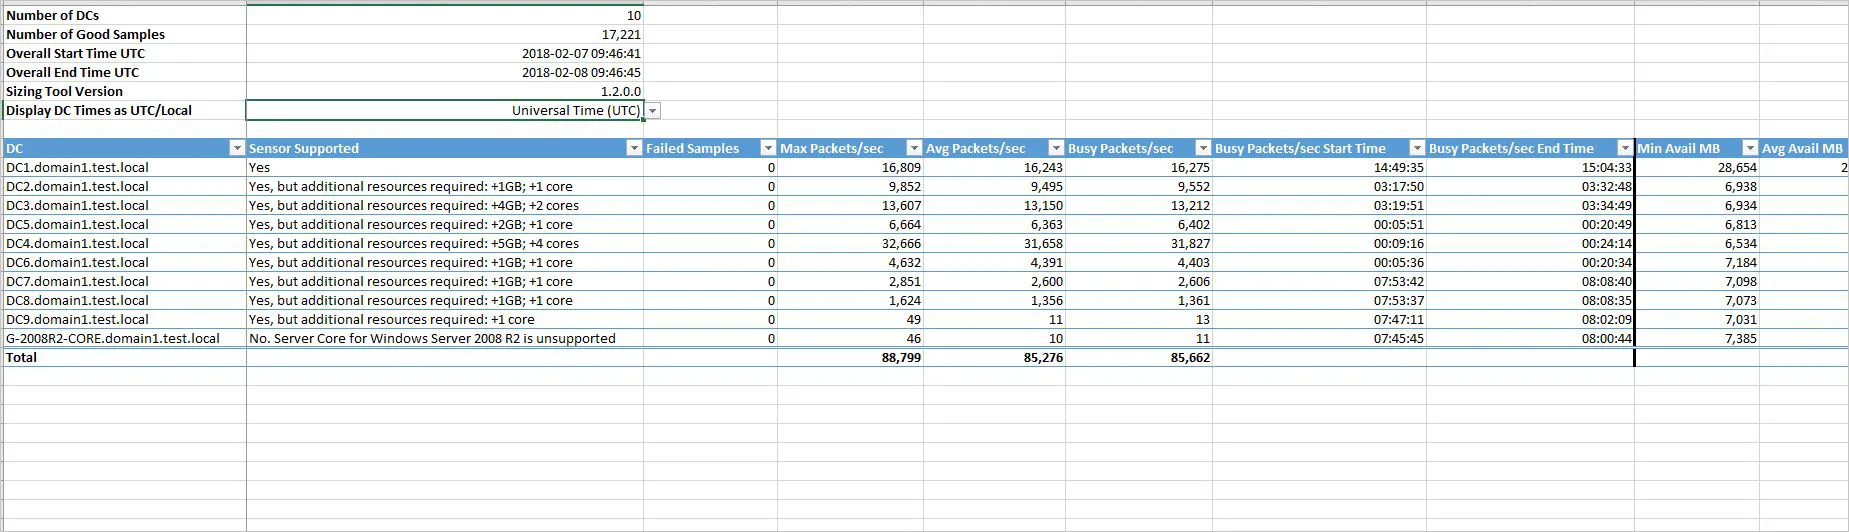
Before installing any sensors in your environment, it is recommended to run the sizing tool to determine capacity for your deployment, the sizing tool will help you understand how much CPU and RAM resources the sensor will need, important to note this is for the sensor only, additional resources will be required for standard server operations.
The tool should be ran from a domain joined workstation or virtual machine that has access to all domain controllers, you can download the tool and review all requirements here: GitHub - microsoft/Microsoft-Defender-for-Identity-Sizing-Tool - You can see in the below image an example of the output summary sheet that clearly advises you if more resources are needed.
Capacity planning out of the way, we then move onto creating the Directory Service Account that will be used for the sensors.
Creating a Directory Servies Account (gMSA account)
KDS root key
A KDS root key is needed prior to creating the managed service account as it is used for generating the password for those accounts. I would advise checking if one already exists using the following command.
Get-KdsRootKey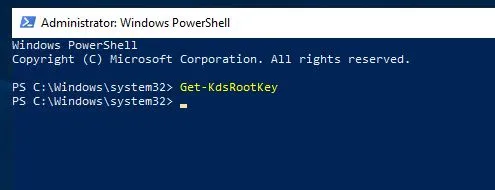
If you do not receive a key value output then you will need to create a KDS root key using the following command.
Add-KdsRootKey -EffectiveImmediately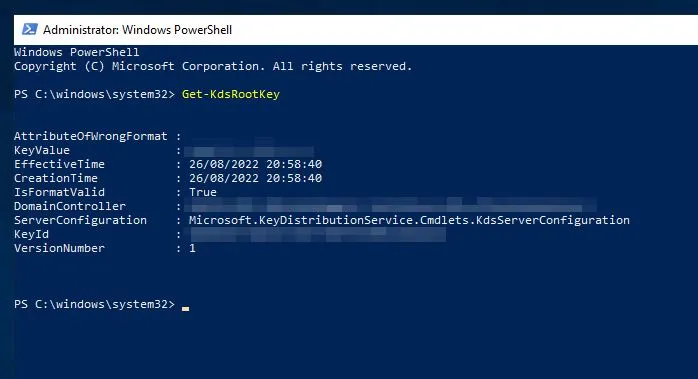
Keep in mind if you have had to create the KDS root key then you will have to wait 10 hours before creating the gMSA account.
You can find more info about the KDS root key creation here:** **Create the Key Distribution Services KDS Root Key | Microsoft Learn
Creating the gMSA account
You can use either a gMSA account or a regular user account here, but it is advised to use the Group Managed Service Account (gMSA) instead. I won’t go into detail here about options for permissions to retrieve the gMSA account password, instead we will just use an Active Directory security group and add to this, the servers that need to retrieve the account password, you can use the following script to do this.
Remember to update the variables with your required account name, group name and hostnames of the servers that will host your MDI sensors.
# Set the variables:
$gMSA_AccountName = 'mdiSvc01'
$gMSA_HostsGroupName = 'mdiSvc01Group'
$gMSA_HostNames = 'DC1', 'DC2', 'DC3', 'DC4', 'DC5', 'DC6', 'ADFS1', 'ADFS2'

# Import the required PowerShell module:
Import-Module ActiveDirectory

# Create the group and add the members
$gMSA_HostsGroup = New-ADGroup -Name $gMSA_HostsGroupName -GroupScope Global -PassThru
$gMSA_HostNames | ForEach-Object { Get-ADComputer -Identity $_ } |
    ForEach-Object { Add-ADGroupMember -Identity $gMSA_HostsGroupName -Members $_ }
# Or, use the built-in 'Domain Controllers' group if the environment is a single forest, and will contain only domain controller sensors
# $gMSA_HostsGroup = Get-ADGroup -Identity 'Domain Controllers'

# Create the gMSA:
New-ADServiceAccount -Name $gMSA_AccountName -DNSHostName "$gMSA_AccountName.$env:USERDNSDOMAIN" –Description "Microsoft Defender for Identity service account" –KerberosEncryptionType AES256 `
-PrincipalsAllowedToRetrieveManagedPassword $gMSA_HostsGroupName
Keep in mind you may want to move the location these items go into within AD.
In addition to having the gMSA account, it must also have the required read-only permissions on all the objects in Active Directory including the **Deleted Objects Container. It is advised that you enable the recycle bin feature if not already, you can do so using the following command. **
Enable-ADOptionalFeature -Identity 'Recycle Bin Feature' -Scope ForestOrConfigurationSet -Target (Get-ADDomain).DNSRoot -Confirm:$falseOnce that’s done you can use the following script to apply the correct permissions to the gMSA account.
Remember to update the Identity variable to your group previously created.
# Declare the *user* or *group* that needs to have read access to the deleted objects container
# Note that if the identity you want to grant the permissions to is a Group Managed Service Account (gMSA),
# you need first to create a security group, add the gMSA as a member and list that group as the identity below
$Identity = 'CONTOSO\mdiSvc01Group'

# Get the deleted objects container's distinguished name:
$distinguishedName = ([adsi]'').distinguishedName.Value
$deletedObjectsDN = 'CN=Deleted Objects,{0}' -f $distinguishedName

# Take ownership on the deleted objects container:
$params = @("$deletedObjectsDN", '/takeOwnership')
C:\Windows\System32\dsacls.exe $params

# Grant the 'List Contents' and 'Read Property' permissions to the user or group:
$params = @("$deletedObjectsDN", '/G', "$($Identity):LCRP")
C:\Windows\System32\dsacls.exe $params
Next you need to install the gMSA account on each server, using the following command.
Remember in this case you need to specify the actual gMSA account for the identity variable.
# Import the required PowerShell module:
Import-Module ActiveDirectory

# Install the gMSA account
Install-ADServiceAccount -Identity 'mdiSvc01'
If you get the below error, then either restart the server or purge current Kerberos tickets using the below command.

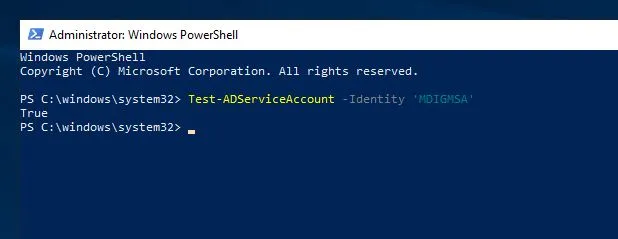
klist purge -li 0x3e7Finally, you can validate the servers have the required permissions to retrieve the password using the following command. Keep in mind that new servers added to the security group will not get permission until a new Kerberos ticket is issued therefore, I recommend you reboot your servers or purge Kerberos tickets if it fails.
Test-ADServiceAccount -Identity 'mdiSvc01'If the command returns a True message, the correct permissions are configured.
Enabling audit events
MDI requires additional event logs to improve detections and provide more information, I would recommend you create a standalone group policy for the below and assign only to the Domain Controllers.
Windows Event Collection
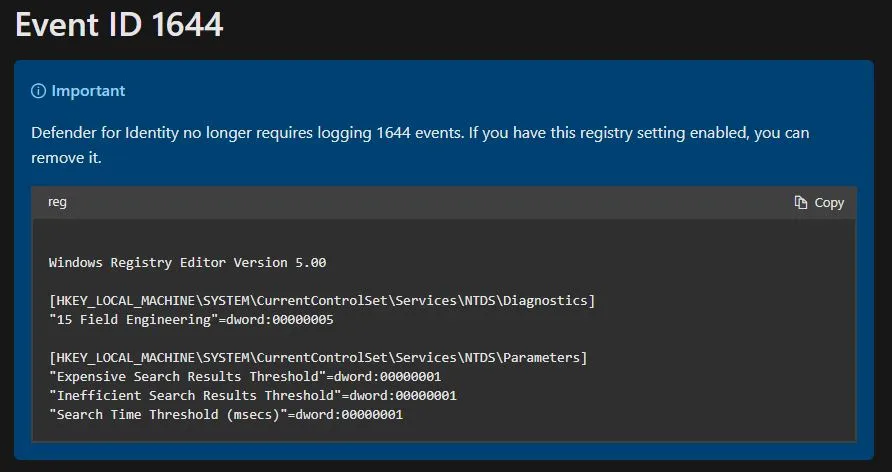
It should be noted that until recently (as of March 27, 2023) Event ID 1644 had to be configured via registry, however this is no longer needed: Configure Windows Event collection - Microsoft Defender for Identity | Microsoft Learn
In Group Policy Management create a new policy and call it MDI Windows Event Collection.
Go to: Computer Configuration > Policies > Windows Settings > Security Settings > Local Policies > Security Options
Enable the policy named: Audit: Force audit policy subcategory settings (Windows Vista or later) to override audit policy category settings.
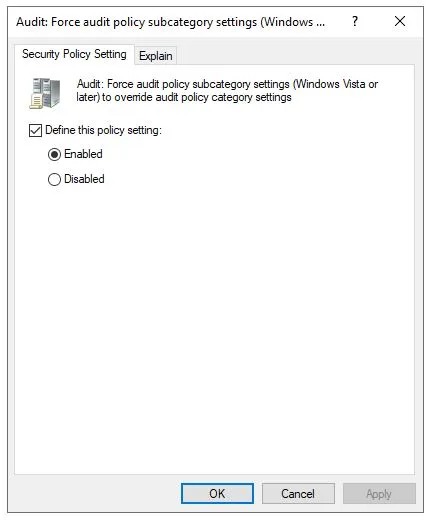
I found that the above policy had to be enabled for the rest to work as expected, see note.
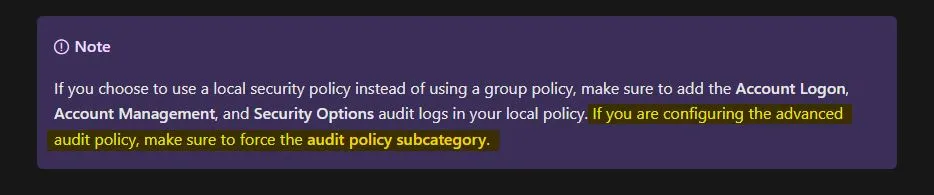
While you are still in this location you can go ahead and enable the policies required for Event ID 8004.
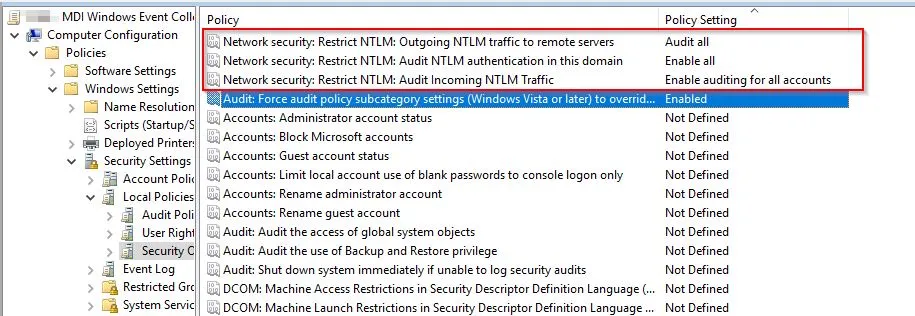
| Security policy setting | Value |
|---|---|
| Network security: Restrict NTLM: Outgoing NTLM traffic to remote servers | Audit all |
| Network security: Restrict NTLM: Audit NTLM authentication in this domain | Enable all |
| Network security: Restrict NTLM: Audit Incoming NTLM Traffic | Enable auditing for all accounts |
Next, we will configure the advanced audit policies.
Go to: Computer Configuration > Policies > Windows Settings > Security Settings > Advanced Audit Policy Configuration > Audit Policies
| Audit policy | Subcategory | Triggers event IDs |
|---|---|---|
| Account Logon | Audit Credential Validation | 4776 |
| Account Management | Audit Computer Account Management | 4741, 4743 |
| Account Management | Audit Distribution Group Management | 4753, 4763 |
| Account Management | Audit Security Group Management | 4728, 4729, 4730, 4732, 4733, 4756, 4757, 4758 |
| Account Management | Audit User Account Management | 4726 |
| DS Access | Audit Directory Service Access | 4662 - For this event, you must also enable object auditing. |
| DS Access | Audit Directory Service Changes | 5136 |
| System | Audit Security System Extension | 7045 |
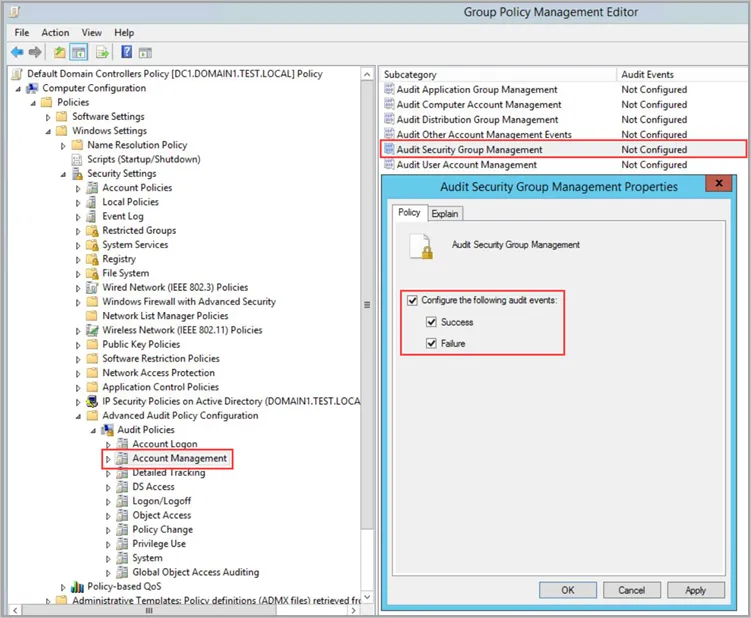
Here’s an example of the Audit Security Group Management policy.
**Configure object auditing **
To collect 4662 events, you must configure object auditing on the required objects.
- Go to the Active Directory Users and Computers console.
- Select the domain or OU that contains the users, groups, or computers you want to audit.
- Select the View menu and select Advanced Features.
- Right-click the container (the domain or OU) and select Properties.
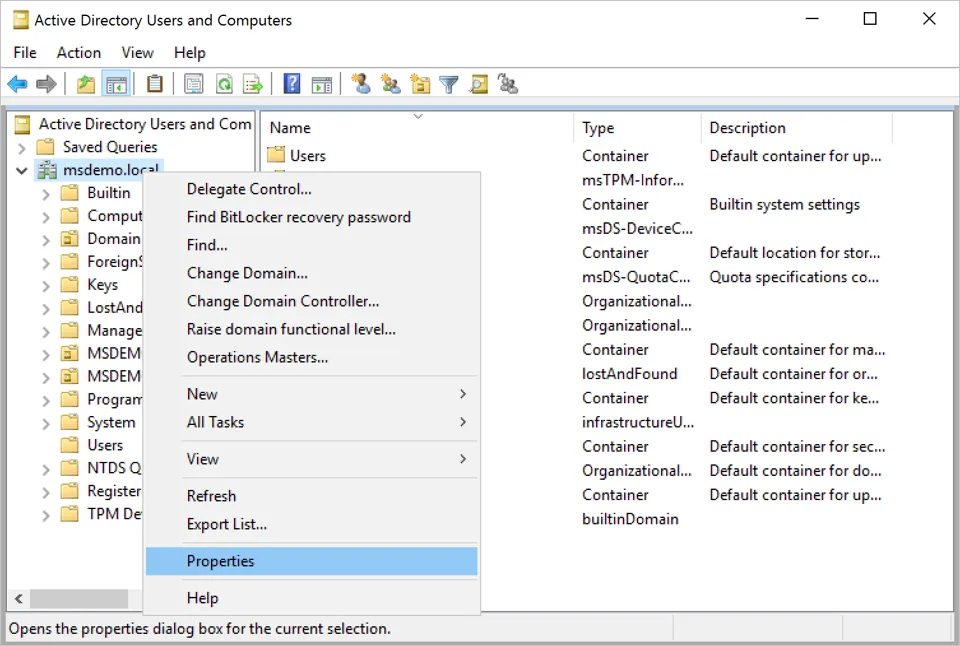
- Go to the Security tab and select Advanced.
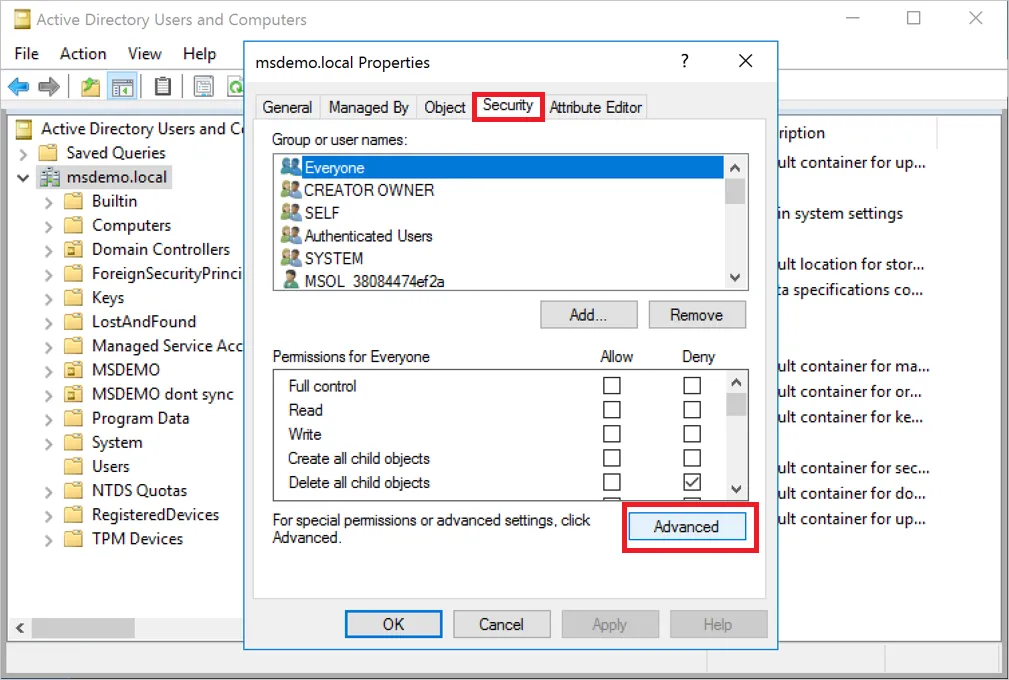
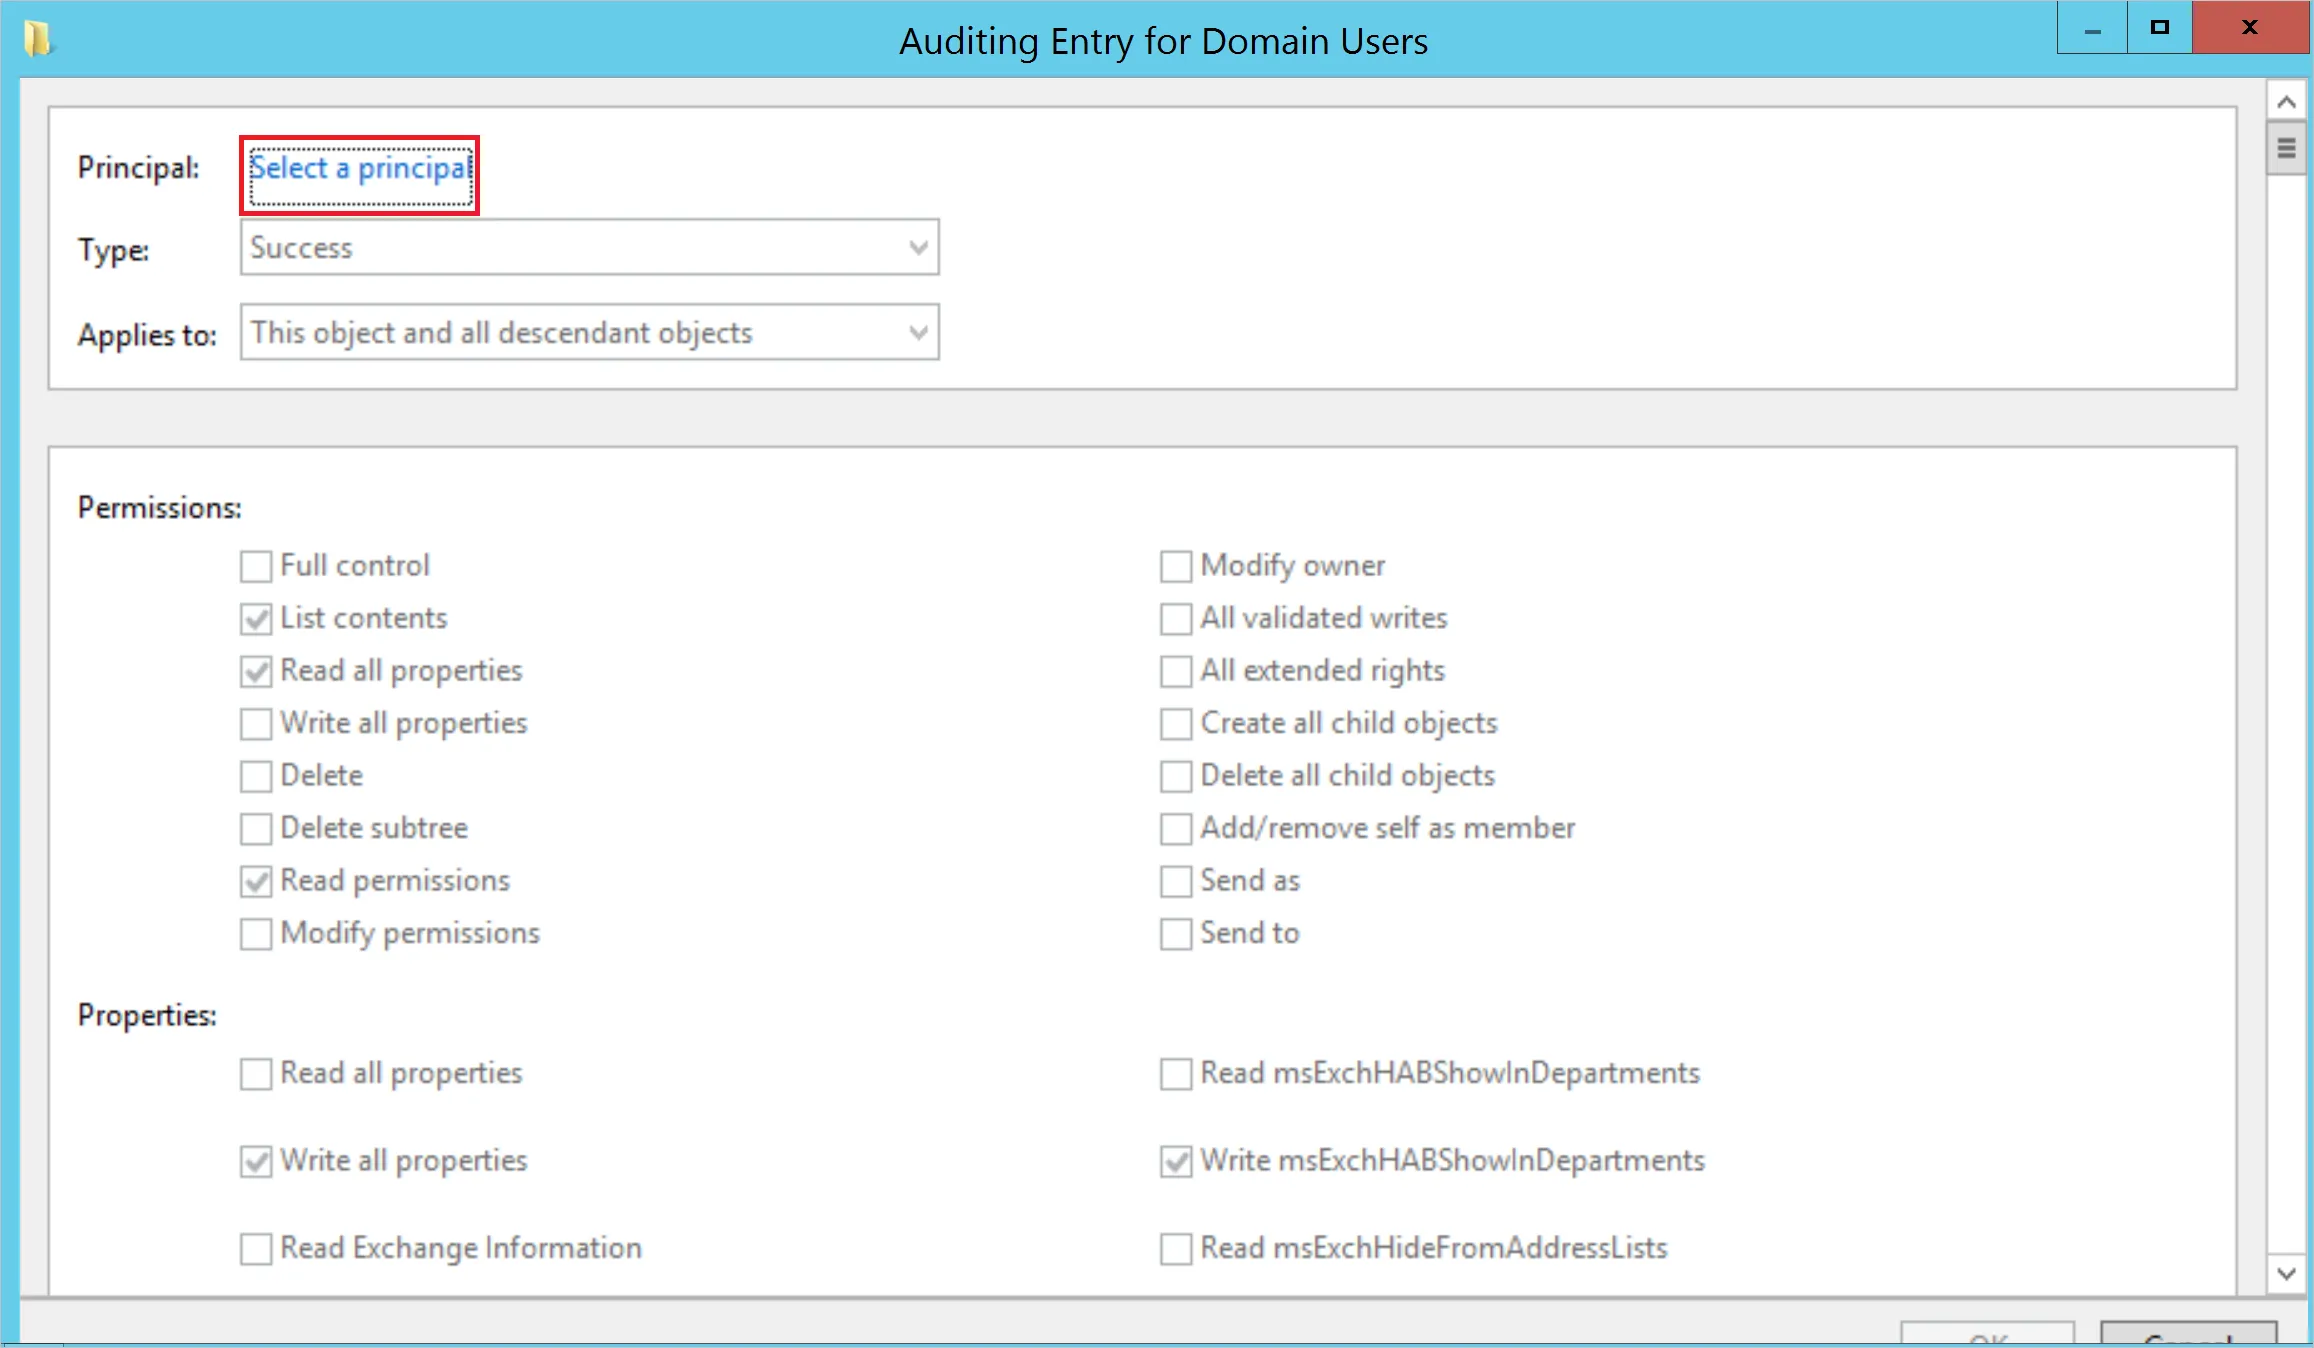
- In Advanced Security Settings, choose the Auditing tab. Select Add.
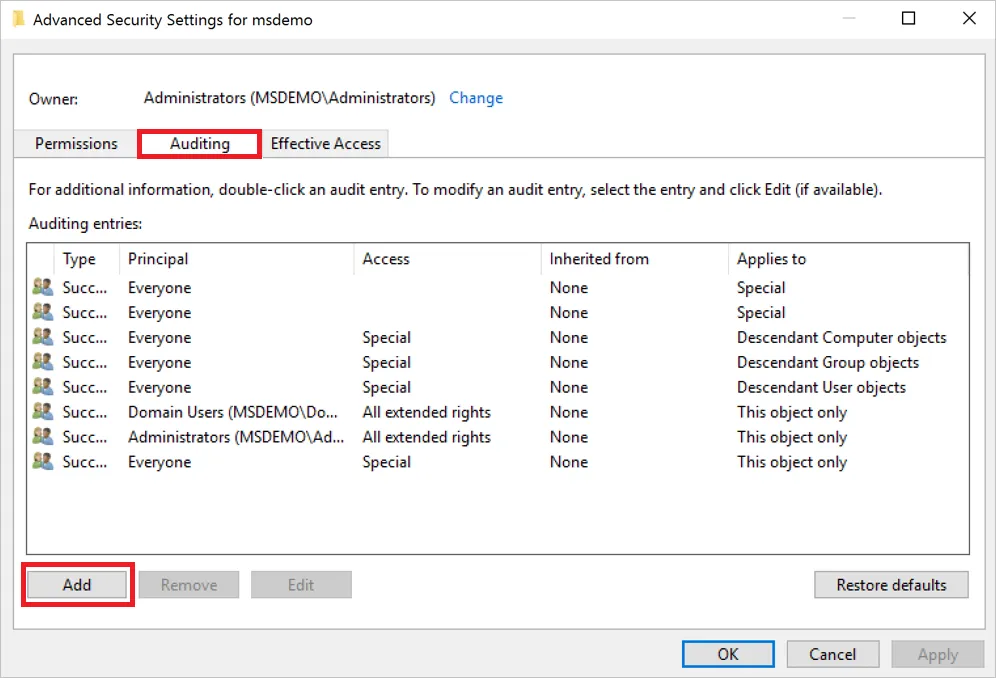
- Choose Select a principal.
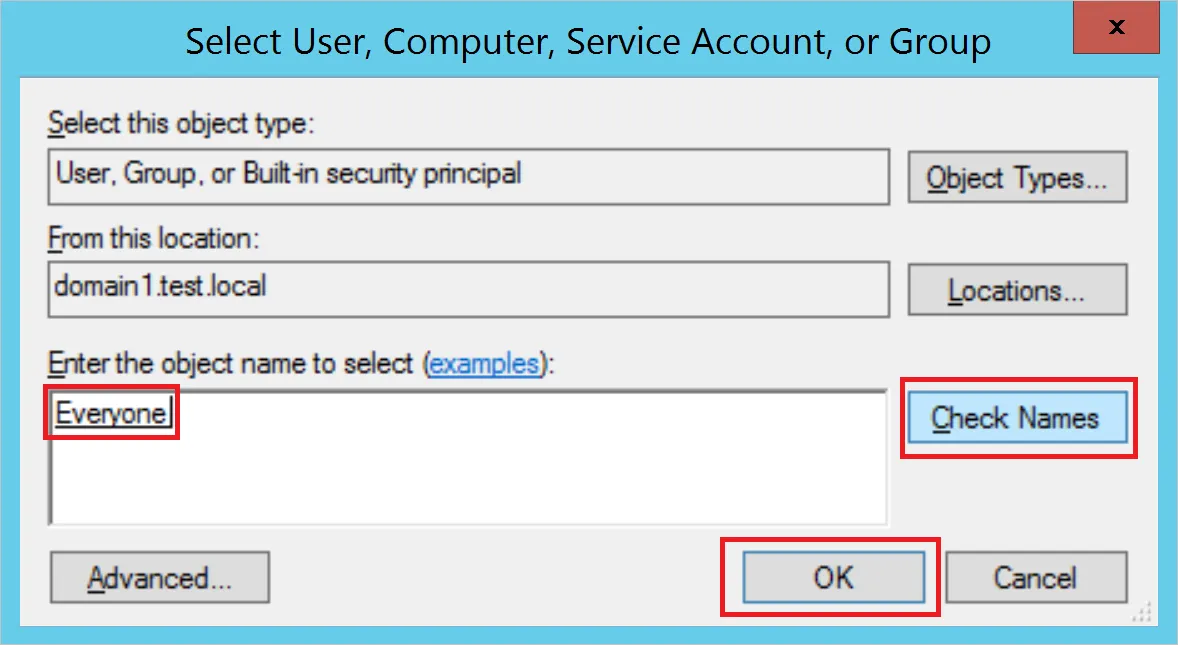
- Under Enter the object name to select, type Everyone. Then select Check Names and select OK.
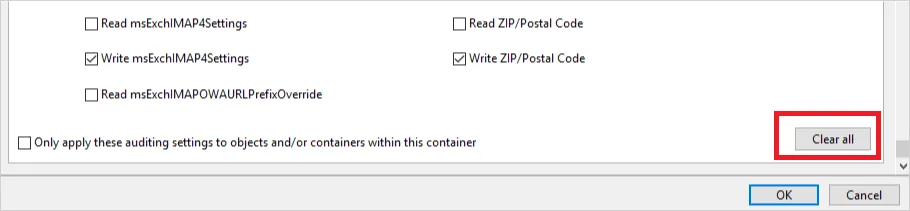
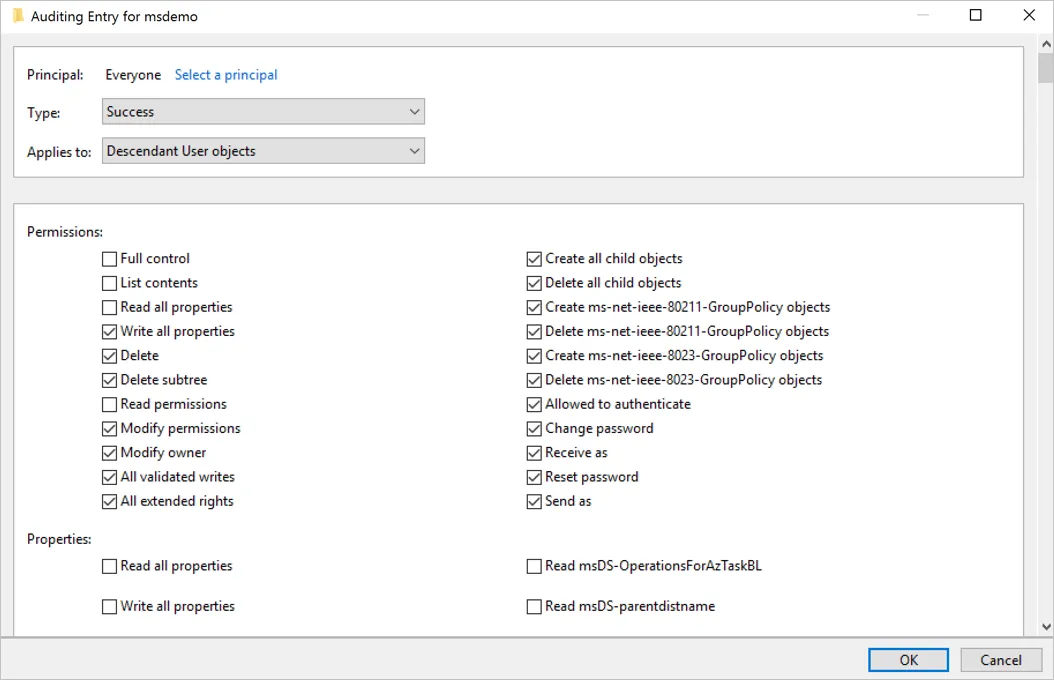
- You’ll then return to Auditing Entry. Make the following selections: - For Type select Success. - For Applies to select Descendant User objects. - Under Permissions, scroll down and select the Clear all button.
- Then scroll back up and select Full Control. All the permissions will be selected. Then uncheck the List contents, Read permissions, and Read all properties permissions. Select OK. This will set all the Properties settings to Write. Now when triggered, all relevant changes to directory services will appear as 4662 events.
- Then repeat the steps above, but for Applies to, select the following object types: - Descendant Group Objects - Descendant Computer Objects - Descendant msDS-GroupManagedServiceAccount Objects - Descendant msDS-ManagedServiceAccount Objects
Additional configuration is required for Exchange and ADFS, more info can be found here: Configure Windows Event collection - Microsoft Defender for Identity | Microsoft Learn
You now need to scope the GPO to your Domain Controllers OU, it is advised to perform a gpupdate on each DC.

After the GPO has been applied you should see new events come into Event Viewer under Windows Logs > Security.
Configuration of SAM-R
Create a new GPO and name it SAM-R required permissions for MDI.
Go to: Computer Configuration > Policies > Windows Settings > Security Settings >Local Policies > Security Options
Find the policy named: Network access: Restrict clients allowed to make remote calls for SAM, enable the policy and add the gMSA account you created earlier, take note you should have the local Administrators group in here also.
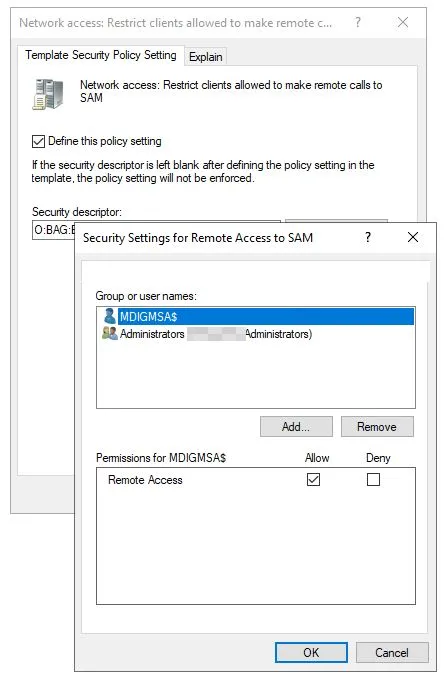
The newly created GPO should be applied to all domain computers except Domain Controllers.
Add Directory services accounts
You must add the gMSA account information into the MDI portal, this can be done from within the General -> Directory services accounts section.
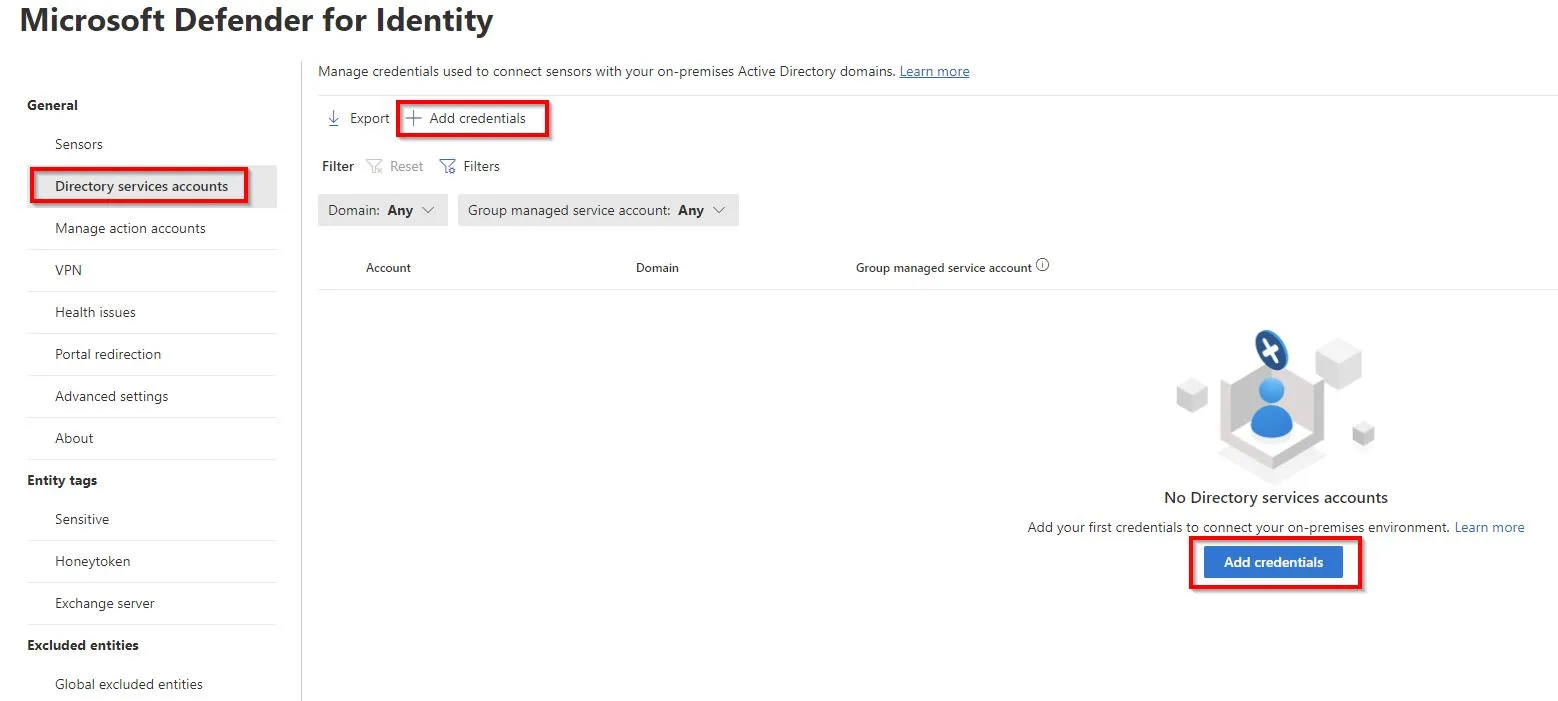
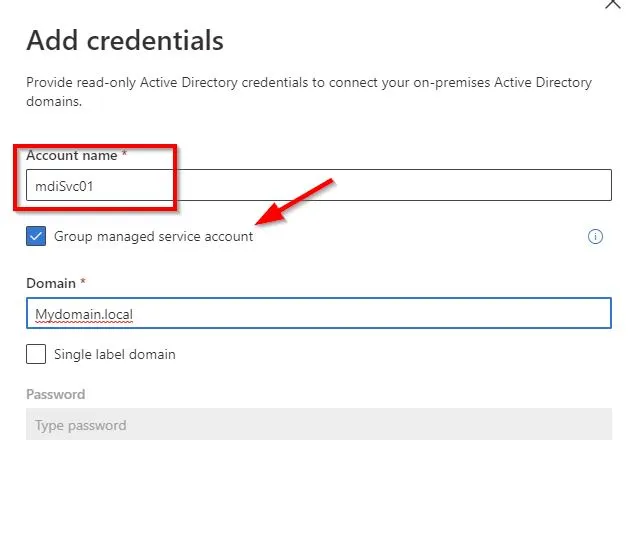
Go ahead and add the account name of your gMSA account and tick the box underneath, add your Active Directory domain info and then save.
Deploy the Defender for Identity sensor
Finally, we are ready to download and install the sensor on our Domain Controllers, to do this head to the Microsoft 365 Defender portal, then go to Settings and then Identities.
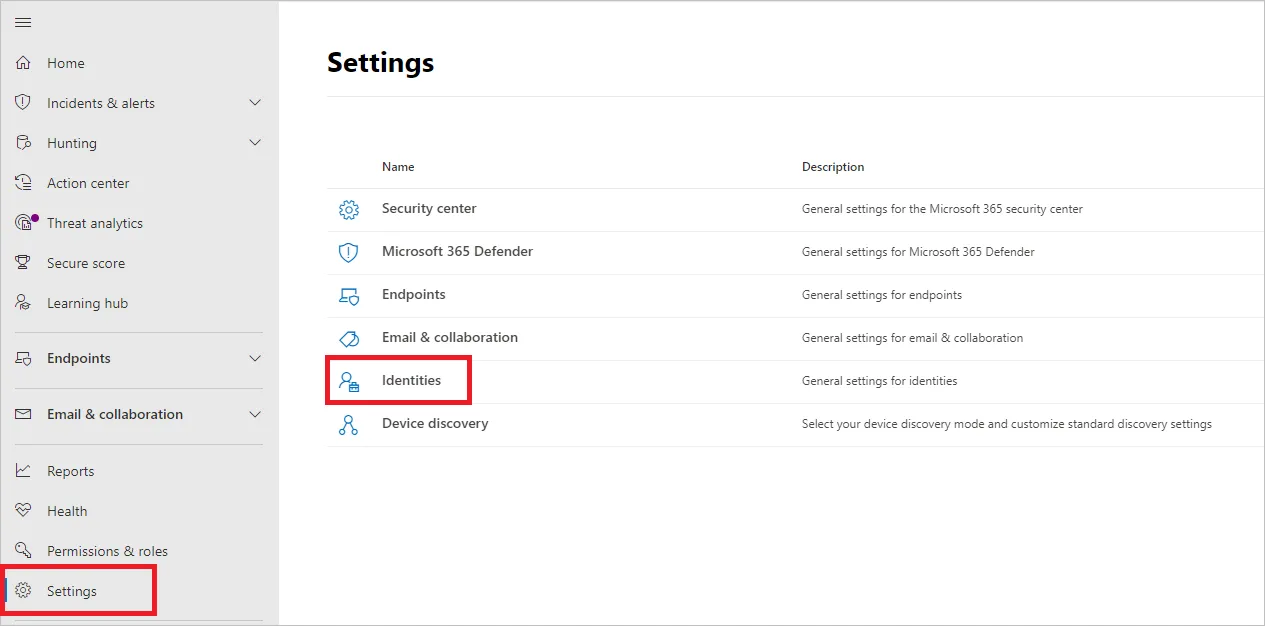
Select the Sensors page on the left-hand side and then select Add sensor.
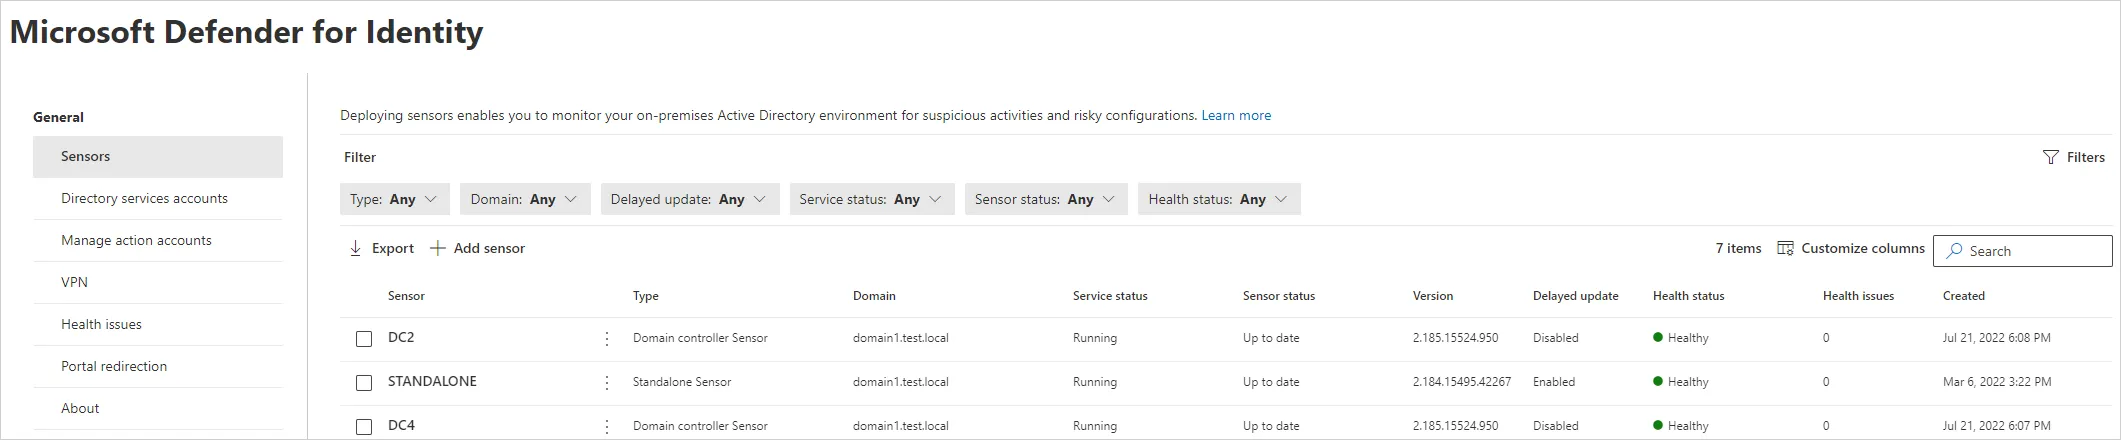
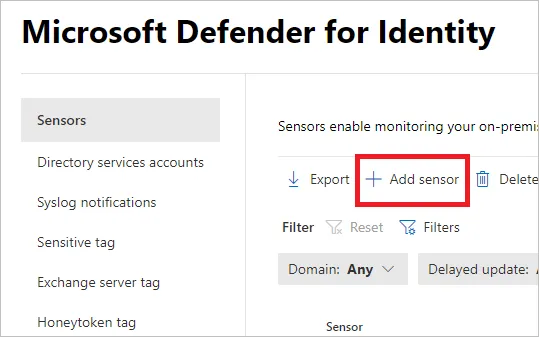
In the flyout you will be presented with a download link for the sensor and an access key, either keep the flyout there during the install or copy the access key to a notepad temporarily.
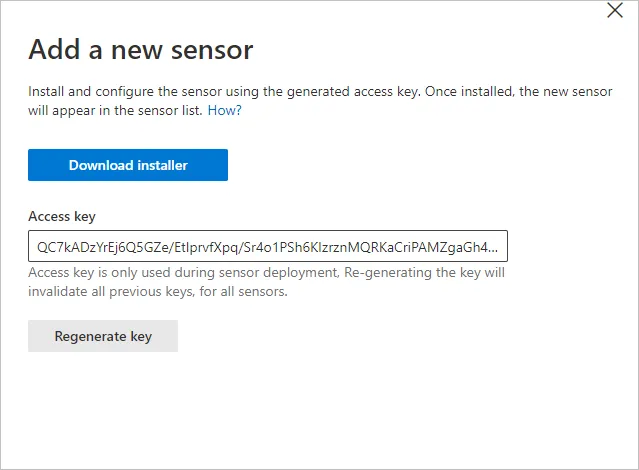
Download the installer and copy to your DCs that you will be installing the sensor on - FYI it is recommended when installing in this scenario to install the sensor on all Domain Controllers.
We will assume that there is no proxy in use, if you are using a proxy then see the following information: Configure endpoint proxy and Internet connectivity settings - Microsoft Defender for Identity | Microsoft Learn
Installing NPCAP
Starting with Defender for Identity version 2.184 the installation package includes the Npcap 1.0 OEM installer instead of the WinPcap 4.1.3 drivers, you MUST install this BEFORE you install the sensor, install using the default settings. Source: Microsoft Defender for Identity health alerts - Microsoft Defender for Identity | Microsoft Learn
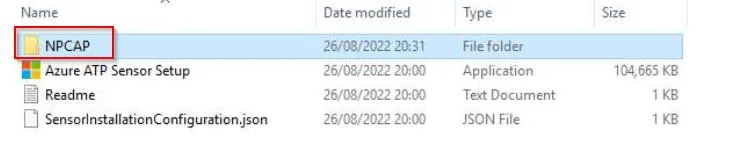
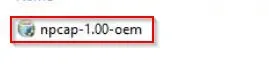
Once installed you will see it in Programs and Features.

If you do not already have Microsoft .NET Framework 4.7 or later installed then the Defender for Identity sensor install will install it, this may require a reboot of the server, so keep this in mind.
I’ll not overcomplicate the steps as it’s very straightforward, just make sure to input the access key you copied earlier when prompted.
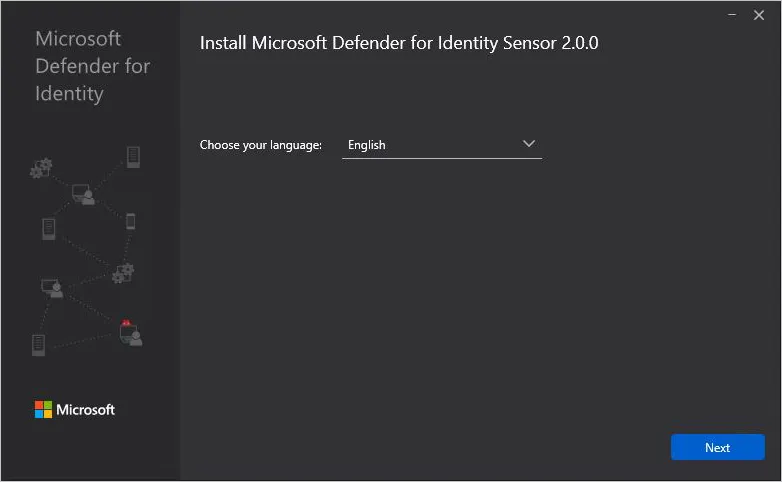
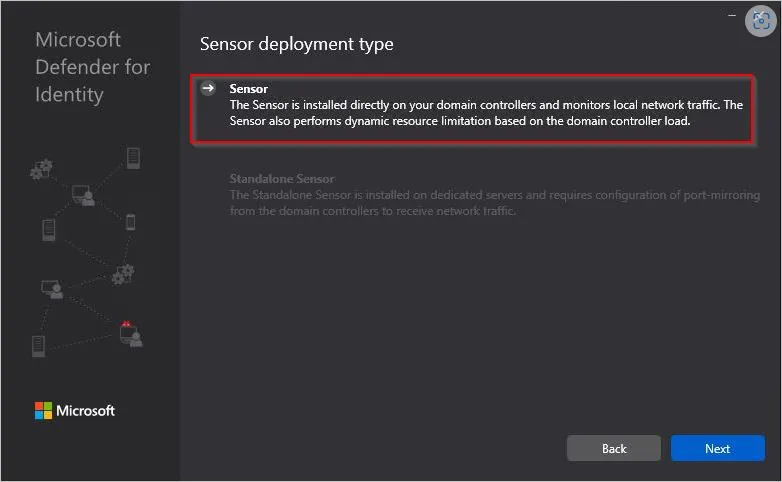
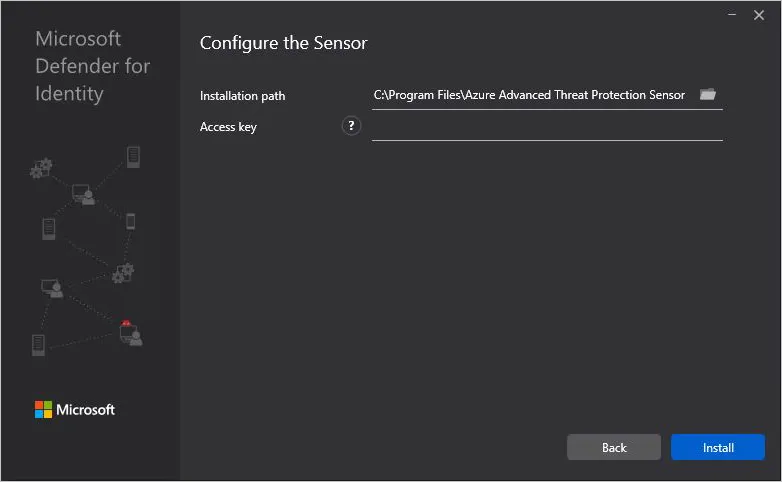
Should you wish to you can perform a silent installation of the sensor, you can do so using the following powershell command.
.\"Azure ATP sensor Setup.exe" /quiet NetFrameworkCommandLineArguments="/q" AccessKey="<Access Key>"Once you have installed the sensor on all servers, you can confirm the service is running.

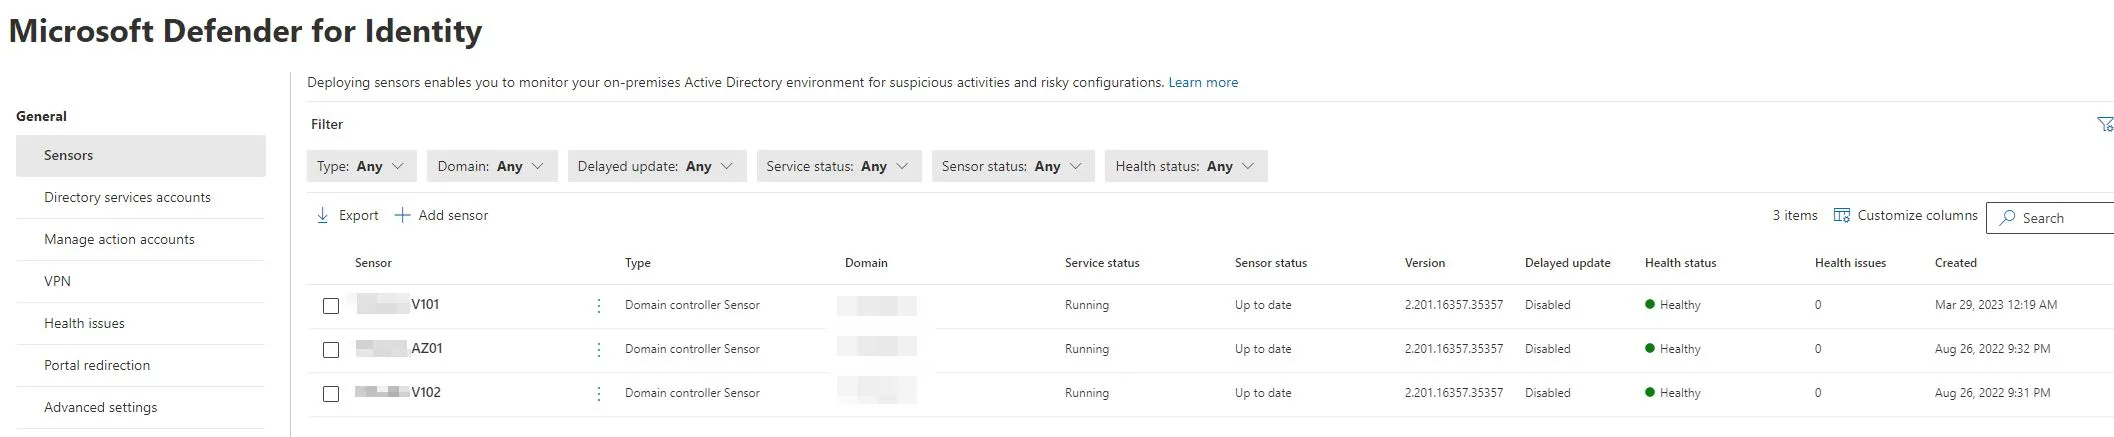
You will also see the sensors in the Sensor pane within the Defender portal.
More info on sensor installation here: Install the sensor - Microsoft Defender for Identity | Microsoft Learn
MDI Readiness report
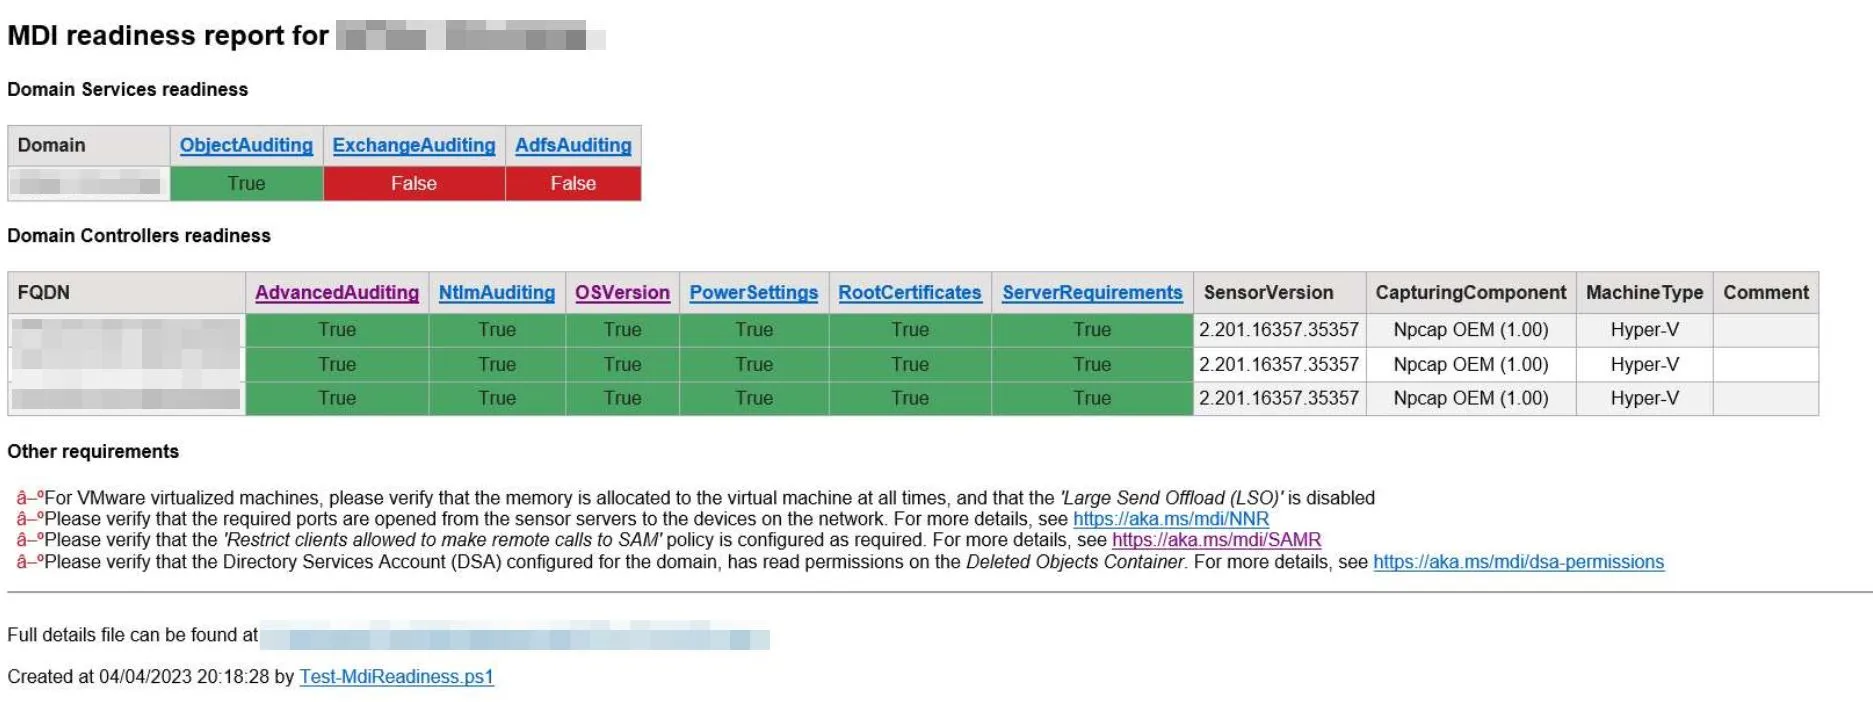
With the use of the MDI readiness report tool you can confirm that your environment is configured as expected: Microsoft-Defender-for-Identity/Test-MdiReadiness at main · microsoft/Microsoft-Defender-for-Identity · GitHub
The tool is very easy to use, just download and extract the folder, navigate to the folder and run the report, which should look like the below if all enabled correctly (I don’t have Exchange or ADFS).
Huge thanks to the others in the community that put together their own guides and blogs as these helped me massively during my learning period.
Inspired articles:
Jeffrey Appel: https://jeffreyappel.nl/how-to-implement-defender-for-identity-and-configure-all-prerequisites
Dishan Francis, Rebel Admin: Microsoft Defender for identity Blog Series Part 01 - Overview (rebeladmin.com)
Microsoft: Microsoft Defender for Identity documentation - Microsoft Defender for Identity | Microsoft Learn